

Before you begin
- Labs create a Google Cloud project and resources for a fixed time
- Labs have a time limit and no pause feature. If you end the lab, you'll have to restart from the beginning.
- On the top left of your screen, click Start lab to begin
Create a GKE Cluster
/ 20
Deploy Existing Monolith
/ 20
Migrate Orders to a microservice
/ 20
Migrate Products to microservice
/ 20
Migrate Frontend to microservice
/ 20
Why migrate from a monolithic application to a microservices architecture? Breaking down an application into microservices has the following advantages, most of these stem from the fact that microservices are loosely coupled:
Some of the disadvantages when compared to monoliths are:
In this lab you will deploy an existing monolithic application to a Google Kubernetes Engine cluster, then break it down into microservices. Kubernetes is a platform to manage, host, scale, and deploy containers. Containers are a portable way of packaging and running code. They are well suited to the microservices pattern, where each microservice can run in its own container.
Start by breaking the monolith into three microservices, one at a time. The microservices include, Orders, Products, and Frontend. Build a Docker image for each microservice using Cloud Build, then deploy and expose the microservices on Google Kubernetes Engine (GKE) with a Kubernetes service type LoadBalancer. You will do this for each service while simultaneously refactoring them out of the monolith. During the process you will have both the monolith and the microservices running until the very end when you are able to delete the monolith.
Read these instructions. Labs are timed and you cannot pause them. The timer, which starts when you click Start Lab, shows how long Google Cloud resources are made available to you.
This hands-on lab lets you do the lab activities in a real cloud environment, not in a simulation or demo environment. It does so by giving you new, temporary credentials you use to sign in and access Google Cloud for the duration of the lab.
To complete this lab, you need:
Click the Start Lab button. If you need to pay for the lab, a dialog opens for you to select your payment method. On the left is the Lab Details pane with the following:
Click Open Google Cloud console (or right-click and select Open Link in Incognito Window if you are running the Chrome browser).
The lab spins up resources, and then opens another tab that shows the Sign in page.
Tip: Arrange the tabs in separate windows, side-by-side.
If necessary, copy the Username below and paste it into the Sign in dialog.
You can also find the Username in the Lab Details pane.
Click Next.
Copy the Password below and paste it into the Welcome dialog.
You can also find the Password in the Lab Details pane.
Click Next.
Click through the subsequent pages:
After a few moments, the Google Cloud console opens in this tab.

Cloud Shell is a virtual machine that is loaded with development tools. It offers a persistent 5GB home directory and runs on the Google Cloud. Cloud Shell provides command-line access to your Google Cloud resources.
Click Activate Cloud Shell 
Click through the following windows:
When you are connected, you are already authenticated, and the project is set to your Project_ID,
gcloud is the command-line tool for Google Cloud. It comes pre-installed on Cloud Shell and supports tab-completion.
Output:
Output:
gcloud, in Google Cloud, refer to the gcloud CLI overview guide.
Set the default zone and project configuration:
You will use an existing monolithic application of an imaginary ecommerce website, with a simple welcome page, a products page and an order history page. We will just need to clone the source from our git repo, so we can focus on breaking it down into microservices and deploying to Google Kubernetes Engine (GKE).
It may take a few minutes for this script to run.
Now that you have your working developer environment, you need a Kubernetes cluster to deploy your monolith, and eventually the microservices, to! Before you can create a cluster, make sure the proper API's are enabled.
It may take several minutes for the cluster to be created.
Output:
You can also view your Kubernetes cluster and related information in the Cloud Console. From the Navigation menu, scroll down to Kubernetes Engine and click Clusters.
You should see your cluster named fancy-cluster.
Congratulations! You have just created your first Kubernetes cluster!
Click Check my progress to verify the objective.
Since the focus of this lab is to break down a monolith into microservices, you need to get a monolith application up and running.
You should see output similar to the following:
If your output lists the external IP as <pending> give it a minute and run the command again.
Once you've determined the external IP address for your monolith, copy the IP address. Point your browser to this URL (such as http://203.0.113.0) to check if your monolith is accessible.
You should see the welcome page for the monolithic website. The welcome page is a static page that will be served up by the Frontend microservice later on. You now have your monolith fully running on Kubernetes!
Click Check my progress to verify the objective.
Now that you have a monolith website running on GKE, start breaking each service into a microservice. Typically, a planning effort should take place to determine which services to break into smaller chunks, usually around specific parts of the application like business domain.
For this lab you will create an example and break out each service around the business domain: Orders, Products, and Frontend. The code has already been migrated for you so you can focus on building and deploying the services on Google Kubernetes Engine (GKE).
The first service to break out is the Orders service. Make use of the separate codebase provided and create a separate Docker container for this service.
Since the codebase is already available, your first step will be to create a Docker container of your Order service using Cloud Build.
Normally this is done in a two step process that entails building a Docker container and pushing it to a registry to store the image for GKE to pull from. Cloud Build can be used to build the Docker container and put the image in the Artifact Registry with a single command!
Google Cloud Build will compress the files from the directory and move them to a Cloud Storage bucket. The build process will then take all the files from the bucket and use the Dockerfile to run the Docker build process. The --tag flag is specified with the host as gcr.io for the Docker image, the resulting Docker image will be pushed to the Artifact Registry.
This process will take a minute, but after it is completed, there will be output in the terminal similar to the following:
To view your build history, or watch the process in real time, in the console, search for Cloud Build then click on the Cloud Build result.
On the History page you can see a list of all your builds; there should only be 1 that you just created. If you click on the build ID, you can see all the details for that build including the log output.
From the build details page, to view the container image that was created, in the right section click the Execution Details tab and see Image.
Now that you have containerized the website and pushed the container to the Artifact Registry, it is time to deploy to Kubernetes!
Kubernetes represents applications as Pods, which are units that represent a container (or group of tightly-coupled containers). The Pod is the smallest deployable unit in Kubernetes. In this tutorial, each Pod contains only your microservices container.
To deploy and manage applications on a GKE cluster, you must communicate with the Kubernetes cluster management system. You typically do this by using the kubectl command-line tool from within Cloud Shell.
First, create a Deployment resource. The Deployment manages multiple copies of your application, called replicas, and schedules them to run on the individual nodes in your cluster. In this case, the Deployment will be running only one pod of your application. Deployments ensure this by creating a ReplicaSet. The ReplicaSet is responsible for making sure the number of replicas specified are always running.
The kubectl create deployment command below causes Kubernetes to create a Deployment named Orders on your cluster with 1 replica.
It may take a few moments for the pod status to be Running.
Output:
You can see your Deployment which is current, the replicaset with the desired pod count of 1, and the pod which is running. Looks like everything was created successfully!
You can also view your Kubernetes deployments in the Cloud Console from the Navigation menu, go to Kubernetes Engine > Workloads.
You have deployed our application on GKE, but don't have a way of accessing it outside of the cluster. By default, the containers you run on GKE are not accessible from the Internet, because they do not have external IP addresses. You must explicitly expose your application to traffic from the Internet via a Service resource. A Service provides networking and IP support to your application's Pods. GKE creates an external IP and a Load Balancer.
For purposes of this lab, the exposure of the service has been simplified. Typically, you would use an API gateway to secure your public endpoints.
When you deployed the Orders service, you exposed it on port 8081 internally via a Kubernetes deployment. In order to expose this service externally, you need to create a Kubernetes service of type LoadBalancer to route traffic from port 80 externally to internal port 8081.
GKE assigns the external IP address to the Service resource, not the Deployment.
kubectl get service command:Output:
Once you've determined the external IP address for your application, copy the IP address. Save it for the next step when you change your monolith to point to the new Orders service!
Since you removed the Orders service from the monolith, you will have to modify the monolith to point to the new external Orders microservice.
When breaking down a monolith, you are removing pieces of code from a single codebase to multiple microservices and deploying them separately. Since the microservices are running on a different server, you can no longer reference your service URLs as absolute paths - you need to route to the Order microservice server address. This will require some downtime to the monolith service to update the URL for each service that has been broken out. This should be accounted for when planning on moving your microservices and monolith to production during the microservices migration process.
You need to update your config file in the monolith to point to the new Orders microservices IP address.
nano editor to replace the local URL with the IP address of the Orders microservice:When the editor opens, your file should look like this:
REACT_APP_ORDERS_URL to the new format while replacing with your Orders microservice IP address so it matches below:Press CTRL+O, press ENTER, then CTRL+X to save the file in the nano editor.
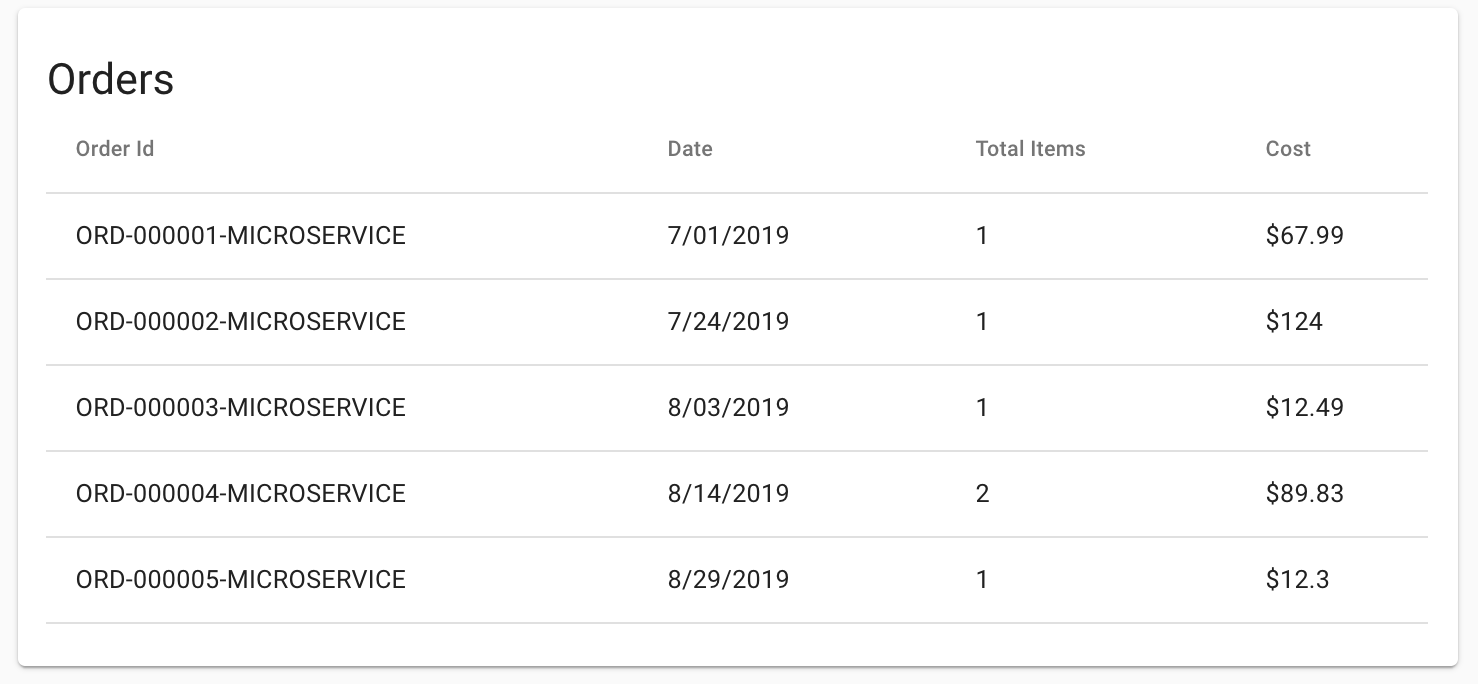
Test the new microservice by navigating the URL you just set in the file. The webpage should return a JSON response from your Orders microservice.
Next, rebuild the monolith frontend and repeat the build process to build the container for the monolith and redeploy to the GKE cluster:
Continue breaking out the services by migrating the Products service next. Follow the same process as before. Run the following commands to build a Docker container, deploy your container, and expose it via a Kubernetes service.
Output:
You will use the IP address in the next step when you reconfigure the monolith to point to your new Products microservice.
nano editor to replace the local URL with the IP address of the new Products microservices:When the editor opens, your file should look like this:
REACT_APP_PRODUCTS_URL to the new format while replacing with your Product microservice IP address so it matches below:Press CTRL+O, press ENTER, then CTRL+X to save the file.
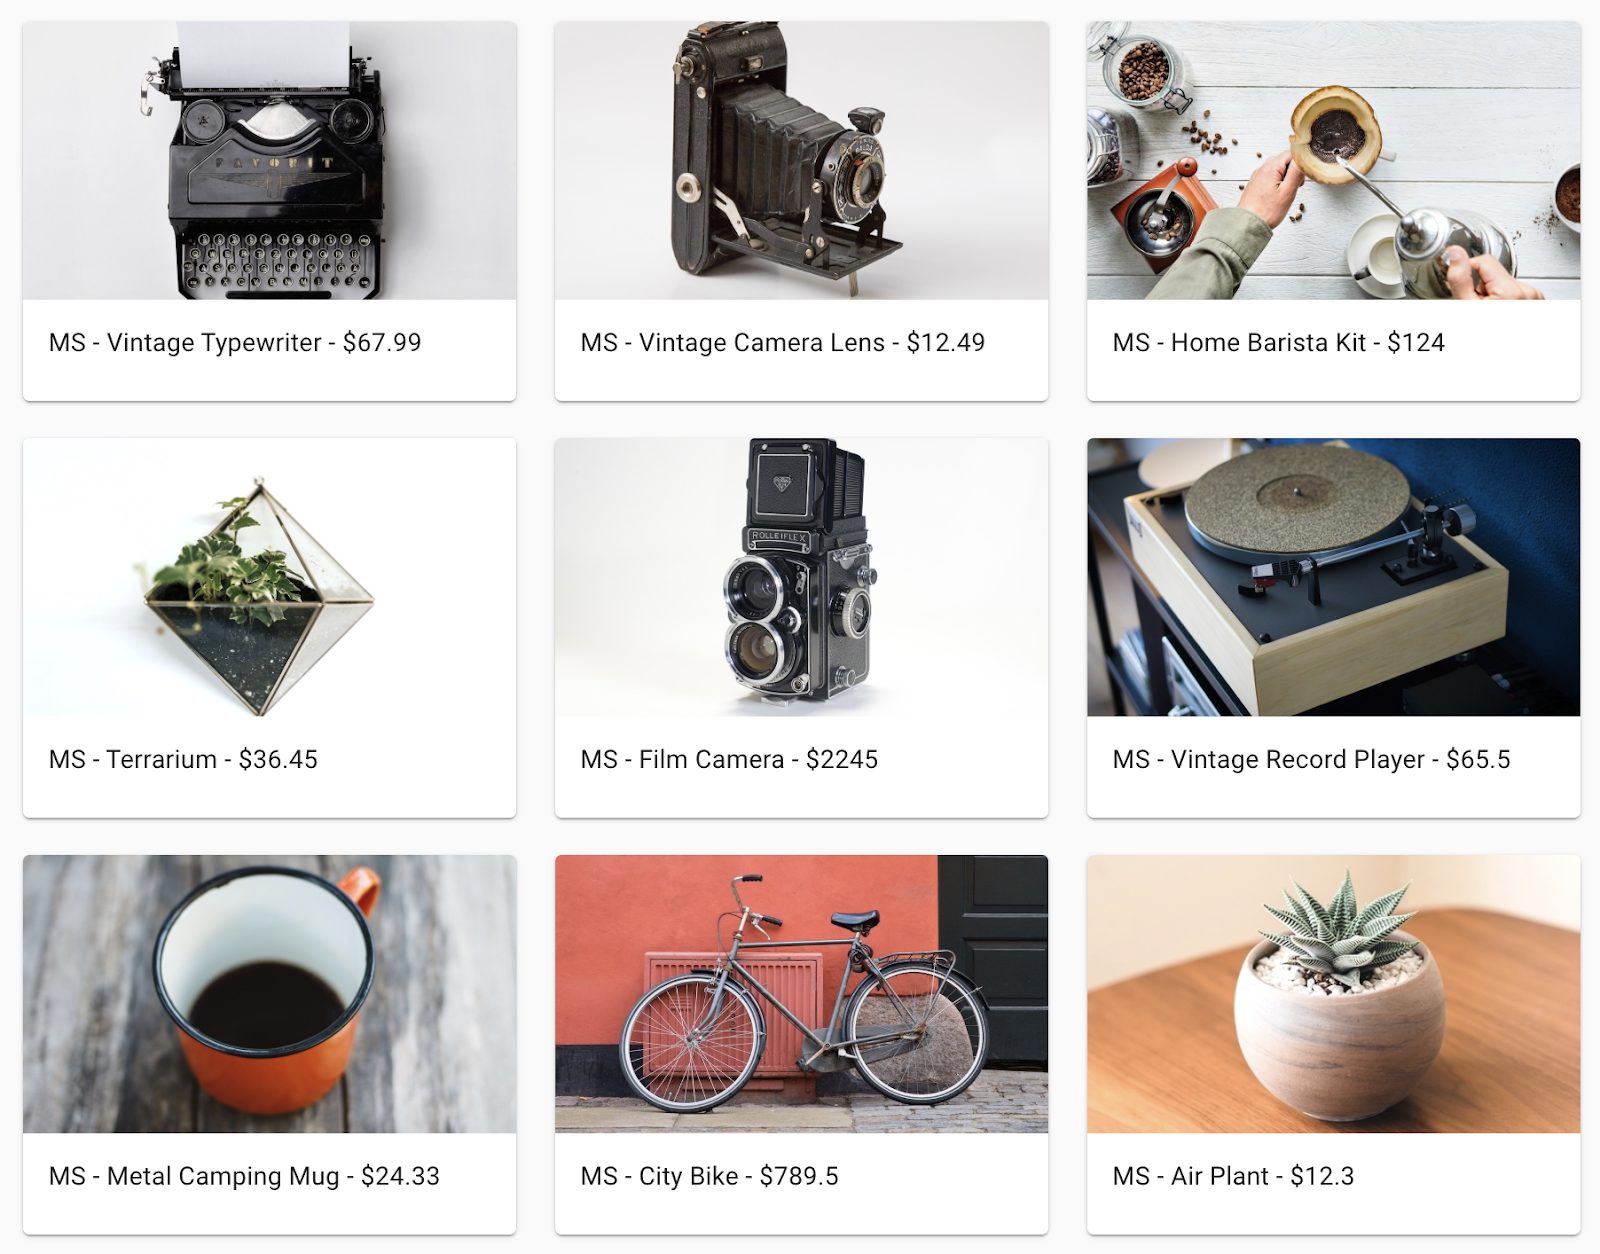
Test the new microservice by navigating the URL you just set in the file. The webpage should return a JSON response from the Products microservice.
Next, rebuild the monolith frontend and repeat the build process to build the container for the monolith and redeploy to the GKE cluster. Run the following commands complete these steps:
Rebuild monolith config files:
The last step in the migration process is to move the Frontend code to a microservice and shut down the monolith! After this step is completed, you will have successfully migrated the monolith to a microservices architecture!
Follow the same procedure as the last two steps to create a new frontend microservice.
Previously when you rebuilt the monolith you updated the config to point to the monolith. Now you need to use the same config for the frontend microservice.
Once that is completed, follow the same process as the previous steps. Run the following commands to build a Docker container, deploy your container, and expose it to via a Kubernetes service.
Create Docker container with Google Cloud Build:
Now that all of the services are running as microservices, delete the monolith application! In an actual migration, this would also entail DNS changes, etc., to get the existing domain names to point to the new frontend microservices for the application.
To verify everything is working, your old IP address from your monolith service should not work now, and your new IP address from your frontend service should host the new application.
Your output should look similar to the following:
Once you've determined the external IP address for your frontend microservice, copy the IP address. Point your browser to this URL (such as http://203.0.113.0) to check if your frontend is accessible. Your website should be the same as it was before you broke down the monolith into microservices!
You successfully broke down your monolithic application into microservices and deployed them on Google Kubernetes Engine!
...helps you make the most of Google Cloud technologies. Our classes include technical skills and best practices to help you get up to speed quickly and continue your learning journey. We offer fundamental to advanced level training, with on-demand, live, and virtual options to suit your busy schedule. Certifications help you validate and prove your skill and expertise in Google Cloud technologies.
Manual Last Updated April 26, 2024
Lab Last Tested September 20, 2023
Copyright 2025 Google LLC All rights reserved. Google and the Google logo are trademarks of Google LLC. All other company and product names may be trademarks of the respective companies with which they are associated.


현재 이 콘텐츠를 이용할 수 없습니다
이용할 수 있게 되면 이메일로 알려드리겠습니다.

감사합니다
이용할 수 있게 되면 이메일로 알려드리겠습니다.

One lab at a time
Confirm to end all existing labs and start this one