


Before you begin
- Labs create a Google Cloud project and resources for a fixed time
- Labs have a time limit and no pause feature. If you end the lab, you'll have to restart from the beginning.
- On the top left of your screen, click Start lab to begin
Load the data
/ 20
Setting up Pub/Sub Topic
/ 20
Add a Pub/Sub subscription
/ 20
Add Cloud Data Fusion API Service Agent role to service account
/ 20
Build and execute runtime pipeline
/ 20
In addition to batch pipelines, Data Fusion also allows you to create realtime pipelines that can process events as they are generated. Currently, realtime pipelines execute using Apache Spark Streaming on Cloud Dataproc clusters. This lab will teach you how to build a streaming pipeline using Data Fusion.
You will create a pipeline that reads from a Cloud Pub/Sub topic and processes the events, runs some transformations, and writes the output to BigQuery.
For each lab, you get a new Google Cloud project and set of resources for a fixed time at no cost.
Sign in to Google Cloud Skills Boost using an incognito window.
Note the lab's access time (for example, 02:00:00), and make sure you can finish within that time.
There is no pause feature. You can restart if needed, but you have to start at the beginning.
When ready, click Start lab.
Note your lab credentials (Username and Password). You will use them to sign in to the Google Cloud console.
Click Open Google console.
Click Use another account and copy/paste credentials for this lab into the prompts.
If you use other credentials, you'll receive errors or incur charges.
Accept the terms and skip the recovery resource page.
Since this is a temporary account, which will last only as long as this lab:
 ) at the top-left.
Cloud Shell is a virtual machine that contains development tools. It offers a persistent 5-GB home directory and runs on Google Cloud. Cloud Shell provides command-line access to your Google Cloud resources. gcloud is the command-line tool for Google Cloud. It comes pre-installed on Cloud Shell and supports tab completion.
Click the Activate Cloud Shell button (
Click Continue.
It takes a few moments to provision and connect to the environment. When you are connected, you are also authenticated, and the project is set to your PROJECT_ID.
(Output)
(Example output)
(Output)
(Example output)
Before you begin working on Google Cloud, you must ensure that your project has the correct permissions within Identity and Access Management (IAM).
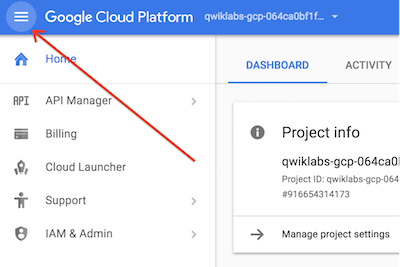
In the Google Cloud console, on the Navigation menu (
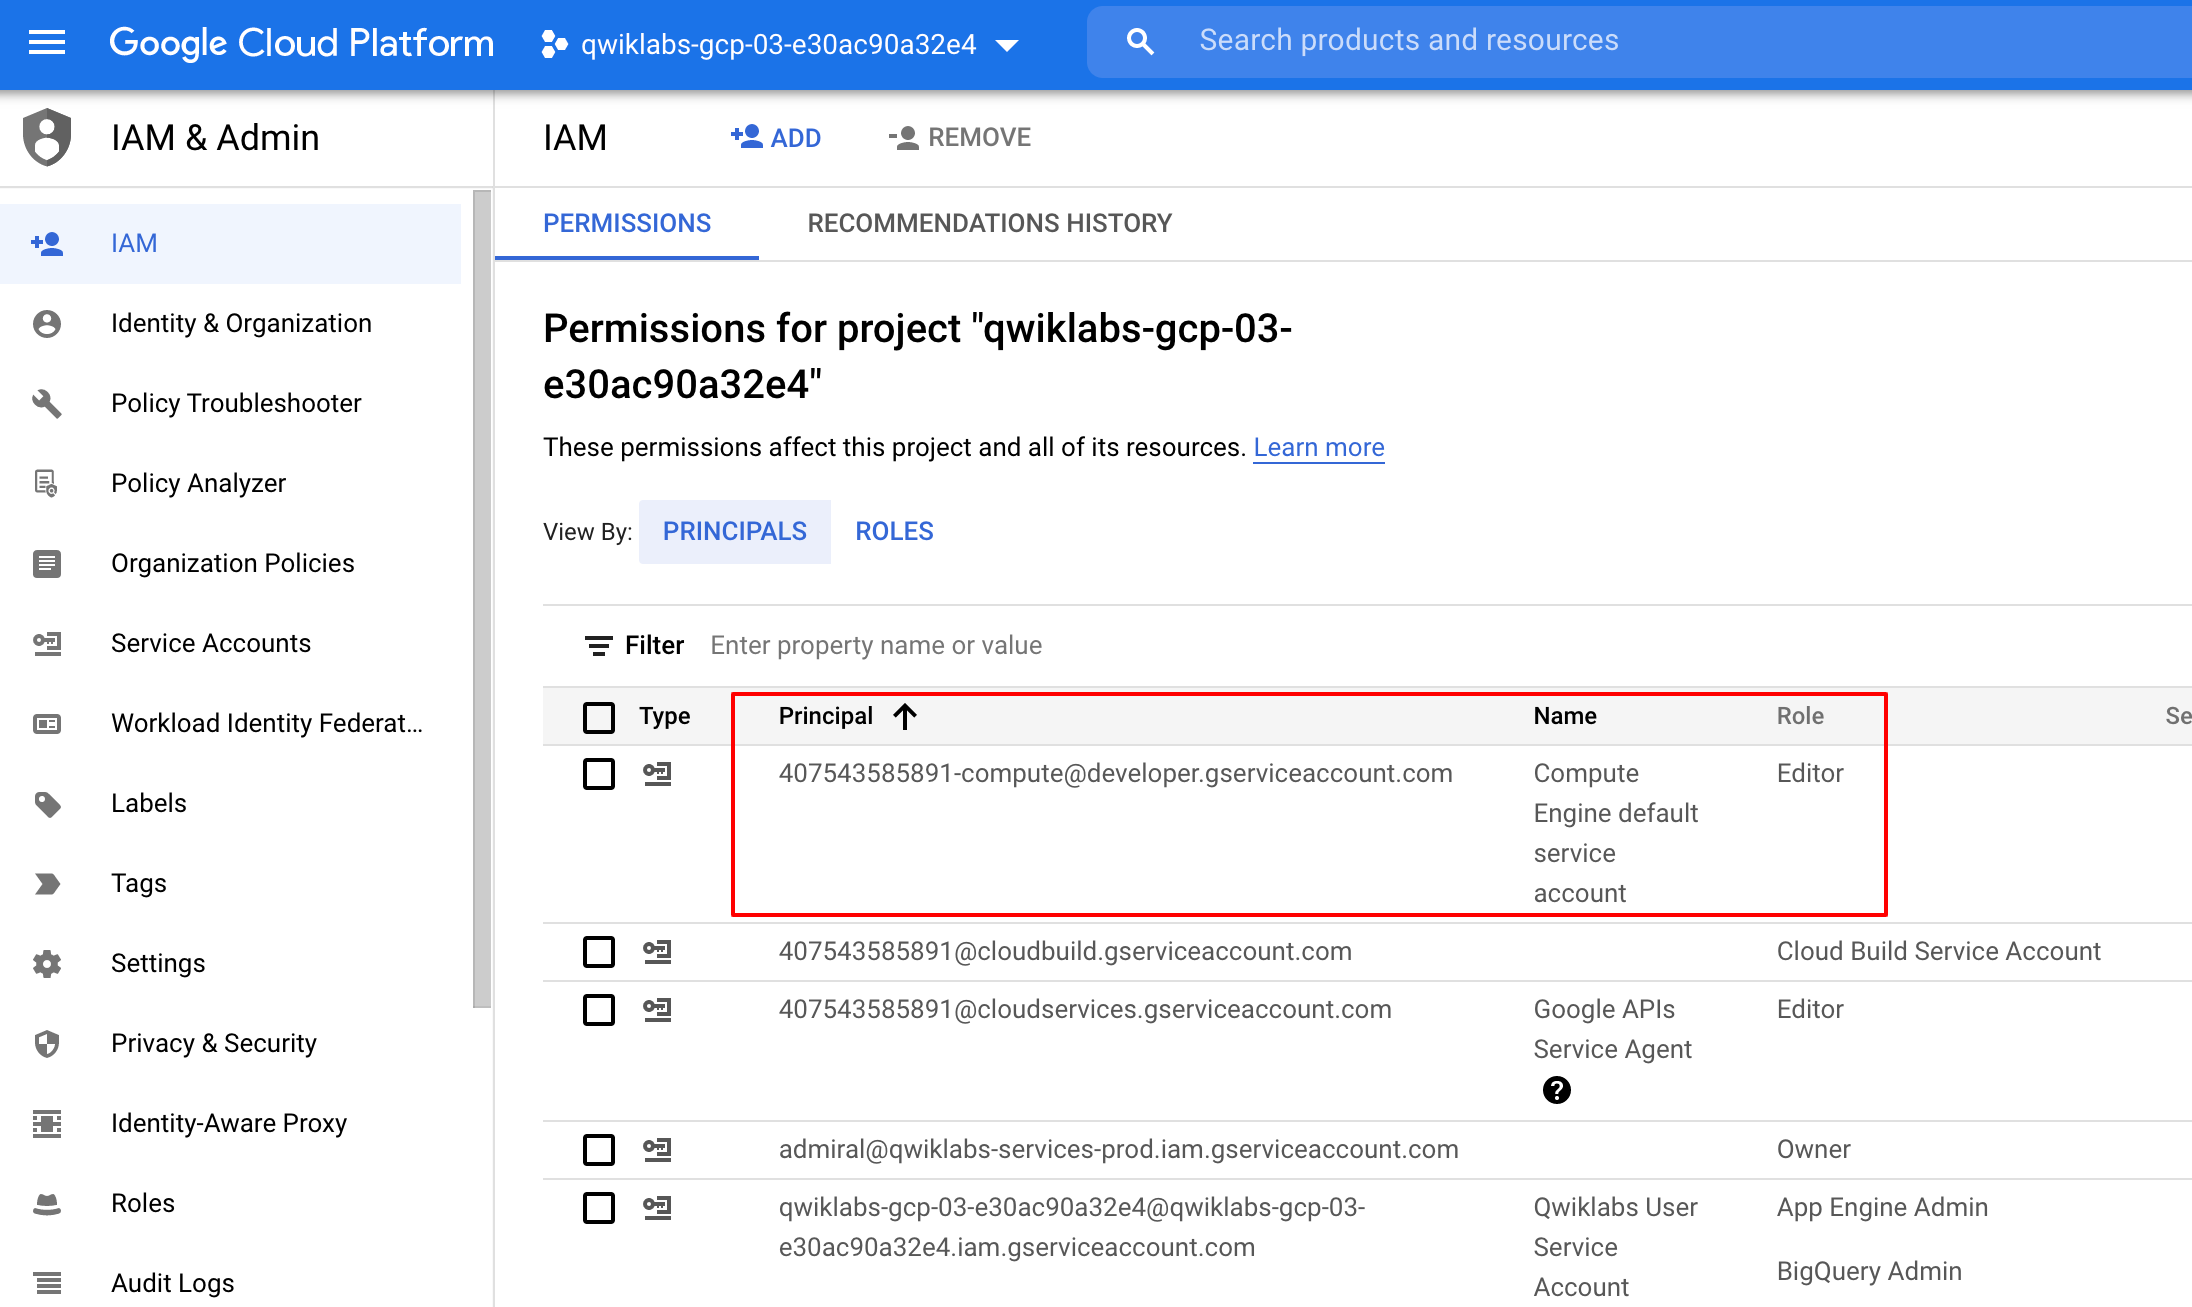
Confirm that the default compute Service Account {project-number}-compute@developer.gserviceaccount.com is present and has the editor role assigned. The account prefix is the project number, which you can find on Navigation menu > Cloud overview.
If the account is not present in IAM or does not have the editor role, follow the steps below to assign the required role.
In the Google Cloud console, on the Navigation menu, click Cloud overview.
From the Project info card, copy the Project number.
On the Navigation menu, click IAM & Admin > IAM.
At the top of the IAM page, click Add.
For New principals, type:
Replace {project-number} with your project number.
For Select a role, select Basic (or Project) > Editor.
Click Save.
To ensure access to the necessary API, restart the connection to the Dataflow API.
In the Cloud Console, enter "Dataflow API" in the top search bar. Click on the result for Dataflow API.
Click Manage.
Click Disable API.
If asked to confirm, click Disable.
You will also need to stage the same sample tweets file in your Cloud Storage bucket. Towards the end of this lab, you will stream the data from your bucket into a Pub/sub topic.
The created bucket has the same name as your Project ID.
Click Check my progress to verify the objective.
To use a Pub/Sub, you create a topic to hold data and a subscription to access data published to the topic.
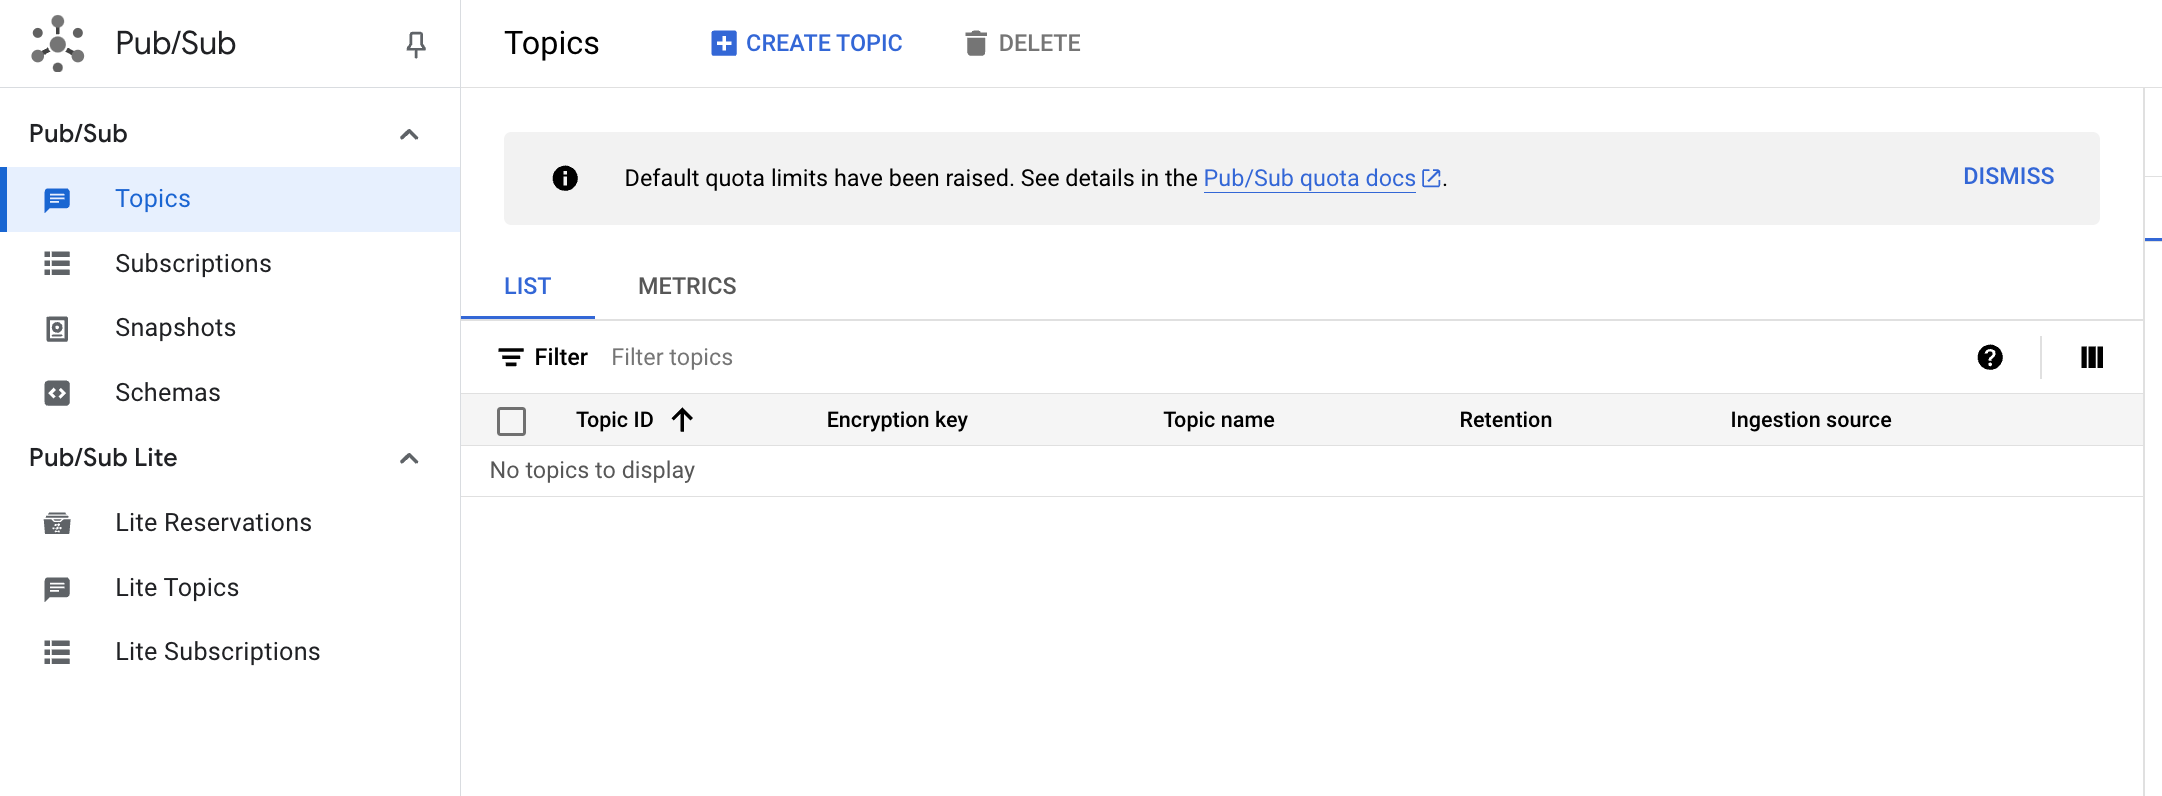
In the Cloud Console, from the Navigation menu click on View All products under Analytics section click Pub/Sub and then select Topics.
Click Create topic.
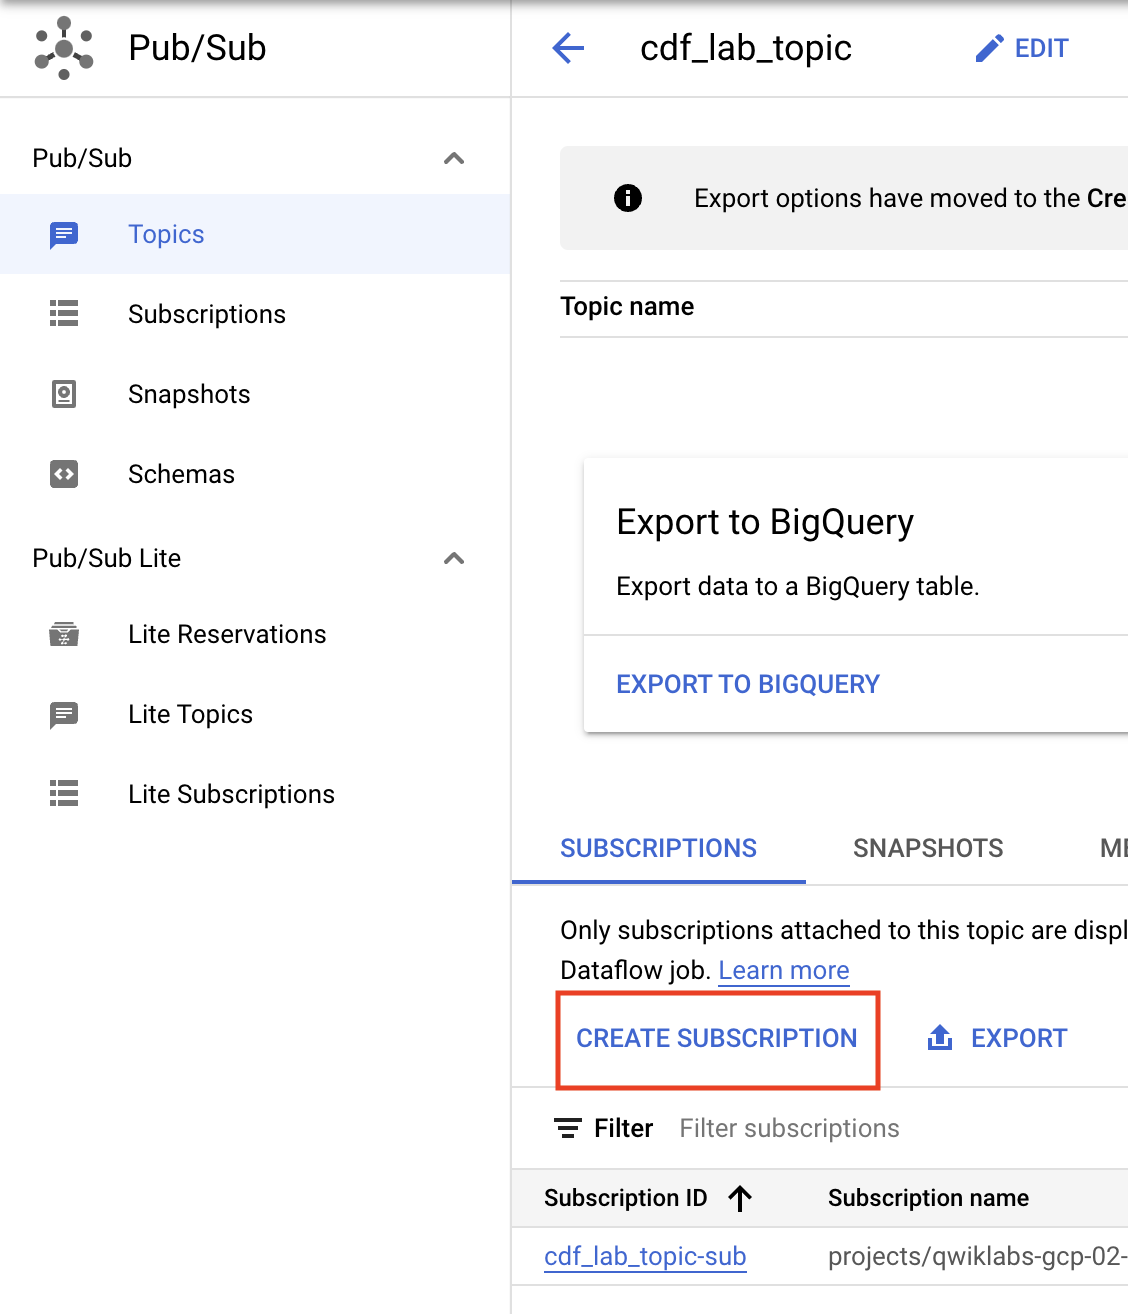
cdf_lab_topic, then click CREATE.Click Check my progress to verify the objective.
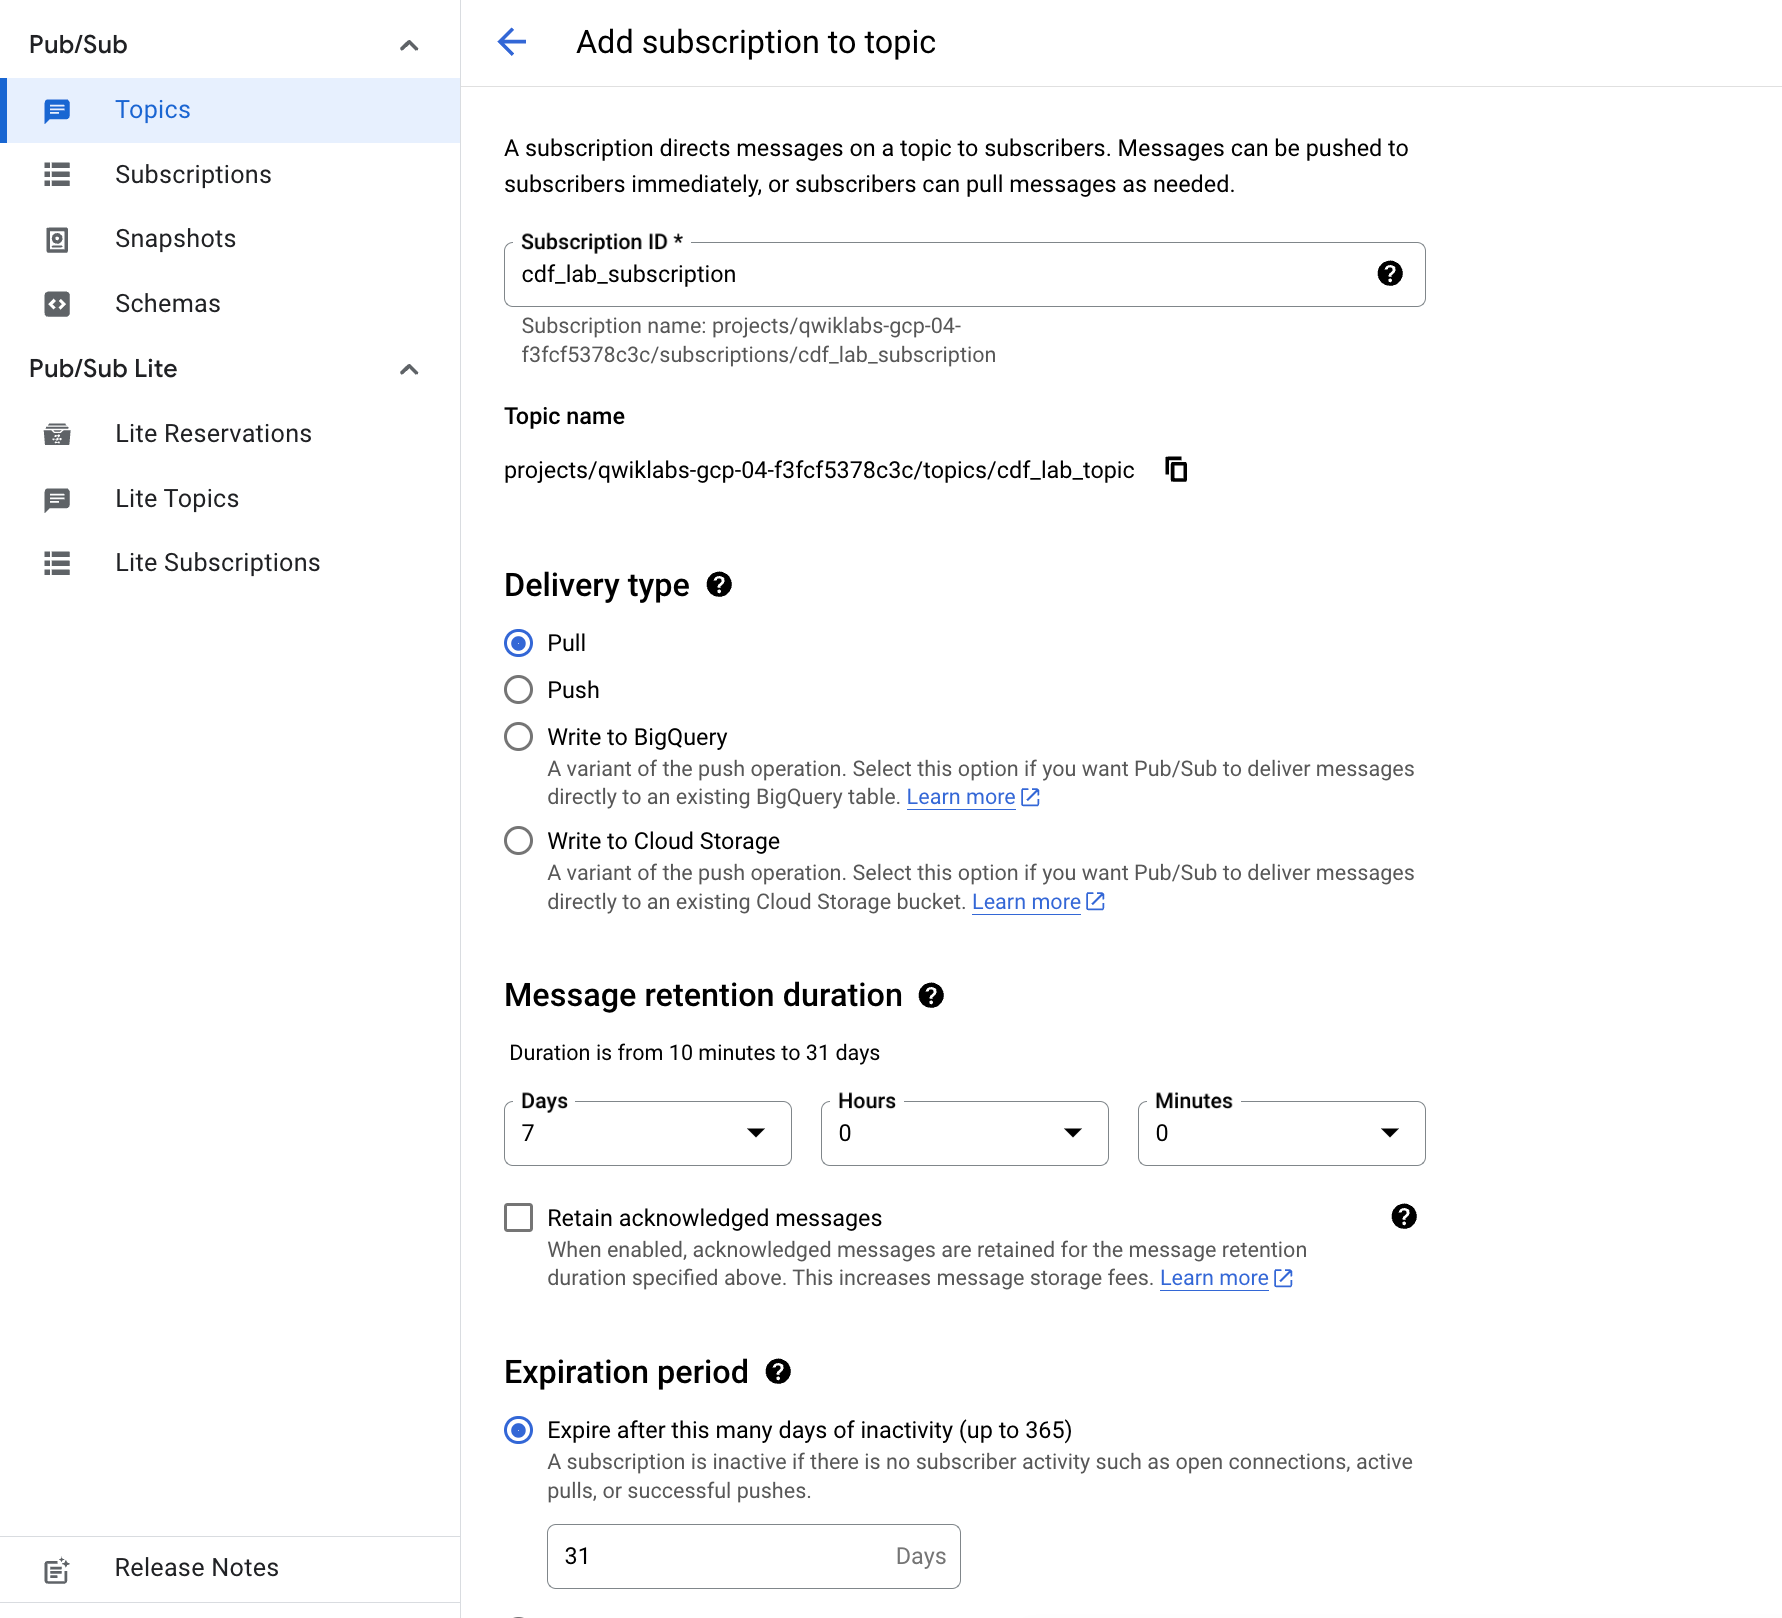
Still on the topic page. Now you'll make a subscription to access the topic.
cdf_lab_subscription, set the Delivery Type to Pull, then click Create.Click Check my progress to verify the objective.
Next, you will grant permissions to the service account associated with the instance, using the following steps.
From the Google Cloud console, navigate to the IAM & Admin > IAM.
Confirm that the Compute Engine Default Service Account {project-number}-compute@developer.gserviceaccount.com is present, copy the Service Account to your clipboard.
On the IAM Permissions page, click +Grant Access.
In the New principals field paste the service account.
Click into the Select a role field and start typing Cloud Data Fusion API Service Agent, then select it.
Click ADD ANOTHER ROLE.
Add the Dataproc Administrator role.
Click Save.
Click Check my progress to verify the objective.
In the console, on the Navigation menu, click IAM & admin > IAM.
Select the Include Google-provided role grants checkbox.
Scroll down the list to find the Google-managed Cloud Data Fusion service account that looks like service-{project-number}@gcp-sa-datafusion.iam.gserviceaccount.com and then copy the service account name to your clipboard.
Next, navigate to the IAM & admin > Service Accounts.
Click on the default compute engine account that looks like {project-number}-compute@developer.gserviceaccount.com, and select the Permissions tab on the top navigation.
Click on the Grant Access button.
In the New Principals field, paste the service account you copied earlier.
In the Role dropdown menu, select Service Account User.
Click Save.
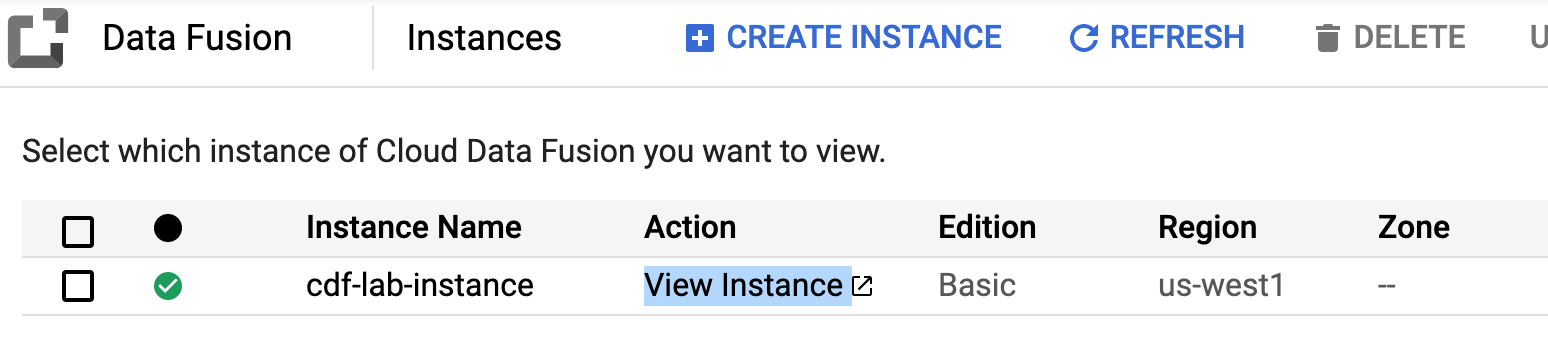
When using Cloud Data Fusion, you use both the Cloud Console and the separate Cloud Data Fusion UI. In the Cloud Console, you can create a Cloud Console project, and create and delete Cloud Data Fusion instances. In the Cloud Data Fusion UI, you can use the various pages, such as Pipeline Studio or Wrangler, to use Cloud Data Fusion features.
To navigate the Cloud Data Fusion UI, follow these steps:
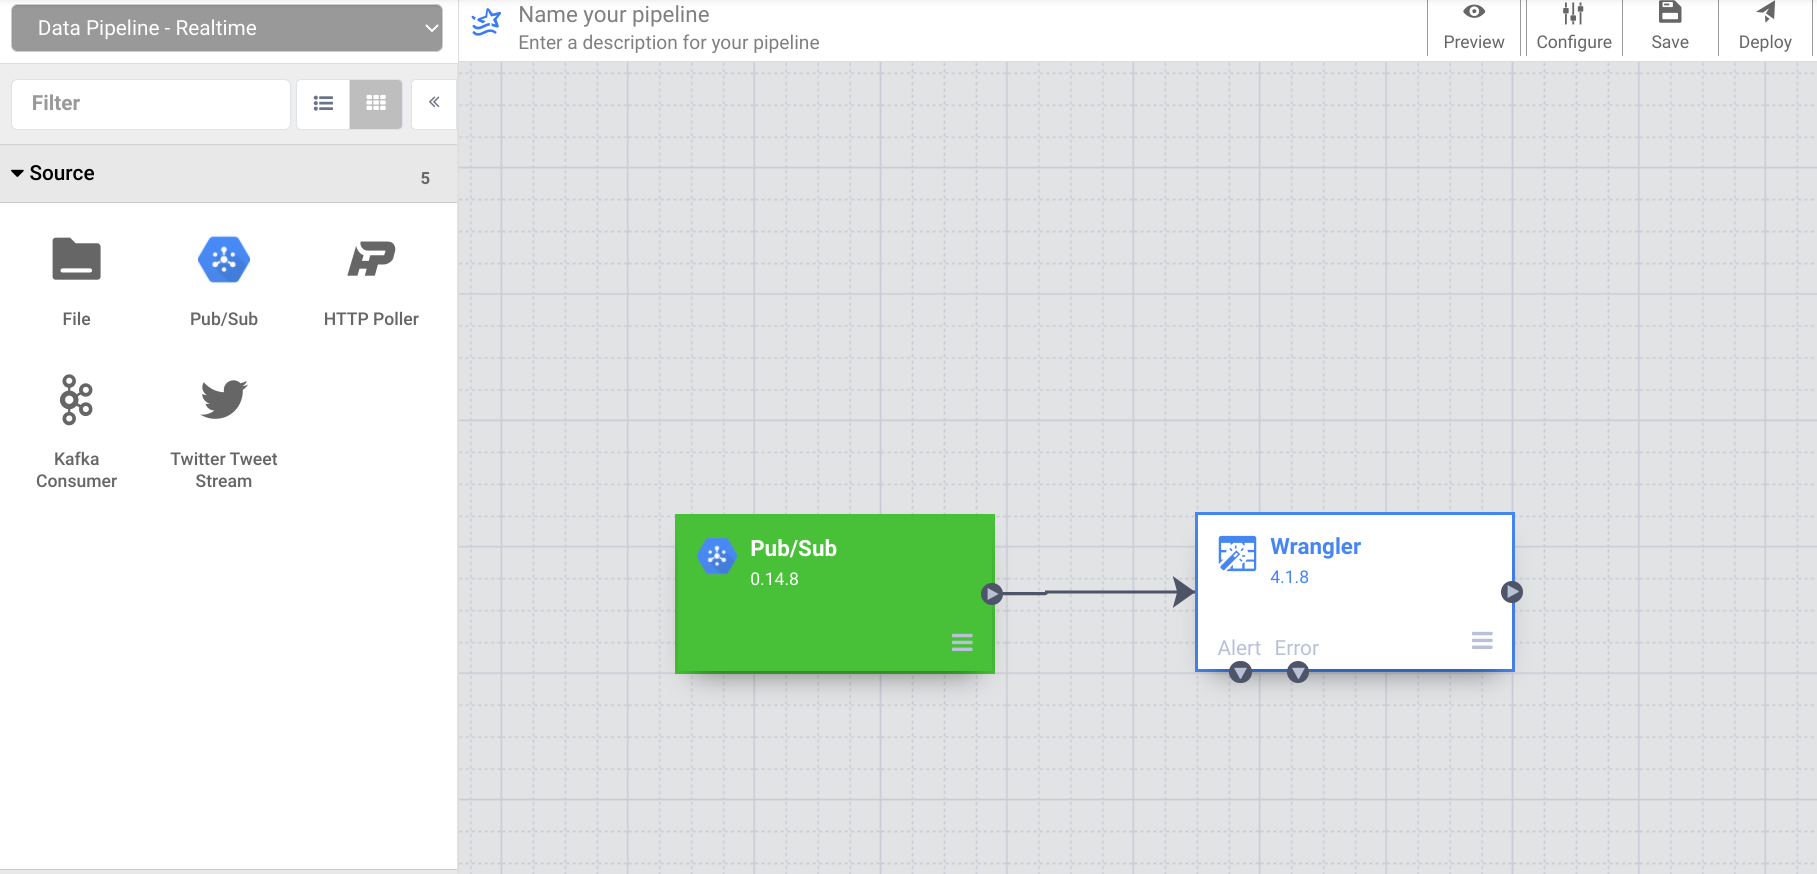
On the Cloud Data Fusion Control Center, use the Navigation menu to expose the left menu, then choose Pipeline > Studio.
On the top left, use the dropdown menu to select Data Pipeline - Realtime.
When working with data it’s handy to be able to see what the raw data looks like so that you can use it as a starting point for your transformation. For this purpose you’ll be using Wrangler for preparing and cleaning data. This data-first approach will allow you to quickly visualize your transformations and the real-time feedback ensures that you’re on the right track.
From the Transform section of the plugin palette, select Wrangler. The Wrangler node will appear on the canvas. Open it by clicking the Properties button.
Click on the WRANGLE button under the Directives section.
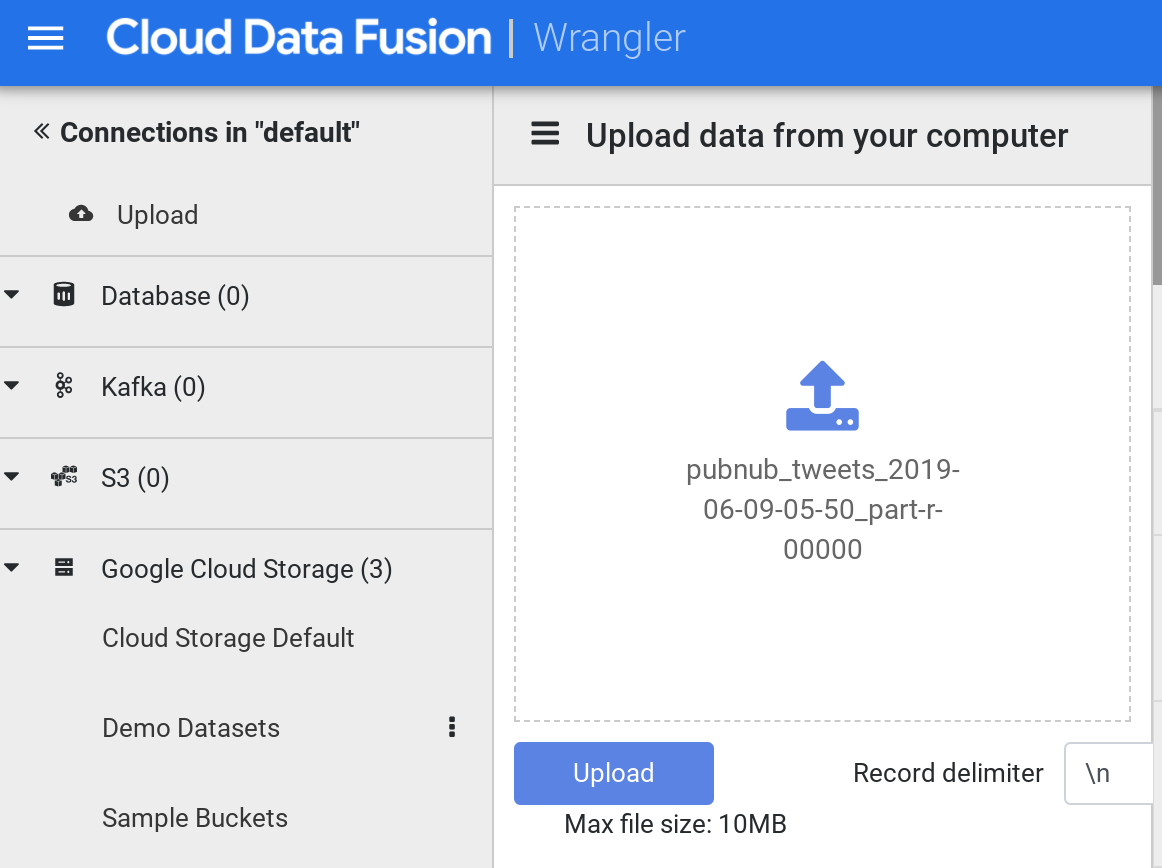
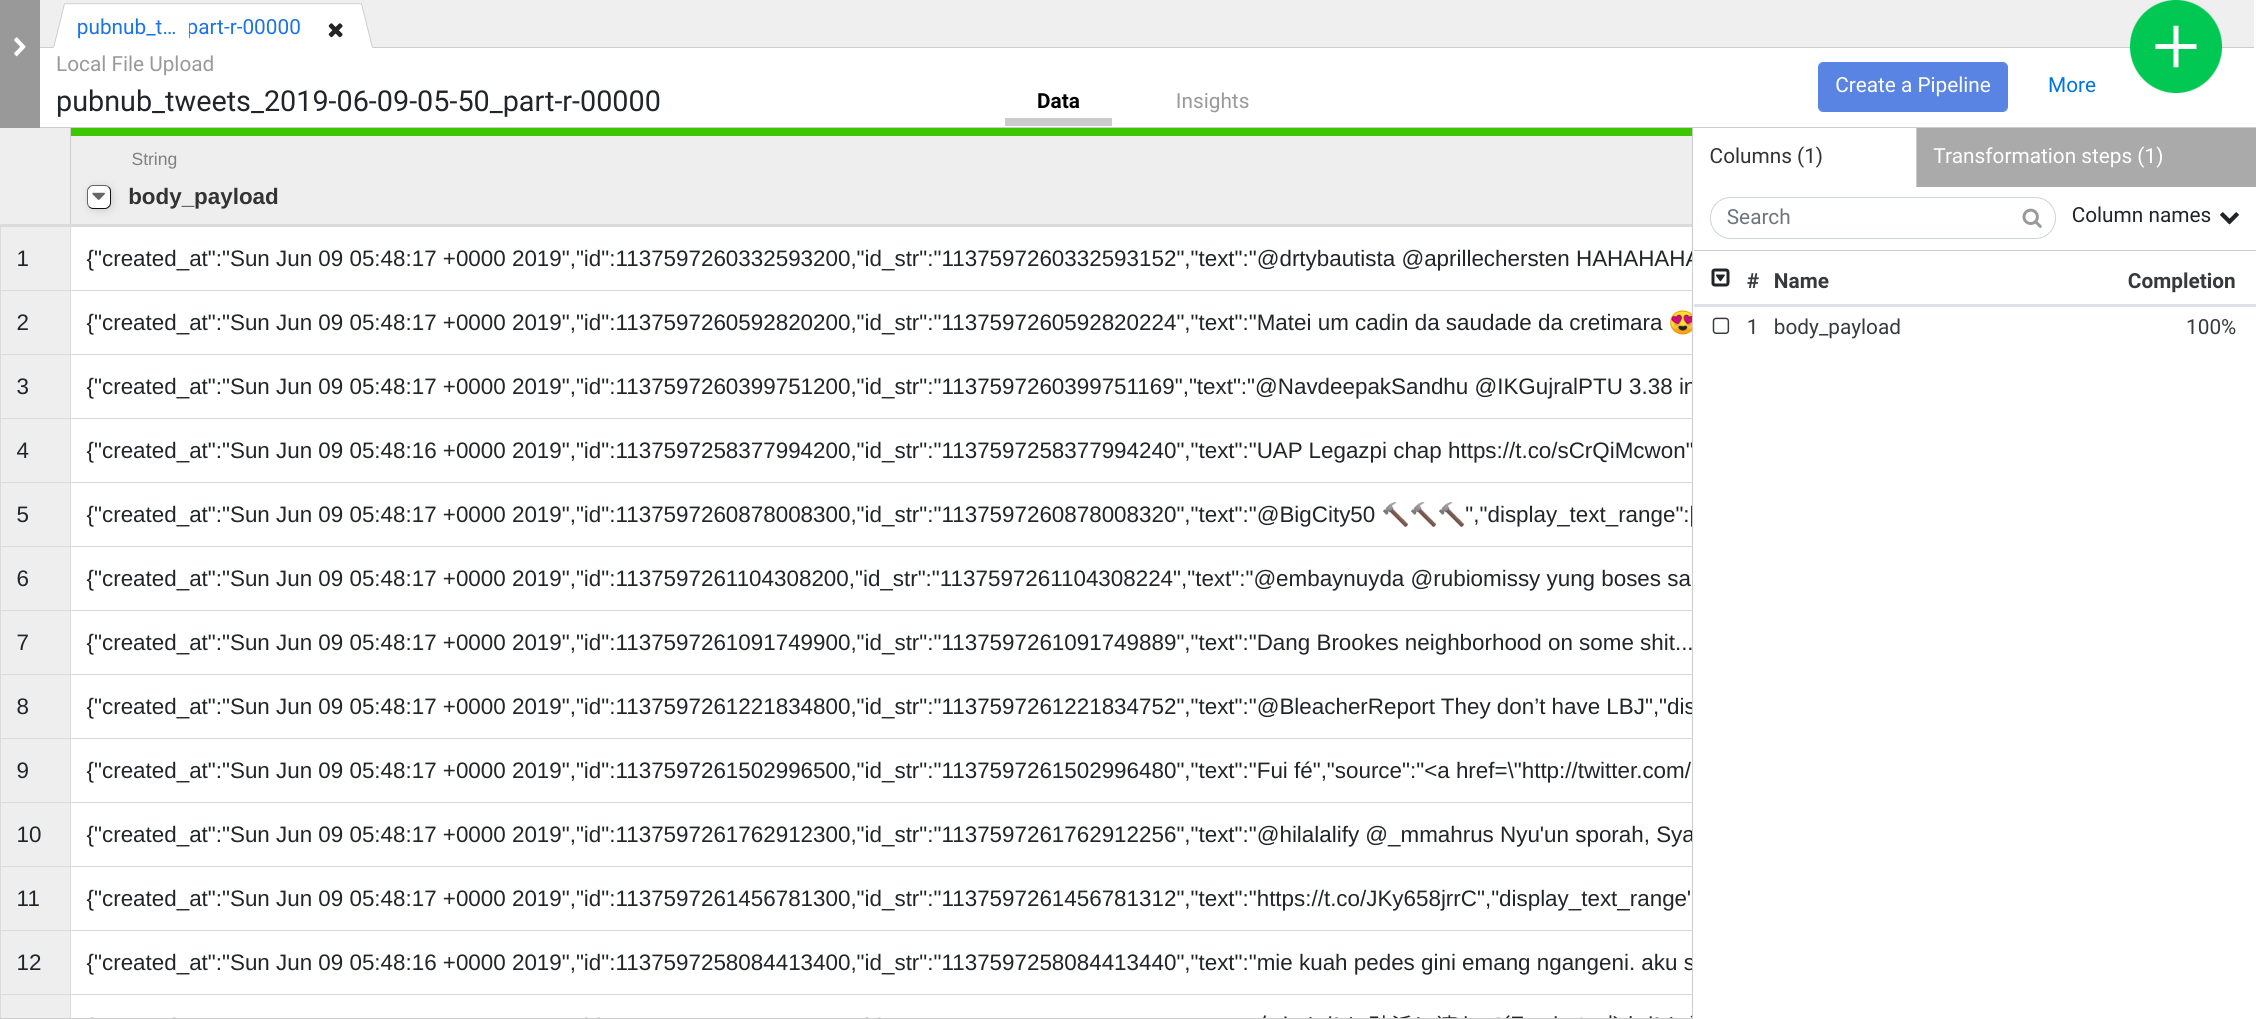
When it loads, on the left side menu click on Upload. Next, click on the upload icon to upload the sample tweets file you had earlier downloaded into your computer.
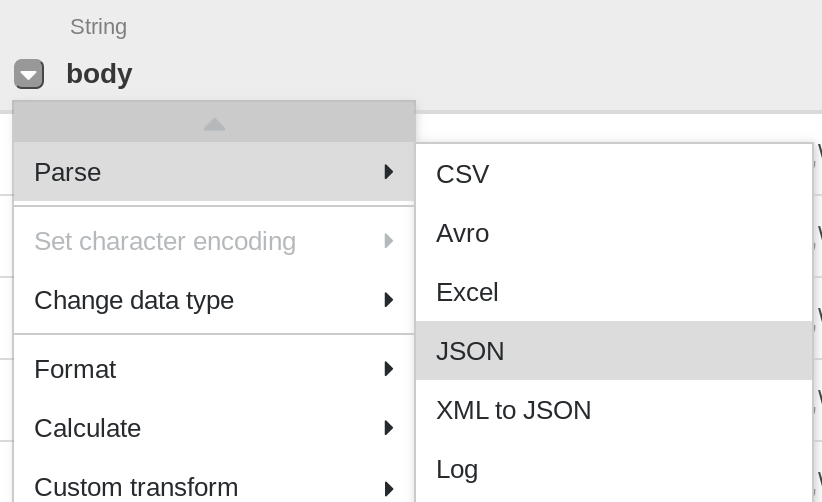
The first operation is to parse the JSON data into a tabular representation that is split into rows and columns. To do this, you will select the dropdown icon from the first column (body) heading , then select the Parse menu item, and then JSON from the submenu. On the popup, set the Depth as 1, then click Apply.
Repeat the previous step to see a more meaningful data structure for further transformation. Click on the body column dropdown icon, then select Parse > JSON and set the Depth as 1, then click Apply.
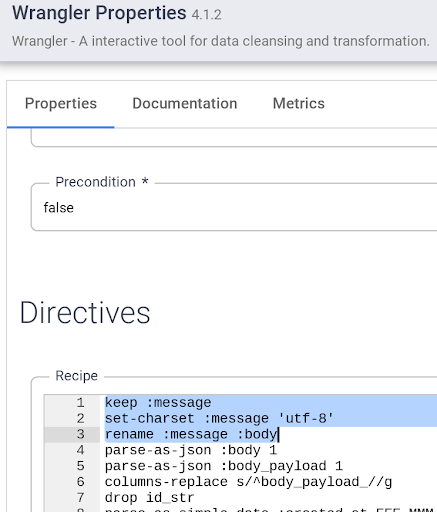
Besides using the UI, you can also write Transformation Steps into the Wrangler directive command line box. This box appears at the lower section of your wrangler UI (look for the command console with the $ prompt in green). You will use the command console to paste a set of Transformation Steps in the next step.
Add the Transformation Steps below by copying all and paste them into the Wrangler directive command line box:
As you can see, you’re back inside the Pipeline Studio, where a single node has been placed on the canvas, representing the transformations you just defined in Wrangler. However, no source is connected to this pipeline, since as explained above, you applied these transformations on a representative sample of the data on your laptop, and not on data in its actual production location.
In the next step, let’s specify where the data will actually be located.
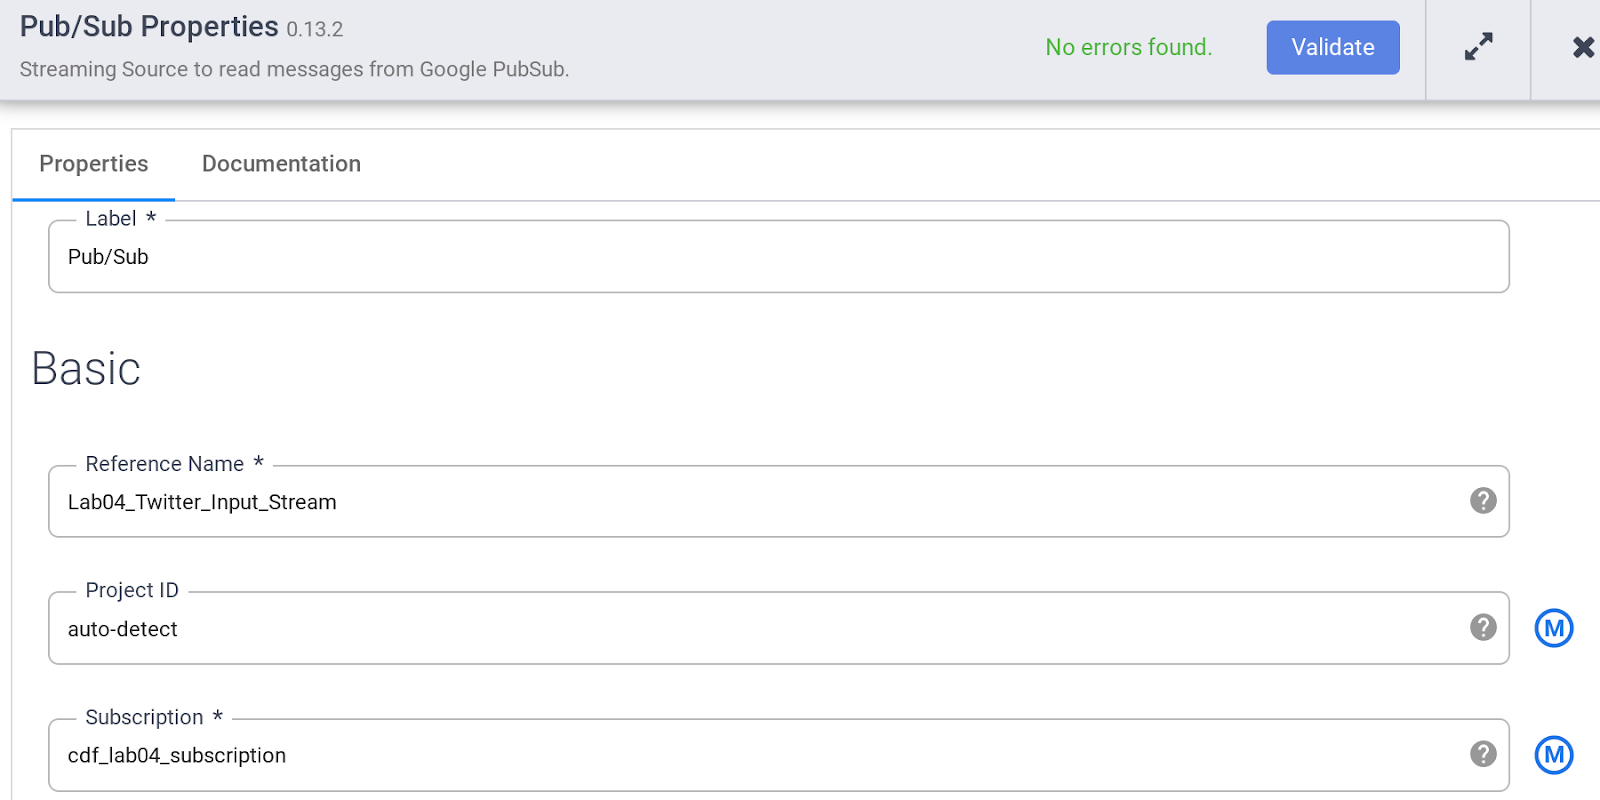
From the Source section of the plugin palette, select PubSub. The PubSub source node will appear on the canvas. Open it by clicking the Properties button.
Specify the various properties of the PubSub source as below:
a. Under Reference Name, enter Twitter_Input_Stream
b. Under Subscription enter cdf_lab_subscription (which is the name of your PubSub subscription you created earlier)
c. Click Validate to ensure that no errors will be found.
d. Click on the X on the top right to close the properties box.
Note that since you previously used a sample of the data in Wrangler, the source column appeared as body in Wrangler. However, the PubSub source emits it in a field with the name message. In the next step, you will fix this discrepancy.
Click on the X on the top right to close the properties box.
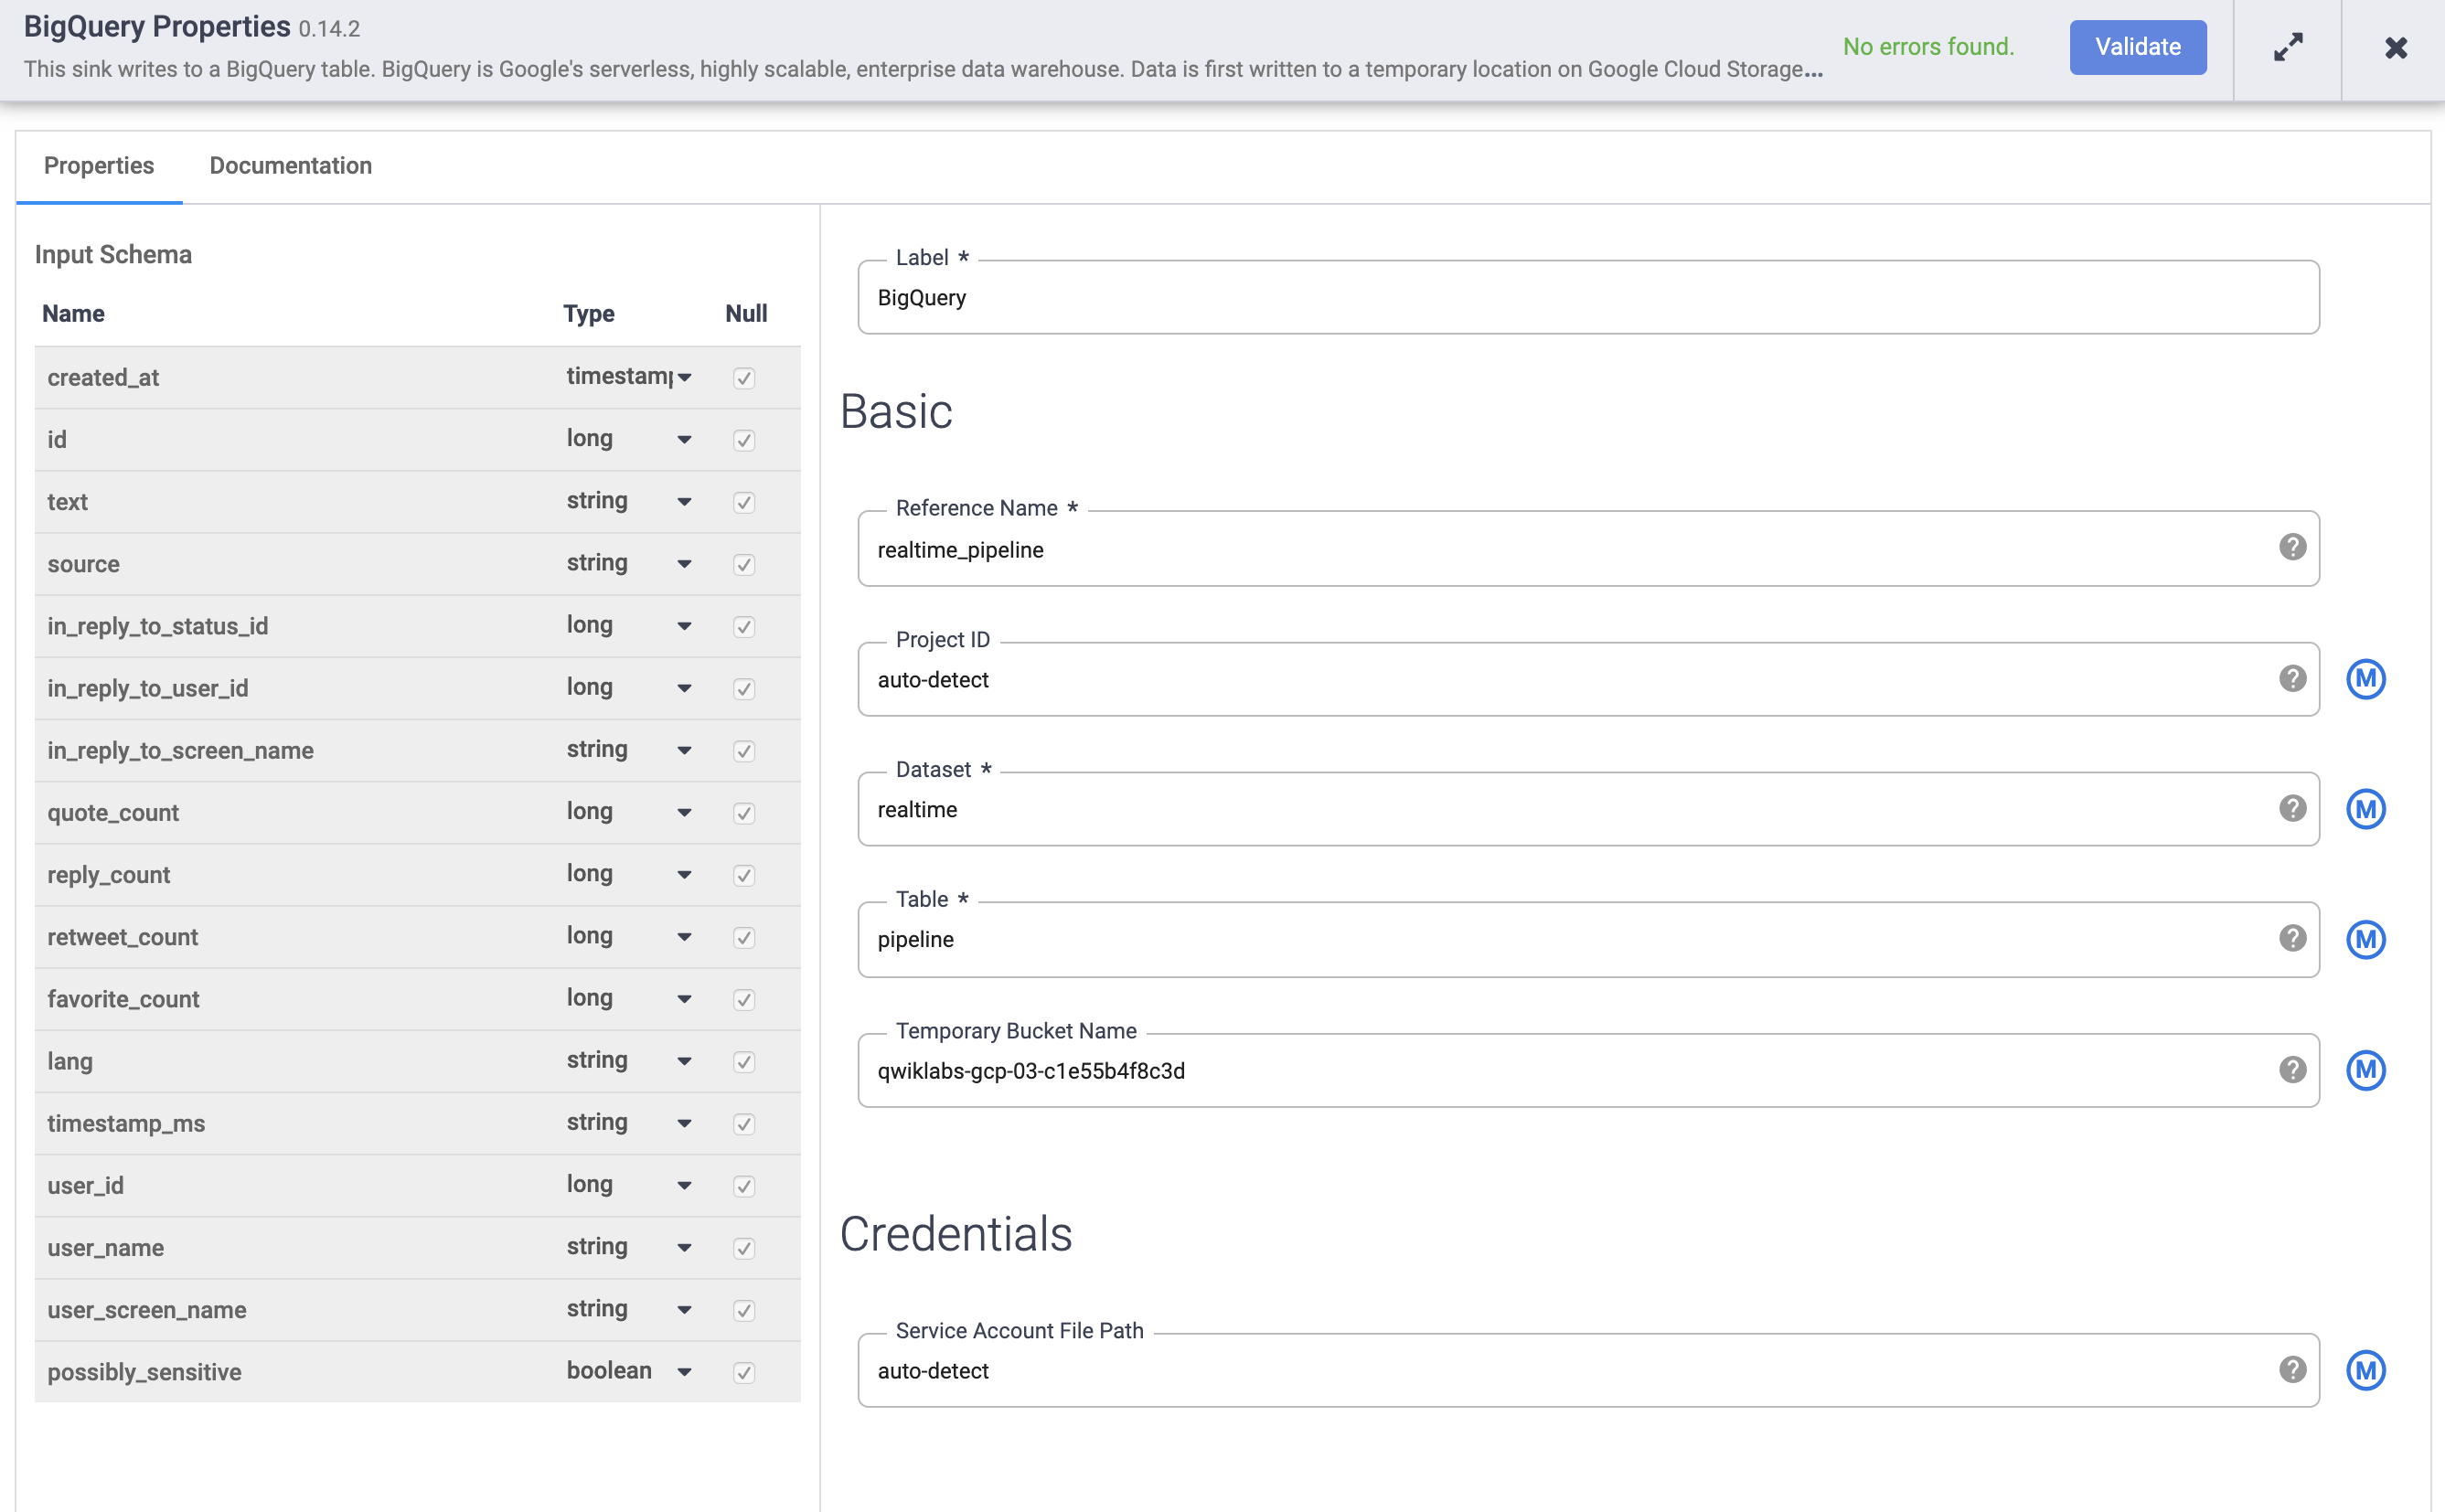
Now that you have connected a source and a transform to the pipeline, complete it by adding a sink. From the Sink section of the left side panel, choose BigQuery. A BigQuery sink node appears on the canvas.
Connect the Wrangler node to the BigQuery node by dragging the arrow from the Wrangler node to the BigQuery node. Next, you will configure the BigQuery node properties.
Hover over the BigQuery node and click on Properties.
a. Under Reference Name, enter realtime_pipeline
b. Under Dataset, enter realtime
c. Under Table, enter tweets
d. Click Validate to ensure that no errors will be found.
Click on the X on the top right to close the properties box.
Click on Name your pipeline , add Realtime_Pipeline as the name, and click Save.
Click on Deploy icon and then start the pipeline.
Once deployed, click Run. Wait for the pipeline Status to change to Running. It will take a couple of minutes.
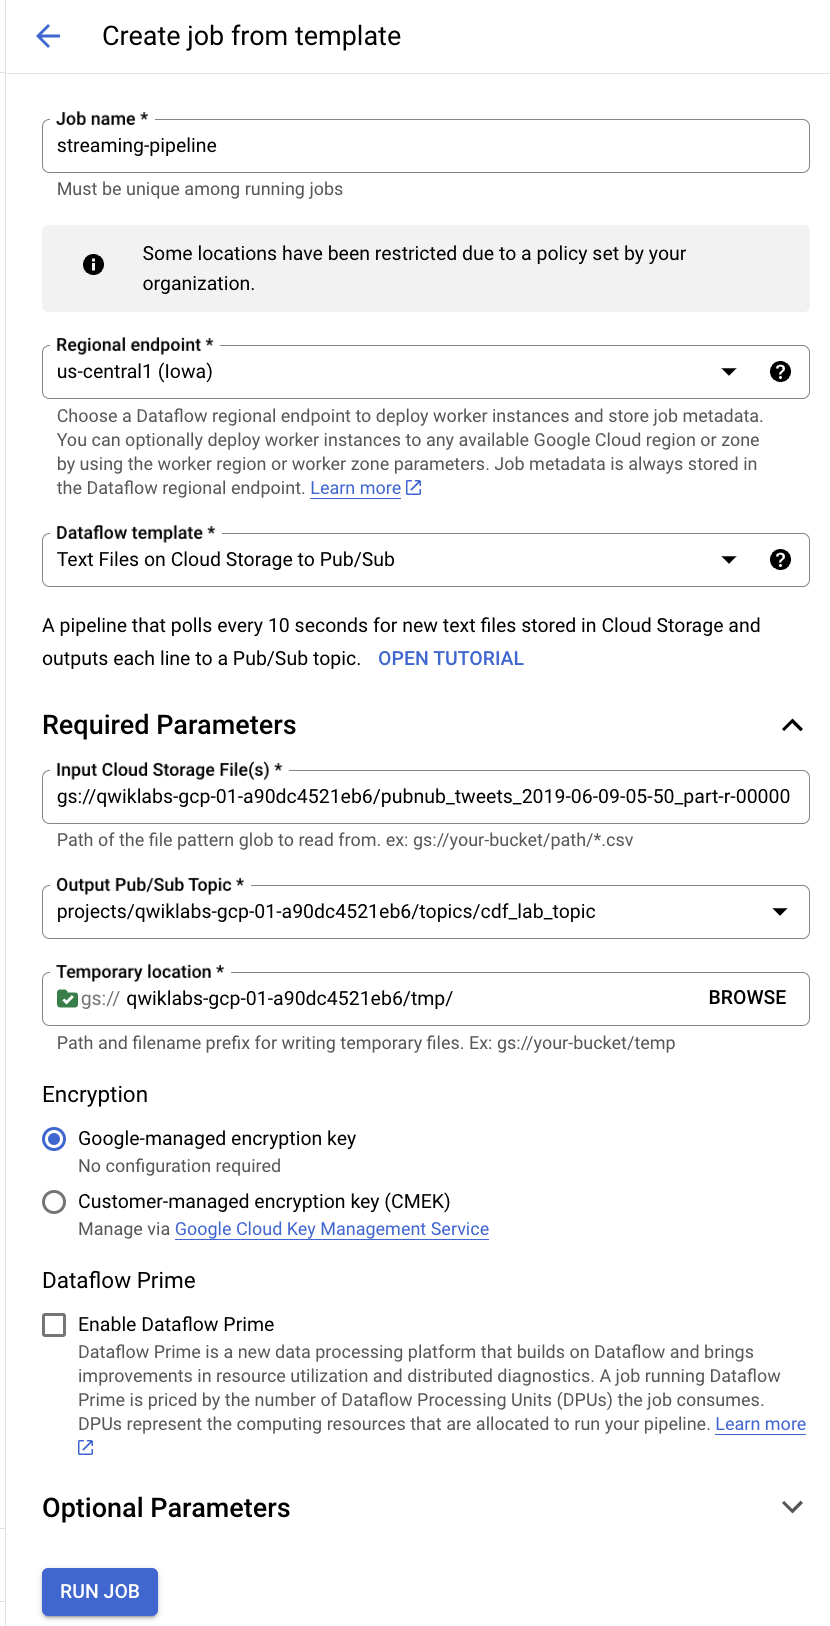
Send events by bulk loading events into the subscription using the Dataflow template.
You will now create a Dataflow job based on template to process multiple messages from the tweets file and publish them onto the earlier created pubsub topic. Use Text Files on Cloud Storage to Pub/Sub under Process Data Continuously (Stream) template from dataflow create job page.
Back in the Cloud Console, go to Navigation menu click on View All products under Analytics section click Dataflow.
In the top menu bar, click CREATE JOB FROM TEMPLATE.
Enter streaming-pipeline as the Job name for your Cloud Dataflow job.
Under Cloud Dataflow template, select Text Files on Cloud Storage to Pub/Sub template.
Under Input Cloud Storage File(s), enter gs://<YOUR-BUCKET-NAME>/<FILE-NAME>
Be sure to replace <YOUR-BUCKET-NAME> with the name of your bucket and <FILE-NAME> with the name of the file which you downloaded earlier into your computer.
For ex: gs://qwiklabs-gcp-01-dfdf34926367/pubnub_tweets_2019-06-09-05-50_part-r-00000
projects/<PROJECT-ID>/topics/cdf_lab_topic
Be sure to replace PROJECT-ID with your actual Project ID.
<YOUR-BUCKET-NAME>/tmp/
Be sure to replace <YOUR-BUCKET-NAME> with the name of your bucket.
Click the Run job button.
Execute dataflow job and wait for a couple of minutes. You can view messages on pubsub subscription and then view them being processed through real time CDF pipeline.
Click Check my progress to verify the objective.
As soon as events are loaded into the Pub/Sub topic , you should start seeing them being consumed by the pipeline - watch for the metrics on each node getting updated.
In the Data Fusion Console, wait for your pipeline metrics to change
In this lab, you learned how to set up a realtime pipeline in Data fusion that reads streaming incoming messages from Cloud Pub/Sub, processes the data, and writes it out into BigQuery.
Manual Last Updated February 6, 2025
Lab Last Tested February 6, 2025
Copyright 2022 Google LLC All rights reserved. Google and the Google logo are trademarks of Google LLC. All other company and product names may be trademarks of the respective companies with which they are associated.


