

Before you begin
- Labs create a Google Cloud project and resources for a fixed time
- Labs have a time limit and no pause feature. If you end the lab, you'll have to restart from the beginning.
- On the top left of your screen, click Start lab to begin
Create a Cloud Storage bucket.
/ 25
Create a Keyring and Crypto key.
/ 25
Encrypt Your Data with the Cloud KMS key and upload it on the storage bucket.
/ 25
Encrypt multiple files using KMS API and upload to cloud storage.
/ 25
In this lab, you learn how to use some advanced features of Google Cloud Security and Privacy APIs, including:
You use abridged data from the Enron Corpus, encrypt it, and load it into Cloud Storage.
Read these instructions. Labs are timed and you cannot pause them. The timer, which starts when you click Start Lab, shows how long Google Cloud resources are made available to you.
This hands-on lab lets you do the lab activities in a real cloud environment, not in a simulation or demo environment. It does so by giving you new, temporary credentials you use to sign in and access Google Cloud for the duration of the lab.
To complete this lab, you need:
Click the Start Lab button. If you need to pay for the lab, a dialog opens for you to select your payment method. On the left is the Lab Details pane with the following:
Click Open Google Cloud console (or right-click and select Open Link in Incognito Window if you are running the Chrome browser).
The lab spins up resources, and then opens another tab that shows the Sign in page.
Tip: Arrange the tabs in separate windows, side-by-side.
If necessary, copy the Username below and paste it into the Sign in dialog.
You can also find the Username in the Lab Details pane.
Click Next.
Copy the Password below and paste it into the Welcome dialog.
You can also find the Password in the Lab Details pane.
Click Next.
Click through the subsequent pages:
After a few moments, the Google Cloud console opens in this tab.

Cloud Shell is a virtual machine that is loaded with development tools. It offers a persistent 5GB home directory and runs on the Google Cloud. Cloud Shell provides command-line access to your Google Cloud resources.
Click Activate Cloud Shell 
Click through the following windows:
When you are connected, you are already authenticated, and the project is set to your Project_ID,
gcloud is the command-line tool for Google Cloud. It comes pre-installed on Cloud Shell and supports tab-completion.
Output:
Output:
gcloud, in Google Cloud, refer to the gcloud CLI overview guide.
In order to store the data for this lab you need to create your own Cloud Storage bucket.
Running this command should also help to verify that you've got the gsutil command line client set up correctly, authentication is working, and you have write access to the cloud project you're operating under.
Click Check my progress to verify the objective.
The Enron Corpus is a large database of over 600,000 emails generated by 158 employees of the Enron Corporation. This data has been copied to the Cloud Storage bucket gs://enron_emails/.
tail the downloaded file to verify the email text is there:You should receive the following output:
This should display the contents of a plaintext mail file. There are two types of files you'll be looking for: plaintext mail files and image files. If you're interested, use the same mechanism to check out what is in those other files.
Cloud KMS is a cryptographic key management service on Google Cloud. Before using KMS you need to enable it in your project. In this lab you have been provisioned KMS should already have been enabled. You can make sure of this by using one of the gcloud CLI commands.
You shouldn't have received any output. Cloud KMS is now enabled in your project!
In order to encrypt the data, you need to create a KeyRing and a CryptoKey. KeyRings are useful for grouping keys. Keys can be grouped by environment (like test, staging, and prod) or by some other conceptual grouping. For this lab, your KeyRing will be called test and your CryptoKey will be called qwiklab.
gcloud command to create the KeyRing. For this lab you will be using a global location, but it could also be set to a specific region:qwiklab:You shouldn't see any output. Just like that, you've created a KeyRing and CryptoKey!
The Key Management web UI allows you to view and manage your CryptoKeys and KeyRings. You will use this UI later when you manage permissions.
Click Check my progress to verify the objective.
Next, try to encrypt some data!
base64 encode it by running the following:Using the encrypt endpoint, you can send the base64-encoded text you want to encrypt to the specified key.
encrypt action will return a different result each time even when using the same text and key.
The response will be a JSON payload containing the encrypted text in the attribute ciphertext.
ciphertext property to the file 1.encrypted. Run the following:decrypt endpoint to verify the decrypted text matches the original email. The encrypted data has information on which CryptoKey version was used to encrypt it, so the specific version is never supplied to the decrypt endpoint. Run the following:Click Check my progress to verify the objective.
In KMS, there are two major permissions to focus on. One permissions allows a user or service account to manage KMS resources, the other allows a user or service account to use keys to encrypt and decrypt data.
The permission to manage keys is cloudkms.admin, and allows anyone with the permission to create KeyRings and create, modify, disable, and destroy CryptoKeys. The permission to encrypt and decrypt is cloudkms.cryptoKeyEncrypterDecrypter, and is used to call the encrypt and decrypt API endpoints.
For this exercise, you will use the current authorized user to assign IAM permissions.
gcloud command to assign the IAM permission to manage the KeyRing you just created:Since CryptoKeys belong to KeyRings, and KeyRings belong to Projects, a user with a specific role or permission at a higher level in that hierarchy inherits the same permissions on the child resources. For example, a user who has the role of Owner on a Project is also an Owner on all the KeyRings and CryptoKeys in that project. Similarly, if a user is granted the cloudkms.admin role on a KeyRing, they have the associated permissions on the CryptoKeys in that KeyRing.
Without the cloudkms.cryptoKeyEncrypterDecrypter permission, the authorized user will not be able to use the keys to encrypt or decrypt data.
gcloud command to assign the IAM permission to encrypt and decrypt data for any CryptoKey under the KeyRing you created:Now you can view the assigned permissions in the Cryptographic Keys section of Key Management.
test), then click Principals in the right info panel.This will open up a menu where you can see the accounts and permissions for the key ring you just added.
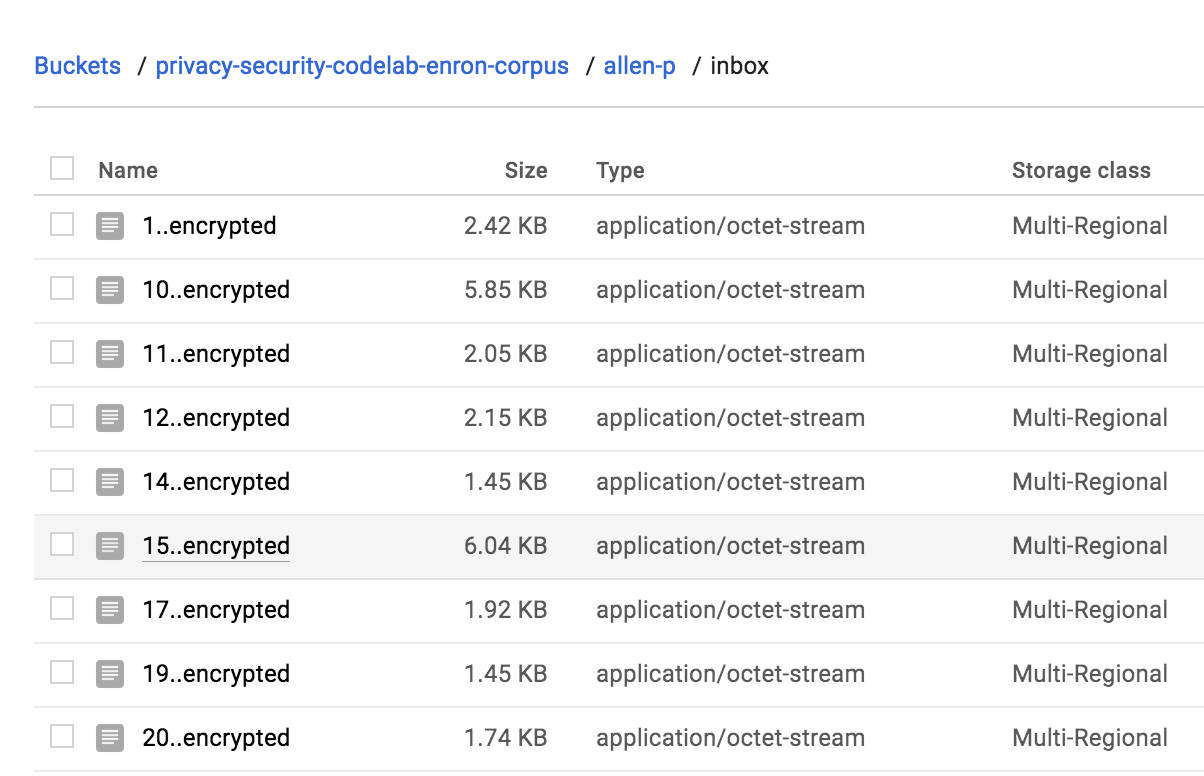
Now that you have an understanding of how to encrypt a single file, and have permission to do so, you can run a script to backup all files in a directory. For this example, copy all emails for allen-p, encrypt them, and upload them to a Cloud Storage bucket.
This script loops over all the files in a given directory, encrypts them using the KMS API, and uploads them to Cloud Storage.
Click Check my progress to verify the objective.
After the script completes, you can view the encrypted files when you click Storage from the Console's left menu.
Google Cloud Audit Logging consists of two log streams, Admin Activity and Data Access, which are generated by Google Cloud services to help you answer the question "who did what, where, and when?" within your Google Cloud projects.
Resource Type and you should see the creation and all modifications made to the KeyRing.You've now encrypted and uploaded data using KMS and Cloud Storage!
Test your knowledge about Cloud KMS by taking this quiz.
You learned how to encrypt data and manage encryption keys using Cloud Key Management Service (KMS).
Manual Last Updated April 15, 2024
Lab Last Tested August 31, 2023
Copyright 2025 Google LLC All rights reserved. Google and the Google logo are trademarks of Google LLC. All other company and product names may be trademarks of the respective companies with which they are associated.


This content is not currently available
We will notify you via email when it becomes available

Great!
We will contact you via email if it becomes available

One lab at a time
Confirm to end all existing labs and start this one