Points de contrôle
Create a Kubernetes cluster
/ 5
Create the monolith pod
/ 5
Create the healthy-monolith pod
/ 5
Create a secret, service, firewall rule and pod with label
/ 5
Kubernetes Basics v1.6
Overview
In this lab, you learn how to:
- Provision a Kubernetes cluster using Google Kubernetes Engine.
- Deploy and manage Docker containers using
kubectl. - Split an application into microservices using Kubernetes' Deployments and Services.
You use Kubernetes Engine and its Kubernetes API to deploy, manage, and upgrade applications. You use an example application called "app" to complete the labs.
Note: App is hosted on GitHub. It's a 12-Factor application with the following Docker images:
- Monolith: includes auth and hello services.
- Auth microservice: generates JWT tokens for authenticated users.
- Hello microservice: greets authenticated users.
- nginx: frontend to the auth and hello services.
Setup
Start the lab
For each lab, you get a new Google Cloud project and set of resources for a fixed time at no cost.
-
Sign in to Qwiklabs using an incognito window.
-
Note the lab's access time (for example,
1:15:00), and make sure you can finish within that time.
There is no pause feature. You can restart if needed, but you have to start at the beginning. -
When ready, click Start lab.
-
Note your lab credentials (Username and Password). You will use them to sign in to the Google Cloud Console.
-
Click Open Google Console.
-
Click Use another account and copy/paste credentials for this lab into the prompts.
If you use other credentials, you'll receive errors or incur charges. -
Accept the terms and skip the recovery resource page.
Enable APIs
Make sure the following APIs are enabled in Cloud Platform Console:
- Kubernetes Engine API
- Container Registry API
-
Expand the Navigation menu (
), then click APIs & services.
-
Scroll down and confirm that your APIs are enabled.
-
If an API is missing, click ENABLE APIS AND SERVICES at the top, search for the API by name, and enable it for your project.
Activate Google Cloud Shell
Google Cloud Shell is a virtual machine that is loaded with development tools. It offers a persistent 5GB home directory and runs on the Google Cloud.
Google Cloud Shell provides command-line access to your Google Cloud resources.
-
In Cloud console, on the top right toolbar, click the Open Cloud Shell button.
-
Click Continue.

It takes a few moments to provision and connect to the environment. When you are connected, you are already authenticated, and the project is set to your PROJECT_ID. For example:

gcloud is the command-line tool for Google Cloud. It comes pre-installed on Cloud Shell and supports tab-completion.
- You can list the active account name with this command:
Output:
Example output:
- You can list the project ID with this command:
Output:
Example output:
Get the code
- Get the sample code from the Git repository:
Review
- Review the app layout:
You'll see the following structure.
|
|
|
|
|
|
|
|
|
|
|
|
|
|
|
|
|
|
Now that you have the code, it's time to try Kubernetes.
A quick demo of Kubernetes
Start a Kubernetes cluster
- Define your zone as a project default zone. This way you do not need to specify --zone parameter in gcloud commands:
- In Cloud Shell, run the following command to start a Kubernetes cluster called
bootcampthat runs 5 nodes:
The scopes argument provides access to project hosting and Google Cloud Storage APIs that you'll use later.
Click Check my progress to verify the objective.
Explore the Kubernetes cluster
- After the cluster is created, check your installed version of Kubernetes using the
kubectl versioncommand:
gcloud container clusters create command automatically authenticated kubectl for you.
- Use
kubectl cluster-infoto find out more about the cluster:
- To view your running nodes in Cloud Platform Console, open the Navigation menu and go to Compute Engine > VM Instances.
Bash completion (Optional)
Kubernetes comes with auto-completion. You can use the kubectl completion command and the built-in source command to set this up.
- Run this command:
-
Press Tab to display a list of available commands.
-
Try the following examples:
You can also complete a partial command:
This feature makes using kubectl even easier.
Run and deploy a container
The easiest way to get started with Kubernetes is to use the kubectl create deployment command.
- Use
kubectl create deploymentto launch a single instance of the nginx container:
Note: In Kubernetes, all containers run in pods. And in this command, Kubernetes created what is called a deployment behind the scenes, and runs a single pod with the nginx container in it.
- Use the
kubectl get podscommand to view the pod running the nginx container:
- Use the
kubectl exposecommand to expose the nginx container outside Kubernetes:
service and an external load balancer with a public IP address attached to it (you will learn about services later). The IP address remains the same for the life of the service. Any client who hits that public IP address (for example an end user or another container) is routed to pods behind the service. In this case, that would be the nginx pod.
- Use the
kubectl getcommand to view the new service:
You'll see an external IP that you can use to test and contact the nginx container remotely.
ExternalIP field is populated for your service. This is normal—just re-run the kubectl get services command every few seconds until the field is populated.
- Use the
kubectl scalecommand to scale up the number of backend applications (pods) running on your service using.
This is useful when you want to increase workload for a web application that is becoming more popular:
- Get the pods one more time to confirm that Kubernetes has updated the number of pods:
- Use the
kubectl get servicescommand again to confirm that your external IP address has not changed:
- Use the external IP address with the
curlcommand to test your demo application:
Kubernetes supports an easy-to-use workflow out of the box using the kubectl run, expose, and scale commands.
Clean up
- Clean up nginx by running the following commands.
Now that you've seen a quick tour of Kubernetes, it's time to dive into each of the components and abstractions.
Pods
Investigate pods in more detail.
Creating pods
Pods can be created using pod configuration files.
- Explore the built-in pod documentation using the
kubectl explaincommand:
kubectl explain will be one of the most common commands you use. Note how you used it above to investigate an API object and how you will use it below to check on various properties of API objects.- Explore the monolith pod's configuration file.
monolith). You pass a few arguments to the container when it starts up and open port 80 for HTTP traffic.
- Use the
kubectl explaincommand with the.specoption to view more information about API objects. This example inspects containers.
Explore the rest of the API before you continue.
- Create the
monolithpod usingkubectl create:
Click Check my progress to verify the objective.
- Use the
kubectl get podscommand to list all pods running in the default namespace:
- When the pod is running, use the
kubectl describecommand to get more information about themonolithpod:
You'll see a lot of the information about the monolith pod, including the pod IP address and the event log. This information will be useful when troubleshooting.
- What is the pod IP address?
- Which node is the pod running on?
- Which containers are running in the pod?
- Which labels are attached to the pod?
- Which arguments are set on the container?
As you can see, Kubernetes makes it easy to create pods by describing them in configuration files and to view information about them when they are running. At this point, you can create all the pods your deployment requires!
Interacting with pods
Pods are allocated a private IP address by default that cannot be reached outside of the cluster. Use the kubectl port-forward command to map a local port to a port inside the monolith pod.
Use two terminals: one to run the kubectl port-forward command, and the other to issue curl commands.
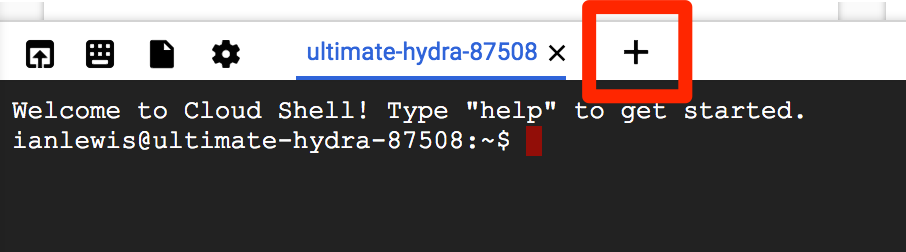
- Click the
+button in Cloud Shell to open a new terminal.
- Run the following command to set up port-forwarding from a local port, 10080, to a pod port, 80 (where your container is listening):
- To access your pod, return to the first terminal window and run the following
curlcommand:
You get a friendly "Hello" back from the container.
- See what happens when you hit a secure endpoint:
You should get an error.
- Log in to get an auth token from
monolith:
- At the login prompt, enter the password as
passwordto sign in.
curl.
- Cloud Shell doesn't handle copying long strings well, so copy the token into an environment variable:
-
At the login prompt, enter the password as
passwordto sign in. -
Access the secure endpoint again, and this time include the auth token:
- Use the
kubectl logscommand to view logs for themonolithpod:
Open another terminal and use the -f flag to get a stream of logs in real-time!
- To create the third terminal, click the
+button in Cloud Shell and run the following command:
- Use
curlin terminal 1 to interact withmonolith. And you see logs update in terminal 3:
- Use the
kubectl execcommand to run an interactive shell inside themonolithpod. This can be useful when you want to troubleshoot from within a container:
- Optional: In the shell, you can test external (outward facing) connectivity using the
pingcommand:
- Sign out of the shell:
As you can see, interacting with pods is as easy as using the kubectl command. If you need to test a container remotely or get a login shell, Kubernetes provides everything you need to start.
- To quit
kubectl port-forwardandkubectl logsin terminal 2 and 3, pressCtrl+C.
Monitoring and health checks
Kubernetes supports monitoring applications in the form of readiness and liveness probes. Health checks can be performed on each container in a pod. Readiness probes indicate when a pod is "ready" to serve traffic. Liveness probes indicate whether a container is "alive."
If a liveness probe fails multiple times, the container is restarted. Liveness probes that continue to fail cause a pod to enter a crash loop. If a readiness check fails, the container is marked as not ready and is removed from any load balancers.
In this lab, you deploy a new pod named healthy-monolith, which is largely based on the monolith pod with the addition of readiness and liveness probes.
In this lab, you learn how to:
- Create pods with readiness and liveness probes.
- Troubleshoot failing readiness and liveness probes.
Creating pods with Liveness and Readiness Probes
- Explore the
healthy-monolithpod configuration file.
- Create the
healthy-monolithpod usingkubectl.
Click Check my progress to verify the objective.
- Pods are not marked ready until the readiness probe returns an HTTP 200 response. Use the
kubectl describecommand to view details for the healthy-monolith pod:
Readiness probes
See how Kubernetes responds to failed readiness probes. The monolith container supports the ability to force failures of its readiness and liveness probes. This enables you to simulate failures for the healthy-monolith pod.
- Use the
kubectl port-forwardcommand in terminal 2 to forward a local port to the health port of thehealthy-monolith pod:
- Force the
monolithcontainer readiness probe to fail. Use thecurlcommand in terminal 1 to toggle the readiness probe status. Note that this command does not show any output:
- Get the status of the
healthy-monolithpod using thekubectl getpods -wcommand:
- Press CTRL+C when there are
0/1ready containers. Use thekubectl describecommand to get more details about the failing readiness probe:
- Notice the events for the
healthy-monolithpod report details about failing readiness probes.
To force the monolith container readiness probe to pass, toggle the readiness probe status by using the curl command:
- Wait about 15 seconds and get the status of the
healthy-monolithpod using thekubectl get podscommand:
- Press CTRL+C in terminal 2 to close the
kubectlproxy (i.eport-forward) command.
Liveness probes
Building on what you learned in the previous tutorial, use the kubectl port-forward and curl commands to force the monolith container liveness probe to fail. Observe how Kubernetes responds to failing liveness probes.
- Use the
kubectl port-forwardcommand to forward a local port to the health port of thehealthy-monolithpod in terminal 2.
- To force the
monolithcontainer readiness probe to pass, toggle the readiness probe status by using thecurlcommand in another terminal:
- Get the status of the
healthy-monolithpod using thekubectl get pods -wcommand:
-
When a liveness probe fails, the container is restarted. Once restarted, the
healthy-monolithpod should return to a healthy state. PressCtrl+Cto exit that command when the pod restarts. Note the restart count. -
Use the
kubectl describecommand to get more details about the failing liveness probe. You can see the related events for when the liveness probe failed and the pod was restarted:
- When you are finished, press
Ctrl+Cin terminal 2 to close thekubectl proxycommand.
Services
Next steps:
- Create a service.
- Use label selectors to expose a limited set of pods externally.
Creating a Service
Before creating your services, create a secure pod with an nginx server called secure-monolith that can handle HTTPS traffic.
Create two volumes that the secure pod will use to bring in (or consume) data.
The first volume of type secret stores TLS cert files for your nginx server.
- Return to terminal 1 and create the first volume using the following command:
tls/ and stores them in a secret called tls-certs.
- Create the second volume of type
ConfigMapto hold nginx's configuration file:
proxy.conf file to the cluster and calls the ConfigMap nginx-proxy-conf.
- Explore the
proxy.conffile that nginx will use:
The file specifies that SSL is ON and specifies the location of cert files in the container file system.
secret volume, so you need to mount the volume to the container's file system.- Explore the
secure-monolithpod configuration file:
volumes, the pod attaches the two volumes you created. And under volumeMounts, it mounts the tls-certs volume to the container's file system so nginx can consume the data.- Run the following command to create the
secure-monolithpod with its configuration data:
Now that you have a secure pod, expose the secure-monolith pod externally using a Kubernetes service.
- Explore the monolith service configuration file:
The file contains:
- The
selectorthat finds and exposes pods with labelsapp=monolithandsecure=enabled -
targetPortandnodePortthat forward external traffic from port 31000 to nginx on port 443.
- Use the
kubectl createcommand to create the monolith service from the monolith service configuration file:
type: NodePort in the Service's yaml file means that it uses a port on each cluster node to expose the service. This means that it's possible to have port collisions if another app tries to bind to port 31000 on one of your servers.
Normally, Kubernetes handles this port assignment for you. In this lab, you chose one so that it's easier to configure health checks later.
- Use the
gcloud compute firewall-rulescommand to allow traffic to the monolith service on the exposed nodeport:
Now that everything is set up, you should be able to test the secure-monolith service from outside the cluster without using port forwarding.
- Get an IP address for one of your nodes:
- Try to open the URL in your browser:
Note: It's time for a quick knowledge check. Use the following commands to answer the questions below.
kubectl get services monolith
kubectl describe services monolith
Questions:
- Why can't you get a response from the monolith service?
- How many endpoints does the monolith service have?
- What labels must a pod have to be picked up by the monolith service?
Adding labels to pods
Currently the monolith service does not have any endpoints. One way to troubleshoot an issue like this is to use the kubectl get pods command with a label query.
- Determine that there are several pods running with the monolith label:
- But what about
app=monolithandsecure=enabled?
- Use the
kubectl labelcommand to add the missingsecure=enabledlabel to thesecure-monolithpod:
Click Check my progress to verify the objective.
- Check to see that your labels are updated:
- View the list of endpoints on the
monolithservice:
- Test this by testing one of your nodes again.
- Open the following URL in your browser. You will need to click through the SSL warning because
secure-monolithis using a self-signed certificate:
Congratulations!
You learned about Kubernetes services and how pod endpoints are selected using labels. You also learned about Kubernetes volumes and how to configure applications using ConfigMaps and secrets.
End your lab
When you have completed your lab, click End Lab. Google Cloud Skills Boost removes the resources you’ve used and cleans the account for you.
You will be given an opportunity to rate the lab experience. Select the applicable number of stars, type a comment, and then click Submit.
The number of stars indicates the following:
- 1 star = Very dissatisfied
- 2 stars = Dissatisfied
- 3 stars = Neutral
- 4 stars = Satisfied
- 5 stars = Very satisfied
You can close the dialog box if you don't want to provide feedback.
For feedback, suggestions, or corrections, please use the Support tab.
Copyright 2022 Google LLC All rights reserved. Google and the Google logo are trademarks of Google LLC. All other company and product names may be trademarks of the respective companies with which they are associated.

