チェックポイント
Create the app
/ 25
Customize the contacts primary view
/ 25
Using forms in your app
/ 25
Implementing the User Experience for your App using AppSheet
Overview
In this lab, you implement the user experience for your app using various UX components available in AppSheet.
Objectives
In this lab, you learn to:
- Modify a default table view to include additional data to display images in the app.
- Update a view to use a different view type to display maps for address columns.
- Create a map view and use it to map addresses in the app.
- Create and use a form view to accept user input and save it to a sheet on Google drive.
- Customize the look and feel of your app.
Setup
Before you click the Start Lab button
Read these instructions. Labs are timed and you cannot pause them. The timer, which starts when you click Start Lab, shows how long lab resources will be made available to you.
This hands-on lab lets you do the lab activities in a real cloud environment, not in a simulation or demo environment. It gives you new, temporary credentials to sign in and access AppSheet for the duration of the lab.
What you need
To complete this lab, you need:
- Access to a standard internet browser (Chrome browser recommended).
- Time to complete the lab.
-
Make sure you sign in to the lab using an incognito window.
-
When ready, click
.
A new panel will appear with the temporary credentials that you must use for this lab.
If you need to pay for the lab, a pop-up will open for you to select your payment method.
-
Note your lab credentials. You will use them to sign in to AppSheet for this lab.
If you use other credentials, you will get errors or incur charges. -
Click Open AppSheet to open the AppSheet UI in a separate browser tab or incognito window.
Note: If you are not already using an incognito browser window, use the right mouse click in Chrome to open AppSheet and select Open link in incognito window. -
Click to sign in with Google.
-
In the Sign in with Google dialog, enter the provided Username, and click Next.
Note: If you see other accounts listed, click Use another account and then enter the provided Username and click Next.If you use other credentials, you'll get errors or incur charges. -
Enter the provided Password and click Next.
-
Click Accept to accept the terms.
-
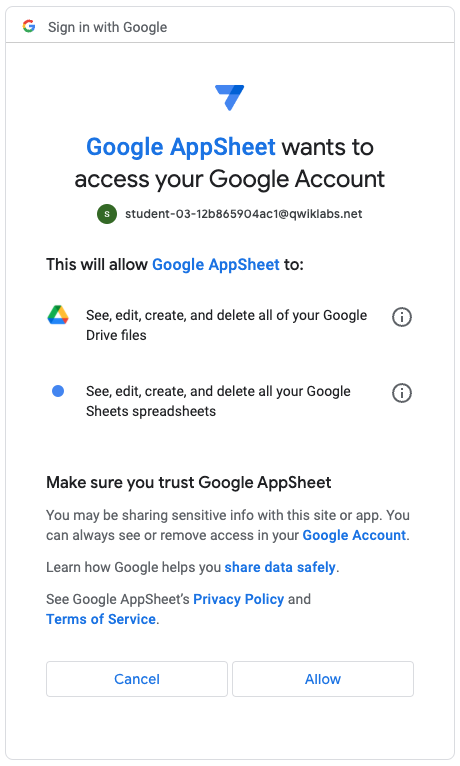
To enable AppSheet to access the Google Drive folders associated with your lab account, on the AppSheet consent page, click Allow.
-
You're now signed in to AppSheet.
To view the AppSheet MyApps page, click X in the top-right corner of the Tell us about you so we can make better recommendations dialog.
The MyApps page might be empty since you do not have any apps yet.
Task 1. Create the app
When working on your own or your company's app, you normally would incrementally build the app over a continuous project timeline.
Apps that you build are saved and accessible in the Recent section on the Apps page until they are deployed and published.
In this task, you create the app that was built in a previous lab, using a template.
Delete prototype app (if listed)
In the lab environment on some occasions it's possible that the app built in a previous lab is still listed in the Recent section. You cannot use this app to continue working on this lab since the underlying data is not available for use by the app.
Delete the app before continuing with this lab.
-
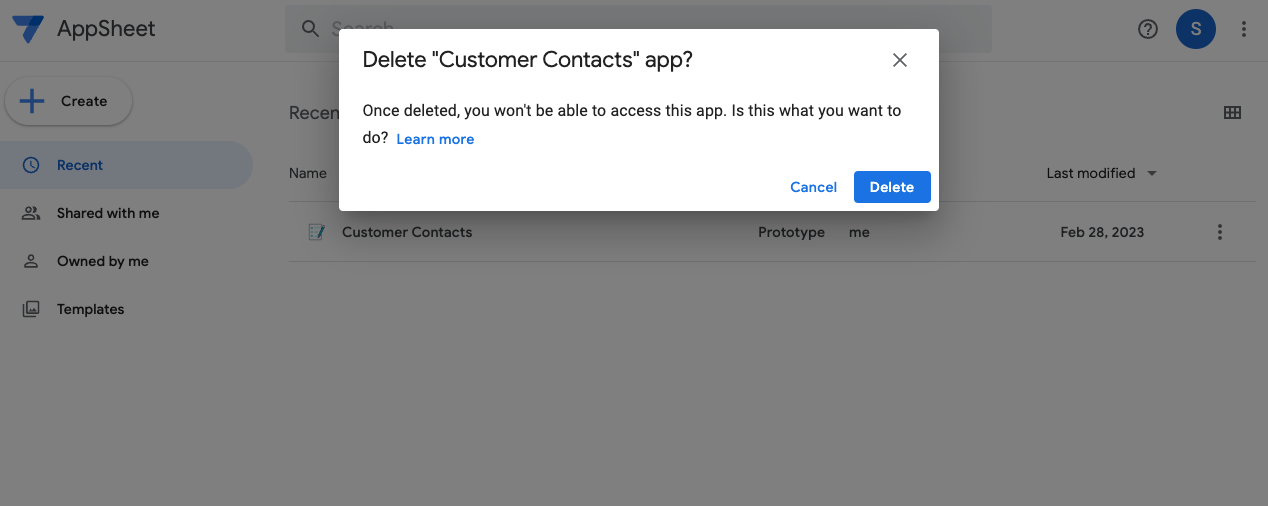
If the Customer Contacts app is listed, click the 3-dots menu and select Delete.
-
To confirm the deletion, click Delete.
Copy a template app to your AppSheet account
To continue building the Customer Contacts app in this lab, you must first recreate the app from a template.
-
Click the following link to copy the Customer Contacts app to your AppSheet account:
-
In the app preview, click Accept.
-
To create a copy of the app for use in this lab, click Copy app (
).
-
In the Copy app form, specify the following, and leave the remaining settings as their defaults:
Property
Value
(type or select)App name
Customer Contacts
-
Click Copy app.
Your app is set up with the original contacts and companies data sources, and you can now continue to build out the app's functionality.
Click Check my progress to verify the objective.
Task 2. Customize the contacts primary view
In this task, you customize the contacts view in the app by changing its layout, and some of its display options.
View the list layout
It would be nice to display a photo of a person in the contacts view of the app, for any contact that has a photo stored on file.
-
In the AppSheet editor, in the left navigation bar, click App (
) > Views (
).
-
To expand the view configuration, under Primary Navigation, click contacts (
).
Note that its view type is set to card.
-
If not already expanded, expand View Options.
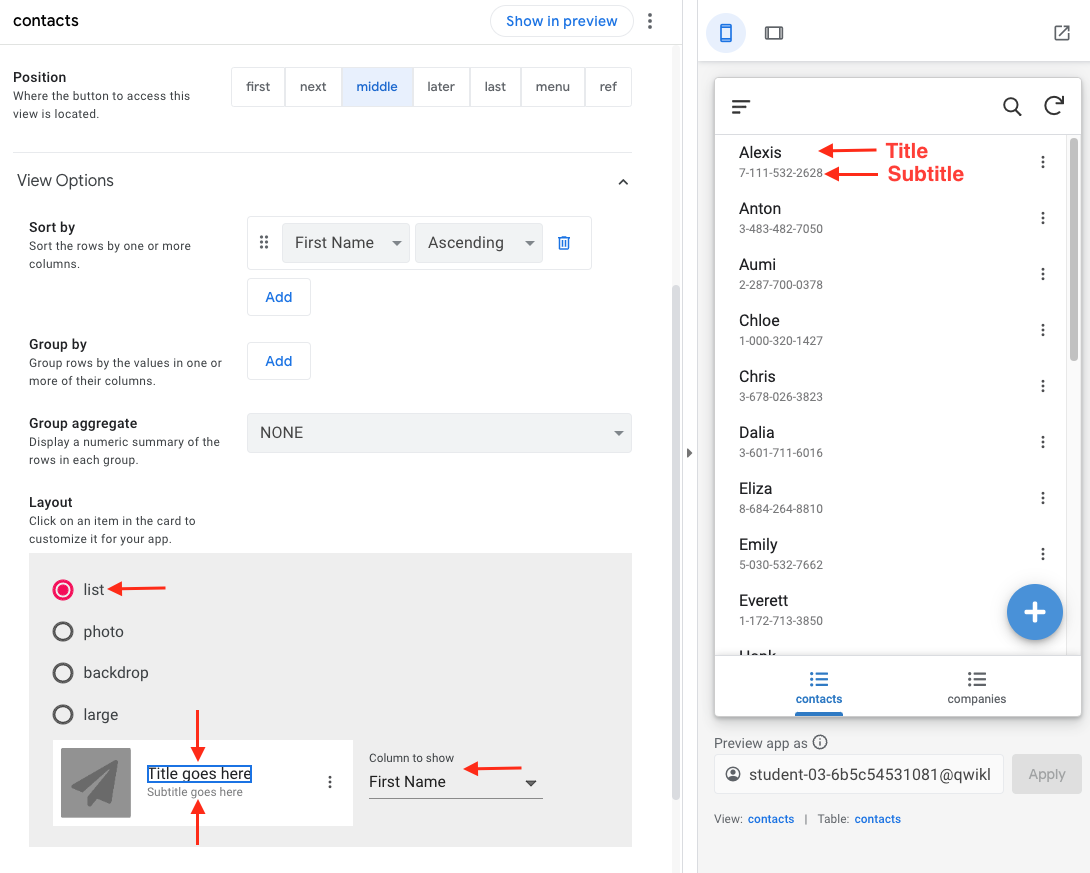
The sort order is by the First Name column in the contacts table.
-
Scroll to the Layout section. The list option is selected by default.
The layout controls how the different items on the card are laid out in the view.
-
Click Title goes here. The Column to show indicates the name of the column whose value is displayed as the title of the card.
In this case, verify that it's the First Name column from the contacts table.
-
Similarly, click Subtitle goes here. Verify that the Column to show indicates the Phone column whose value is displayed as the subtitle on the card.
-
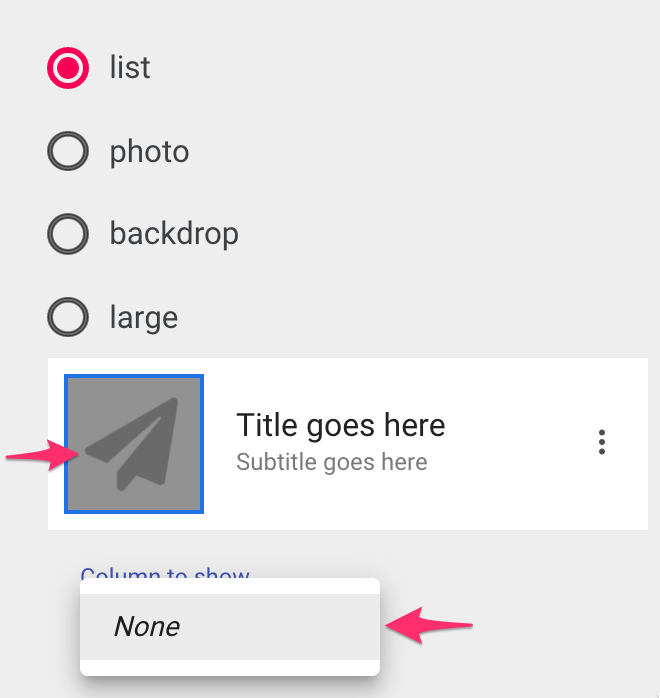
Click the airplane icon to set the photo column.
Note that AppSheet could not identify a column in the contacts table that contains image data. This is because the Google sheet used by the table does not contain such a column.
Use a photo column in the list layout
Lets add a column to our contacts Google sheet to store the photo of a contact.
-
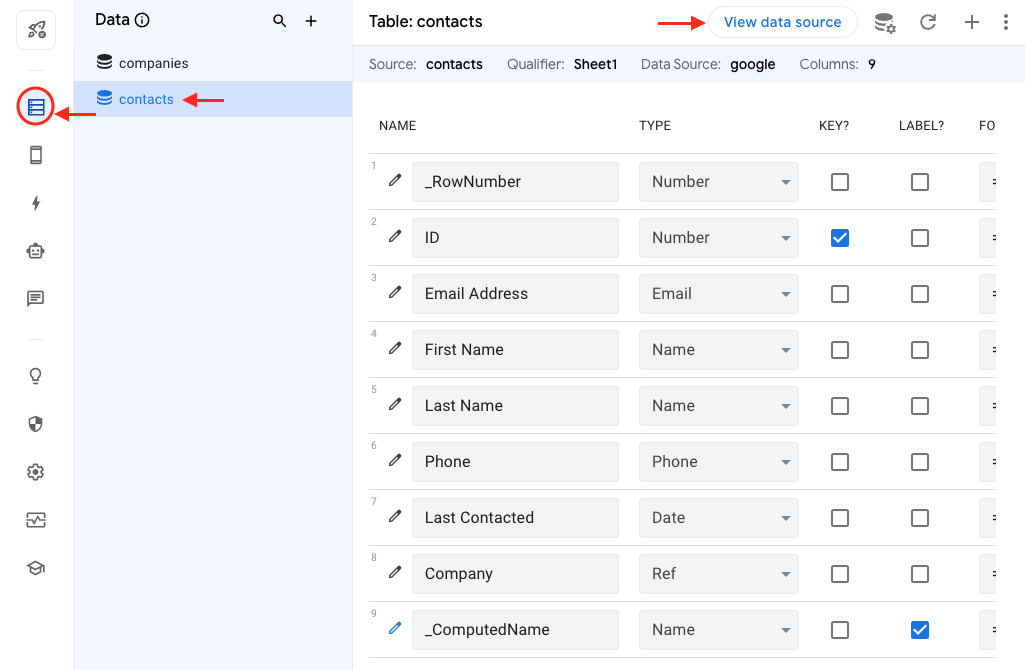
In the AppSheet editor, in the left navigation bar, click Data (
).
-
To expand the table configuration, click contacts (
).
-
Click View data source.
AppSheet opens the contacts Google sheet in a separate window or tab in the browser.
-
In column H of the contacts sheet, add the new column header: Photo.
This column will contain a publicly accessible URL to the photo image of the contact person.
Note: This column can also contain a folder path and name of a file on Google drive that contains the image. The file must be located in the same or relative path location as the spreadsheet and must be publicly accessible. -
In the other browser tab, switch to the AppSheet editor, and navigate to Data (
) > contacts (
).
-
Since the photo column was added to the Google sheet, we need to let AppSheet know of the new column structure of the contacts table:
- Click Regenerate schema (
).
- Click Regenerate to confirm.
AppSheet automatically infers the correct column type of Image for the new Photo column.
- Click Regenerate schema (
Store the image data
You now have a place to store image URLs or image filenames in the table that is used by your app.
In this step, you provide the app with access to the image files using publicly hosted URLs.
-
Click Photos, and open the Photos sheet in a separate browser tab.
-
For some rows in the contacts sheet, update the Photo column with the URLs to the images:
- Copy the image URLs from the Photo column in the Photos sheet opened in the previous step.
- Paste them in the corresponding rows with the matching ID values in the contacts sheet.
Note: In the lab environment not all the contacts will have photo image urls and some images may be duplicated.
Update the contacts list layout to use the photo column
-
Navigate back to the (
) App > (
) Views and scroll to the Layout section of the contacts view configuration.
-
With the list layout selected, click the airplane icon.
-
For Column to show, select Photo from the drop-down list.
-
For Image shape, select the circle icon.
-
Click Save to save your changes to the app configuration.
AppSheet updates the app in the live preview to show the photos of the contacts whose images were updated in the Google sheet.
-
If the live app preview does not update automatically, you may need to sync the app by clicking Sync (
).
Click Check my progress to verify the objective.
Task 3. Customize the companies primary view
In this task, you customize the companies view to use a different view type and layout.
Change the companies view type and layout
-
In the AppSheet editor, navigate to App (
) > Views (
), and select the companies primary view.
-
Change the View type to card by selecting it.
-
Scroll to the Layout section under View Options, and select photo.
-
Select the small airplane icon, and for Column to show, select Business Address.
-
Select the large airplane icon, and for Column to show, select Business Address.
-
Click Save.
The app now displays a map of the business address location for each company.
Change the companies view icon
-
In the same form, scroll and expand the Display options.
-
In the Icon search box, type company, and select any of the icons from the icons search results list.
-
Click Save.
The companies view icon in the app's bottom navigation bar now displays the new icon.
Task 4. Using the Map view
The map view is a great way to display locations within your app. Depending on your needs you can display location data, drop pins, or provide directions with your app.
Location data points can come from addresses, XY (coordinates of a point), or LatLong (GPS) information.
You can also use either Google maps to display your mapped locations using addresses and LatLong information, or a custom image to map XY points.
In this task, you use a Map view to display the business address location of companies on a map in the app.
Create a Map view
-
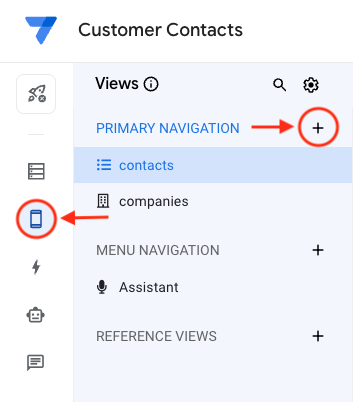
In the AppSheet editor, navigate to App (
) > Views (
).
-
Click Contacts.
-
To add a new view in the Customer contacts app, click +.
-
Click Create a new view.
-
In the New View form, specify the following, and leave the remaining settings as their defaults:
Property
Value (type or select)
View name
Business Addresses
For this data
companies
View type
map
Position
menu
View options
Map column
Business Address
This view will map data from the Business Addresses column in the companies table.
The user will be able to access this view from the app's main menu.
-
In the same form, expand the Display options.
-
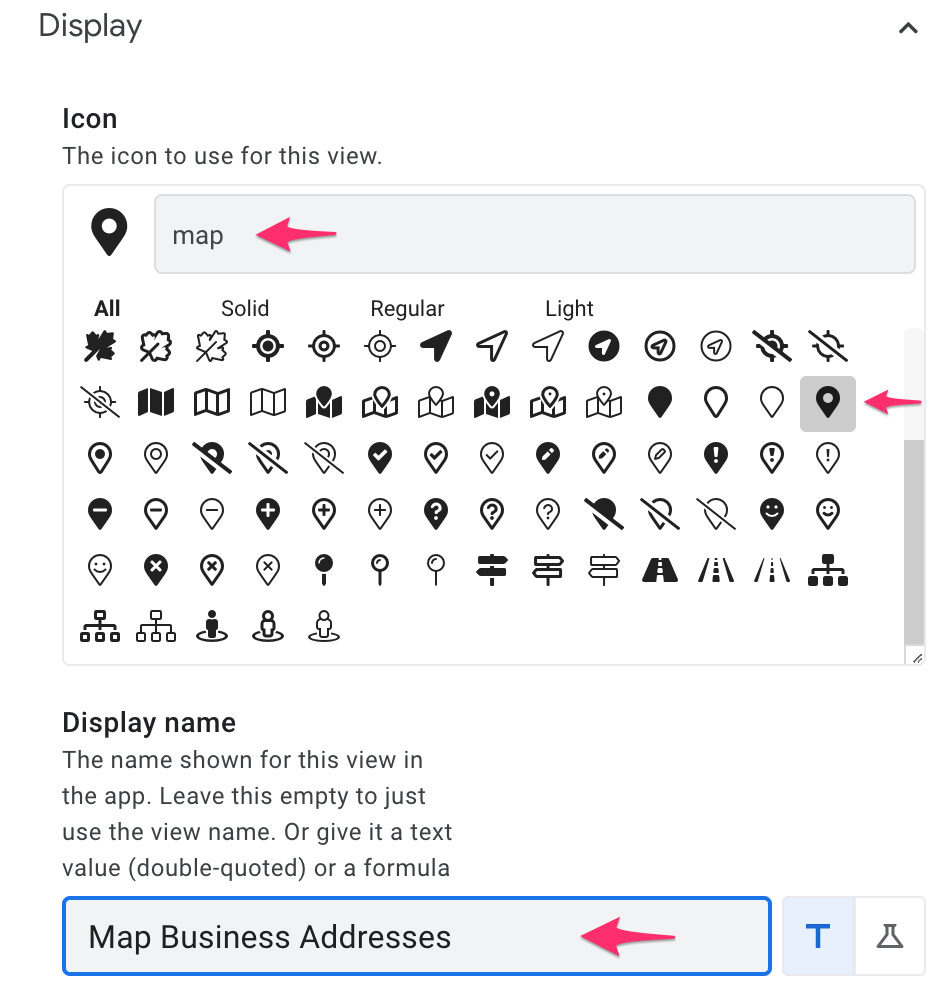
In the Icon search box, type map, and select any of the map icons from the list.
-
For Display name, type Map Business Addresses.
This will be the name displayed for this item in the main menu.
-
To save the new view, click Save.
Preview the map view
-
To test and preview the new map view, in the live app preview, click the app's main menu icon to display the menu.
-
Verify that the Map Business Addresses menu item is included on the main menu.
-
Select the Map Business Addresses menu item from the main navigation to map all the business addresses from the companies table.
-
Select any of the pinned locations in the map. AppSheet automatically displays details about the company at that location.
Task 5. Using forms in your app
Apps usually need input from the user at some point as the user interacts with the app. To collect user input, AppSheet supports the Form view type.
In this task, you use a form view in the app to enable the user to enter product information in order to ship products to a company.
Add the shipTo data source to your app
The form view must have a place to store the user entered data from the app. Before you create the view, you must create or use a table to store this information.
-
To add a table to your app, in the AppSheet editor, navigate to Data (
) > + Add new data.
-
Click Google Sheets from Add data.
-
In the file picker, select the
shipToGoogle sheet from your drive folder and click Select. This sheet was automatically provisioned for the lab. -
In the Create a new table dialog, click Add to app.
AppSheet adds the table to your app. You can now create and use views for this table in the app.
View and update the shipTo table column structure
-
In the AppSheet editor, navigate to Data (
) > shipTo (
), and expand the shipTo table configuration.
AppSheet has automatically inferred the types of the columns from the sheet.
Column
Type
Description
ID
Text
Unique ID of the table
Product Name
Name
Name of the product being shipped
Quantity
Number
Number of units of the product being shipped
Date
Date
Current date of the request
Status
Text
Status of the request
Company
Number
ID of the company to which the product is being shipped
-
In the column structure for the ID column, scroll the properties, and uncheck the Show? and Search? properties.
The ID column was selected as the key for the table and is automatically populated with system generated unique values using the
UNIQUEID()expression in the INITIAL VALUE property.As this column contains random system generated values, it can be hidden and made unsearchable for the app user.
Learn more about using keys in AppSheet.
-
To open the column property edit form, click the pencil icon to the left of the Company column.
The Company column refers to the company to which items are being shipped, so its type should be set to Ref.
-
In this form specify the following, and leave the remaining settings as their defaults:
Property
Value
(type or select)Type
Ref
Source table
companies
-
To close the column property edit form, click Done.
-
The Status column should be populated from a fixed set of values and not contain free text entered by the user.
To change the type of the Status column, click the pencil icon to the left of the column.
-
In the column edit dialog, change the type to Enum.
-
Under Type Details, for Values, click Add and type New.
-
Repeat the previous step to add additional Status values: Cancel, Hold.
-
Click Done.
-
To save your changes, click Save.
Add a virtual column to the shipTo table
It would be nice to also include a company's shipping information whenever the shipTo form is displayed in the app. The Shipping Information column in the companies table already stores this information.
We can use a virtual column in the shipTo table to implement this capability. A virtual column is not an actual column in the underlying sheet. Instead, it's automatically computed with an app formula expression.
-
In the shipTo table's columns configuration, click + Add virtual column.
-
In the New Virtual Column dialog, for Column name, type Shipping Info.
-
Click in the App formula box to open the Expression Assistant.
-
In the Expression Assistant dialog, for App Formula for column New Virtual Column, type [Company].[Shipping Information].
Note: Enter the expression as shown above, including the period (.) between the two column names. The expression evaluates to the value of the Shipping Information column of the row in the companies table that is referenced by the company ID value in the Company column in the shipTo table.
-
In the Expression Assistant, click Save.
-
In the New Virtual Column dialog, click Done.
-
To save the configuration changes, click Save.
The virtual Shipping Info column will now automatically be used in the form view that you will create in the next task.
Create the shipTo form view
-
To create the shipTo form view, in the AppSheet editor, navigate to App (
) > Views (
), and click + Add View.
-
To add the form view, click Create a new view.
-
In the New View form specify the following, and leave the remaining settings as their defaults:
Property
Value (type or select)
View name
ShipTo
For this data
shipTo
View type
form
Position
next
-
Under View Options, for Form style, select Side-by-side. This style lays out the input fields with their labels alongside the field's UI component.
-
Under View Options, for Finish view, select shipTo_Detail. This sets the view that the app will display after the user submits this form.
-
Scroll the form and expand the Display section.
-
For Icon, type ship in the search box.
-
Select any one of the appropriate icons. This icon will be displayed in the center position of the app's bottom navigation bar.
-
To save your changes in the AppSheet editor, click Save.
Test the ShipTo form
Follow the steps below to preview and test the new form.
-
If the live app preview is displaying the ShipTo form, click Cancel in the app's bottom navigation bar.
We will test the user experience starting from the initial view in the app.
Note the new ShipTo view icon on the app's bottom navigation bar.
-
Click companies in the app's bottom navigation bar.
-
To open the form, click the ShipTo icon.
-
In the form specify the following, and leave the remaining settings as their defaults:
Property
Value
(type or select)Name of the product being shipped
Widget 1
Number of units of the product being shipped
2
Status of the request
New
ID of the company to which the product is being shipped
Any company from the list
The app automatically displays the Shipping Info based on the selected company.
-
To submit the form and save the new shipping entry to the shipTo table, click Save.
Verify the entry in the Google sheet
-
As a final verification step, switch to your browser tab to view the shipTo Google sheet on drive.
-
Verify that the new shipping entry has been added to the sheet.
Click Check my progress to verify the objective.
Task 6. Customize the look and feel of your app
In the final task of this lab, you customize your app's look and feel by implementing a few branding changes.
Change theme and color
-
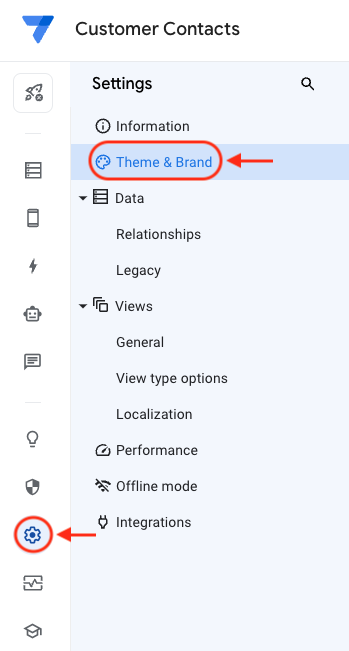
To change the app's theme and color, in the left navigation bar click (
) Settings > Theme & Brand tab in the AppSheet editor.
-
Switch between the light and dark themes by clicking each theme. Select one of the themes that best suits your preference.
You can change the primary colors used for text, buttons and icons in the app by selecting one of the colors from the list of colors available, or create a custom color of your choice.
- Select any one of the colors to customize the look of your app.
Change logo and images
-
To change the app's logo, select one from the list.
-
To change the launch image of the app, select one from the list.
-
To change the background image of the app, select one from the list.
Note: For the app's logo and images, you can also provide custom logos and images by hosting them on your cloud providers file storage service and providing the path to the files.
Customize header and footer
You can choose to display the app's logo and view names in the app's header, hide the app's menu and search buttons, and change the color style of the header and footer.
-
Click Show view name in header to enable this feature.
-
Click Show logo in header to enable this feature.
-
For style, select the full color style option.
-
To save your changes, click Save.
-
Preview your branding changes in the live app preview.
Congratulations!
You have successfully implemented the user experience for your app using AppSheet.
In this lab you learned how to:
- Modify a default table view to include additional data to display images in the app.
- Update a view to use a different view type to display maps for address columns.
- Create a map view and use it to map addresses in the app.
- Create and use a form view to accept user input and save it to a sheet on Google drive.
- Customize the look and feel of your app.
End your lab
When you have completed your lab, click End Lab. Qwiklabs removes the resources you’ve used and cleans the account for you.
You will be given an opportunity to rate the lab experience. Select the applicable number of stars, type a comment, and then click Submit.
The number of stars indicates the following:
- 1 star = Very dissatisfied
- 2 stars = Dissatisfied
- 3 stars = Neutral
- 4 stars = Satisfied
- 5 stars = Very satisfied
You can close the dialog box if you don't want to provide feedback.
For feedback, suggestions, or corrections, please use the Support tab.
Copyright 2022 Google LLC All rights reserved. Google and the Google logo are trademarks of Google LLC. All other company and product names may be trademarks of the respective companies with which they are associated.
![contacts sheet new photo column] The contacts sheet displaying the highlighted column heading](https://cdn.qwiklabs.com/0ceXm78ZS5RtG8SDayzTPVC0EbBWrmAUP4Xml29HD88%3D)

