arrow_back

Flutter Qwik Start

Sign in Join
Test and share your knowledge with our community!
done
Get access to over 700 hands-on labs, skill badges, and courses

Flutter Qwik Start

Lab 1 hour universal_currency_alt 1 Credit show_chart Introductory
info This lab may incorporate AI tools to support your learning.
Test and share your knowledge with our community!
done
Get access to over 700 hands-on labs, skill badges, and courses

GSP1009

Google Cloud self-paced labs logo

Overview

Flutter is Google's UI toolkit for building beautiful, natively compiled applications for mobile, web, and desktop from a single codebase.

Flutter works with existing code, is used by developers and organizations around the world, and is free and open source.

In this lab, you will create a Flutter app using generated template code.

The basic Flutter interface provides a simple example to get started programming in Flutter.
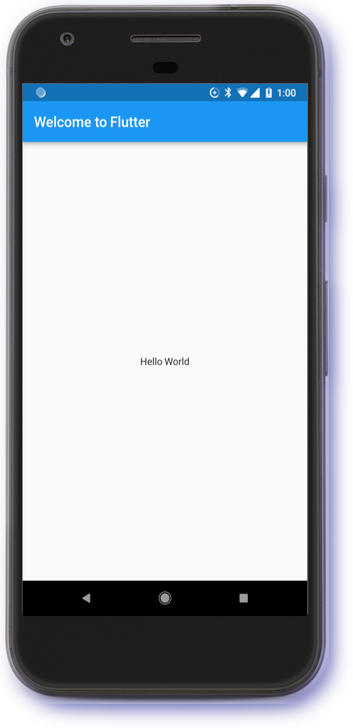
The Welcome to Flutter page displayed on a mobile phone screen

What you'll learn

In this lab, you will learn about the following:

  • How to write a Flutter app that looks natural on iOS, Android, and the web
  • Basic structure of a Flutter app
  • Finding and using packages to extend functionality
  • Using hot reload for a quicker development cycle

Prerequisites

Based on the content, it is recommended to have some familiarity with:

  • Flutter
  • Dart

Setup

Before you click the Start Lab button

Read these instructions. Labs are timed and you cannot pause them. The timer, which starts when you click Start Lab, shows how long Google Cloud resources will be made available to you.

This hands-on lab lets you do the lab activities yourself in a real cloud environment, not in a simulation or demo environment. It does so by giving you new, temporary credentials that you use to sign in and access Google Cloud for the duration of the lab.

To complete this lab, you need:

  • Access to a standard internet browser (Chrome browser recommended).
Note: Use an Incognito or private browser window to run this lab. This prevents any conflicts between your personal account and the Student account, which may cause extra charges incurred to your personal account.
  • Time to complete the lab---remember, once you start, you cannot pause a lab.
Note: If you already have your own personal Google Cloud account or project, do not use it for this lab to avoid extra charges to your account.

How to start your lab and sign in to the Google Cloud console

  1. Click the Start Lab button. If you need to pay for the lab, a pop-up opens for you to select your payment method. On the left is the Lab Details panel with the following:

    • The Open Google Cloud console button
    • Time remaining
    • The temporary credentials that you must use for this lab
    • Other information, if needed, to step through this lab
  2. Click Open Google Cloud console (or right-click and select Open Link in Incognito Window if you are running the Chrome browser).

    The lab spins up resources, and then opens another tab that shows the Sign in page.

    Tip: Arrange the tabs in separate windows, side-by-side.

    Note: If you see the Choose an account dialog, click Use Another Account.
  3. If necessary, copy the Username below and paste it into the Sign in dialog.

    {{{user_0.username | "Username"}}}

    You can also find the Username in the Lab Details panel.

  4. Click Next.

  5. Copy the Password below and paste it into the Welcome dialog.

    {{{user_0.password | "Password"}}}

    You can also find the Password in the Lab Details panel.

  6. Click Next.

    Important: You must use the credentials the lab provides you. Do not use your Google Cloud account credentials. Note: Using your own Google Cloud account for this lab may incur extra charges.
  7. Click through the subsequent pages:

    • Accept the terms and conditions.
    • Do not add recovery options or two-factor authentication (because this is a temporary account).
    • Do not sign up for free trials.

After a few moments, the Google Cloud console opens in this tab.

Note: To view a menu with a list of Google Cloud products and services, click the Navigation menu at the top-left. Navigation menu icon

Activate Cloud Shell

Cloud Shell is a virtual machine that is loaded with development tools. It offers a persistent 5GB home directory and runs on the Google Cloud. Cloud Shell provides command-line access to your Google Cloud resources.

  1. Click Activate Cloud Shell Activate Cloud Shell icon at the top of the Google Cloud console.

When you are connected, you are already authenticated, and the project is set to your Project_ID, . The output contains a line that declares the Project_ID for this session:

Your Cloud Platform project in this session is set to {{{project_0.project_id | "PROJECT_ID"}}}

gcloud is the command-line tool for Google Cloud. It comes pre-installed on Cloud Shell and supports tab-completion.

  1. (Optional) You can list the active account name with this command:
gcloud auth list
  1. Click Authorize.

Output:

ACTIVE: * ACCOUNT: {{{user_0.username | "ACCOUNT"}}} To set the active account, run: $ gcloud config set account `ACCOUNT`
  1. (Optional) You can list the project ID with this command:
gcloud config list project

Output:

[core] project = {{{project_0.project_id | "PROJECT_ID"}}} Note: For full documentation of gcloud, in Google Cloud, refer to the gcloud CLI overview guide.

Task 1. Open the Code Server editor

In this lab, we will use a custom editor that includes the Flutter and Dart extensions.

From the initial lab panel:
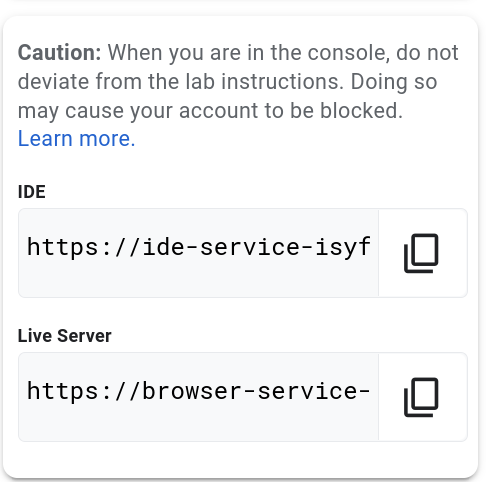
The Lab Details pane displaying the populated IDE and Live Server text fields
  1. Copy the Flutter IDE address displayed.
  2. Paste the IDE address into a Browser tab.

Task 2. Create a Flutter template

In this section create a Flutter Web application called first_app.

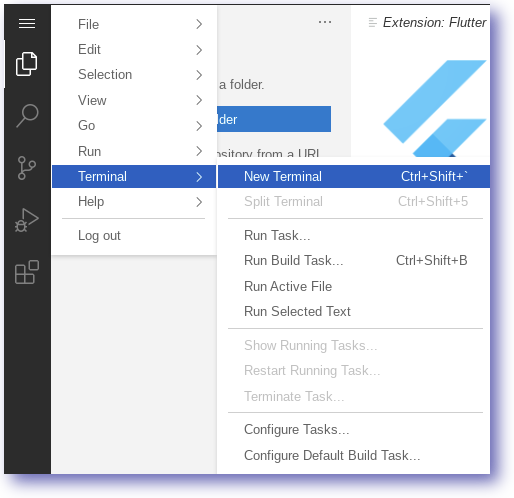
  1. Click the hamburger button (i.e. left hand side, three horizontal lines The Navigation menu icon).
  2. Open a Terminal within the browser by selecting New Terminal.
The navigation path to 'New Terminal' highlighted
  1. In the terminal enter the following command:
flutter create first_app
  1. Move to the first_app directory:
cd first_app
  1. Close the terminal window
exit

The first_app directory and template code have now been created.

Task 3. Exploring the Flutter code

In this section edit the Flutter Web application.

Use the editor to open the first_app directory created in the previous step.

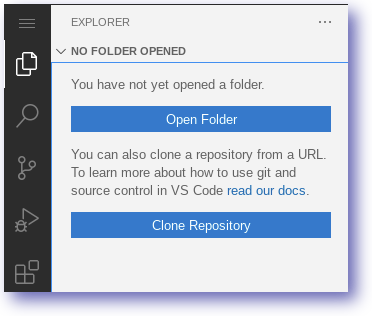
  1. From the main panel select the Explorer Icon.
The Explorer icon highlighted and the expanded Explore menu displayed
  1. Select the Open Folder option

  2. Open the first_app folder i.e.

/home/ide-dev/first_app
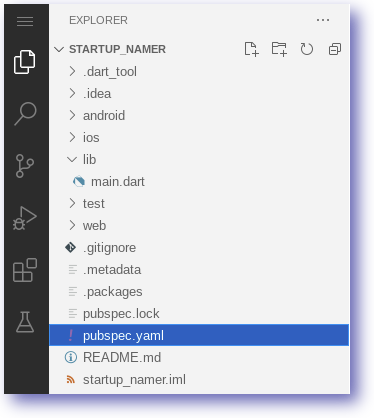
  1. The editor view will change to the Folder view.
The folder view with the `pubspec.yaml`option highlighted
  1. Explore the template code, especially the lib/main.dart and pubspec.yaml files.

Task 4. Running the Flutter web application

In this section run the Flutter Web application from the command line.

  1. In the editor, open a Terminal
  2. Ensure the directory is set to first_app:
fwr

The running web server should look similar to below:

The running web server details
  1. Copy the Flutter Live Server address from the lab Panel
  2. Paste the address into a new browser tab
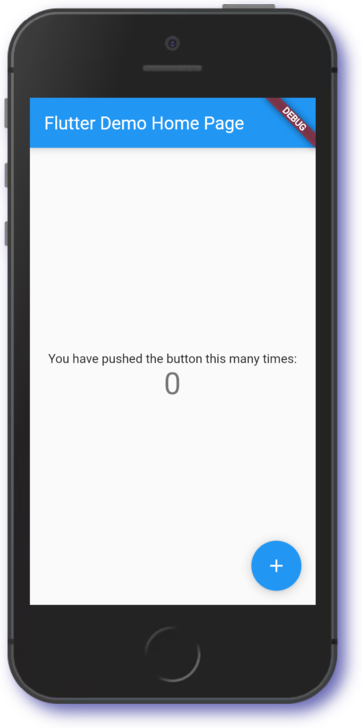
  3. The browser will render the web application e.g.
The Flutter Demo Home Page title displayed on a mobile phone Note:
Rendering of the web application can take up to ten seconds. The view will show the application based on the code in the editor.

Feel free to interact with the running application.

Task 5. Flutter Hot reload

Flutter supports Hot reload which means changes can be made to the application dynamically.

In this section we use the Hot reload function to change the Title.

  1. In the editor, amend the file lib/main.dart
  2. Look for class MyApp and find the Title field Flutter Demo Home Page
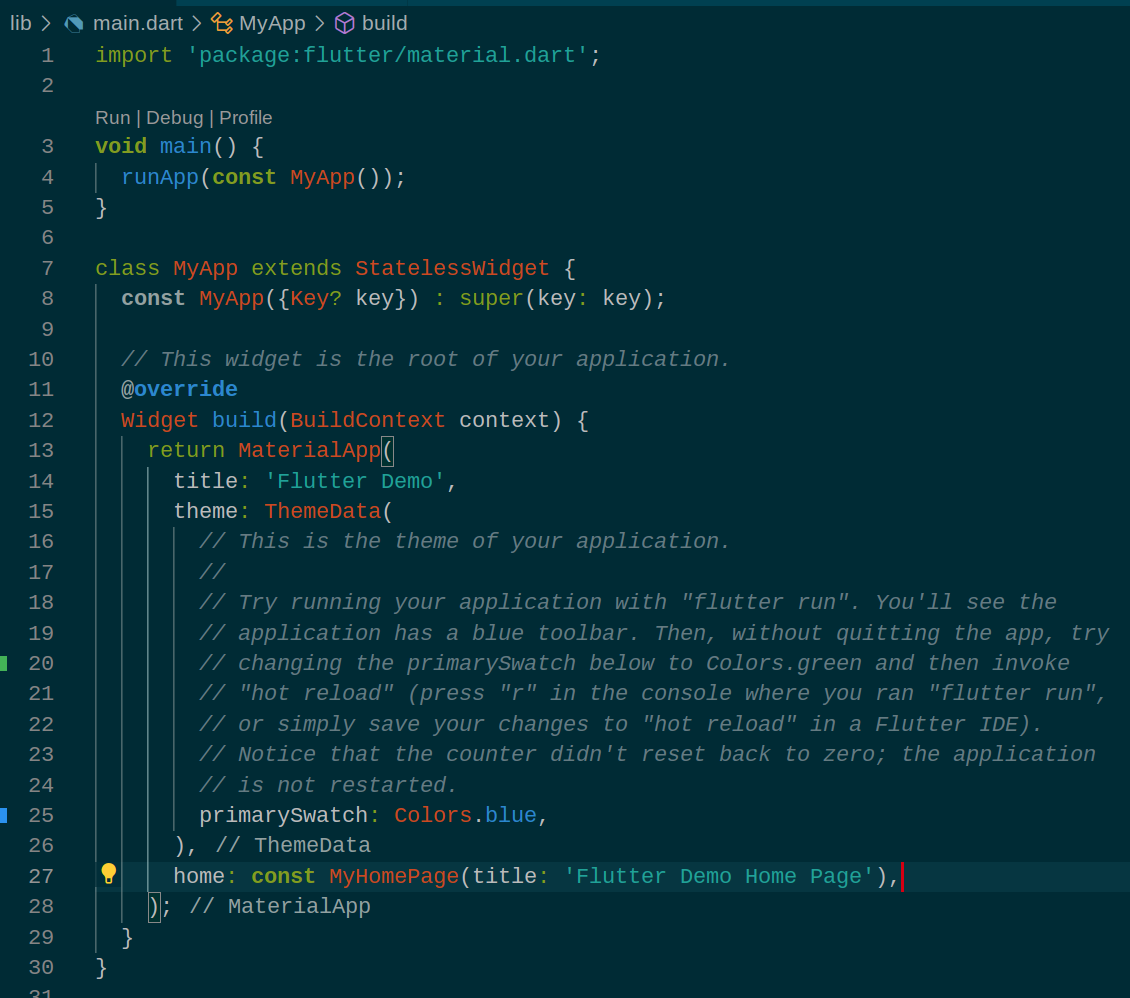
The following line of code highlighted on the build page: home: const MyHomePage(title: 'Flutter Demo Home Page
  1. Amend the HomePage title value on line 27 to the following
Flutter is awesome Note:
Flutter templates may change with each revision, so your code may look slightly different. If the line is not the same, use the editor find command to look for the MyHomePage widget value.
  1. Save the editor changes made i.e. CTRL+S

  2. The lib/main.dart code should now look similar to below:
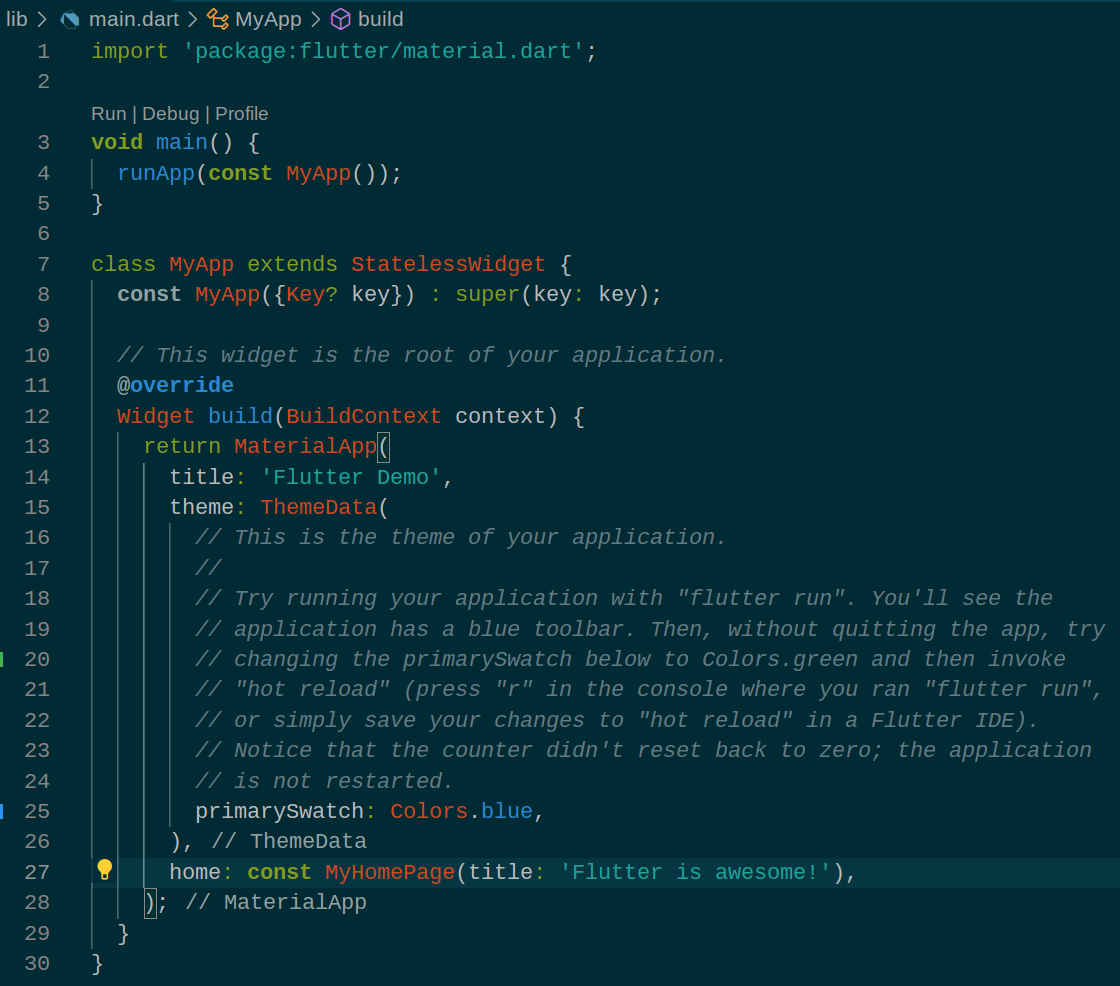
The following line of code highlighted on the build page: home: const MyHomePage(title: 'Flutter is awesome!'
  1. Click in the open Terminal window, and press ‘r'
The terminal window displaying the message: To hot restart changes while running, press "r" or "R"
  1. Switch to the Flutter Device browser tab
  2. Press CTRL+R to reload the page
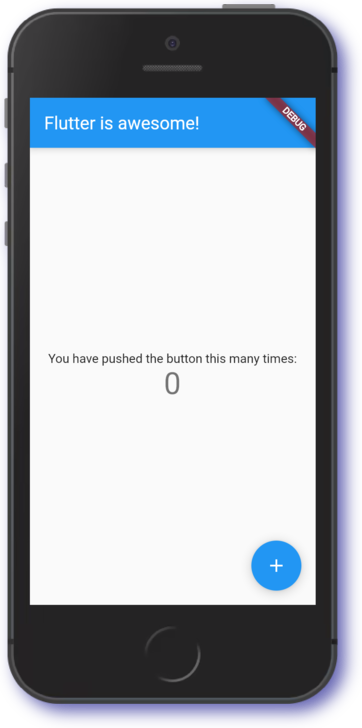
The Flutter is awesome! title displayed on a mobile phone screen

Awesome work getting started with Flutter.

In the next section learn how to add CSS styling to the application using a Webpack loader.

Click Check my progress to verify the objective.

Assess my progress

Congratulations!

You have successfully completed the lab and demonstrated your knowledge of Flutter. Over the course of this lab, you have performed the following tasks:

  • Installed the Flutter + Dart extensions
  • Developed a simple Flutter web application
  • Learned to use hot reload feature
  • Tested code updates in the web device

Manual Last Updated Nov 7, 2024

Lab Last Tested Nov 7, 2024

Copyright 2025 Google LLC All rights reserved. Google and the Google logo are trademarks of Google LLC. All other company and product names may be trademarks of the respective companies with which they are associated.

This content is not currently available

We will notify you via email when it becomes available

Great!

We will contact you via email if it becomes available