

Before you begin
- Labs create a Google Cloud project and resources for a fixed time
- Labs have a time limit and no pause feature. If you end the lab, you'll have to restart from the beginning.
- On the top left of your screen, click Start lab to begin
Create a Cloud Storage bucket and upload an object
/ 30
Create a Load Balancer
/ 30
Delete the object from Cloud Storage bucket
/ 20
Create Edge Security Policy for your CDN Cache and Validate Policy
/ 20
Google Cloud Armor edge security policies allow you to restrict access to cached objects on Cloud CDN (Content Delivery Network) and Cloud Storage. Edge security policies are deployed and enforced at the outermost perimeter of Google's network, upstream of where the Cloud CDN cache resides. Reasons to do this include ensuring that your users do not access objects in storage buckets from restricted geographies, or ensuring that your media distribution is filtering on the geographies that you have a license to do so.
In this lab you create a Google Cloud Storage bucket, upload an image to it, bind it to a load balancer, and then enable Cloud CDN and Cloud Armor edge security policies on it.
In this lab, you learn how to:
Read these instructions. Labs are timed and you cannot pause them. The timer, which starts when you click Start Lab, shows how long Google Cloud resources are made available to you.
This hands-on lab lets you do the lab activities in a real cloud environment, not in a simulation or demo environment. It does so by giving you new, temporary credentials you use to sign in and access Google Cloud for the duration of the lab.
To complete this lab, you need:
Click the Start Lab button. If you need to pay for the lab, a dialog opens for you to select your payment method. On the left is the Lab Details pane with the following:
Click Open Google Cloud console (or right-click and select Open Link in Incognito Window if you are running the Chrome browser).
The lab spins up resources, and then opens another tab that shows the Sign in page.
Tip: Arrange the tabs in separate windows, side-by-side.
If necessary, copy the Username below and paste it into the Sign in dialog.
You can also find the Username in the Lab Details pane.
Click Next.
Copy the Password below and paste it into the Welcome dialog.
You can also find the Password in the Lab Details pane.
Click Next.
Click through the subsequent pages:
After a few moments, the Google Cloud console opens in this tab.

The Cloud Storage bucket will be the origin source for Cloud CDN.
In the console, go to Navigation menu (
To create a new Cloud Storage bucket, click CREATE.
Set the bucket name as
Click Continue.
For Location type, select Region, and choose
Click Continue.
The default storage class for your bucket is Standard. Click Continue.
Uncheck Enforce public access prevention on this bucket checkbox under Prevent public access.
Choose Fine-grained under Access Control.
Click Continue.
Click Create.
That's it — you've just created a Cloud Storage bucket!
Now upload an object into the bucket, which you will use later. By default, Cloud Storage buckets are private. As part of this lab, you will make the object available to the Internet.
gsutil cp command to upload the image from the Cloud Shell to the bucket you created:Locate the object you have uploaded to the bucket by navigating to Cloud Storage > Buckets >
Now, click on the three dots on the right side of the object you uploaded and click Edit access.
Click on Add Entry and set the entity as Public from the drop-down list.
Click Save.
Click Check my progress to verify the objective.
Cloud CDN and Cloud Armor are components that can be tied to Google's global Cloud Load Balancing. In this section, you create an HTTP Load balancer.
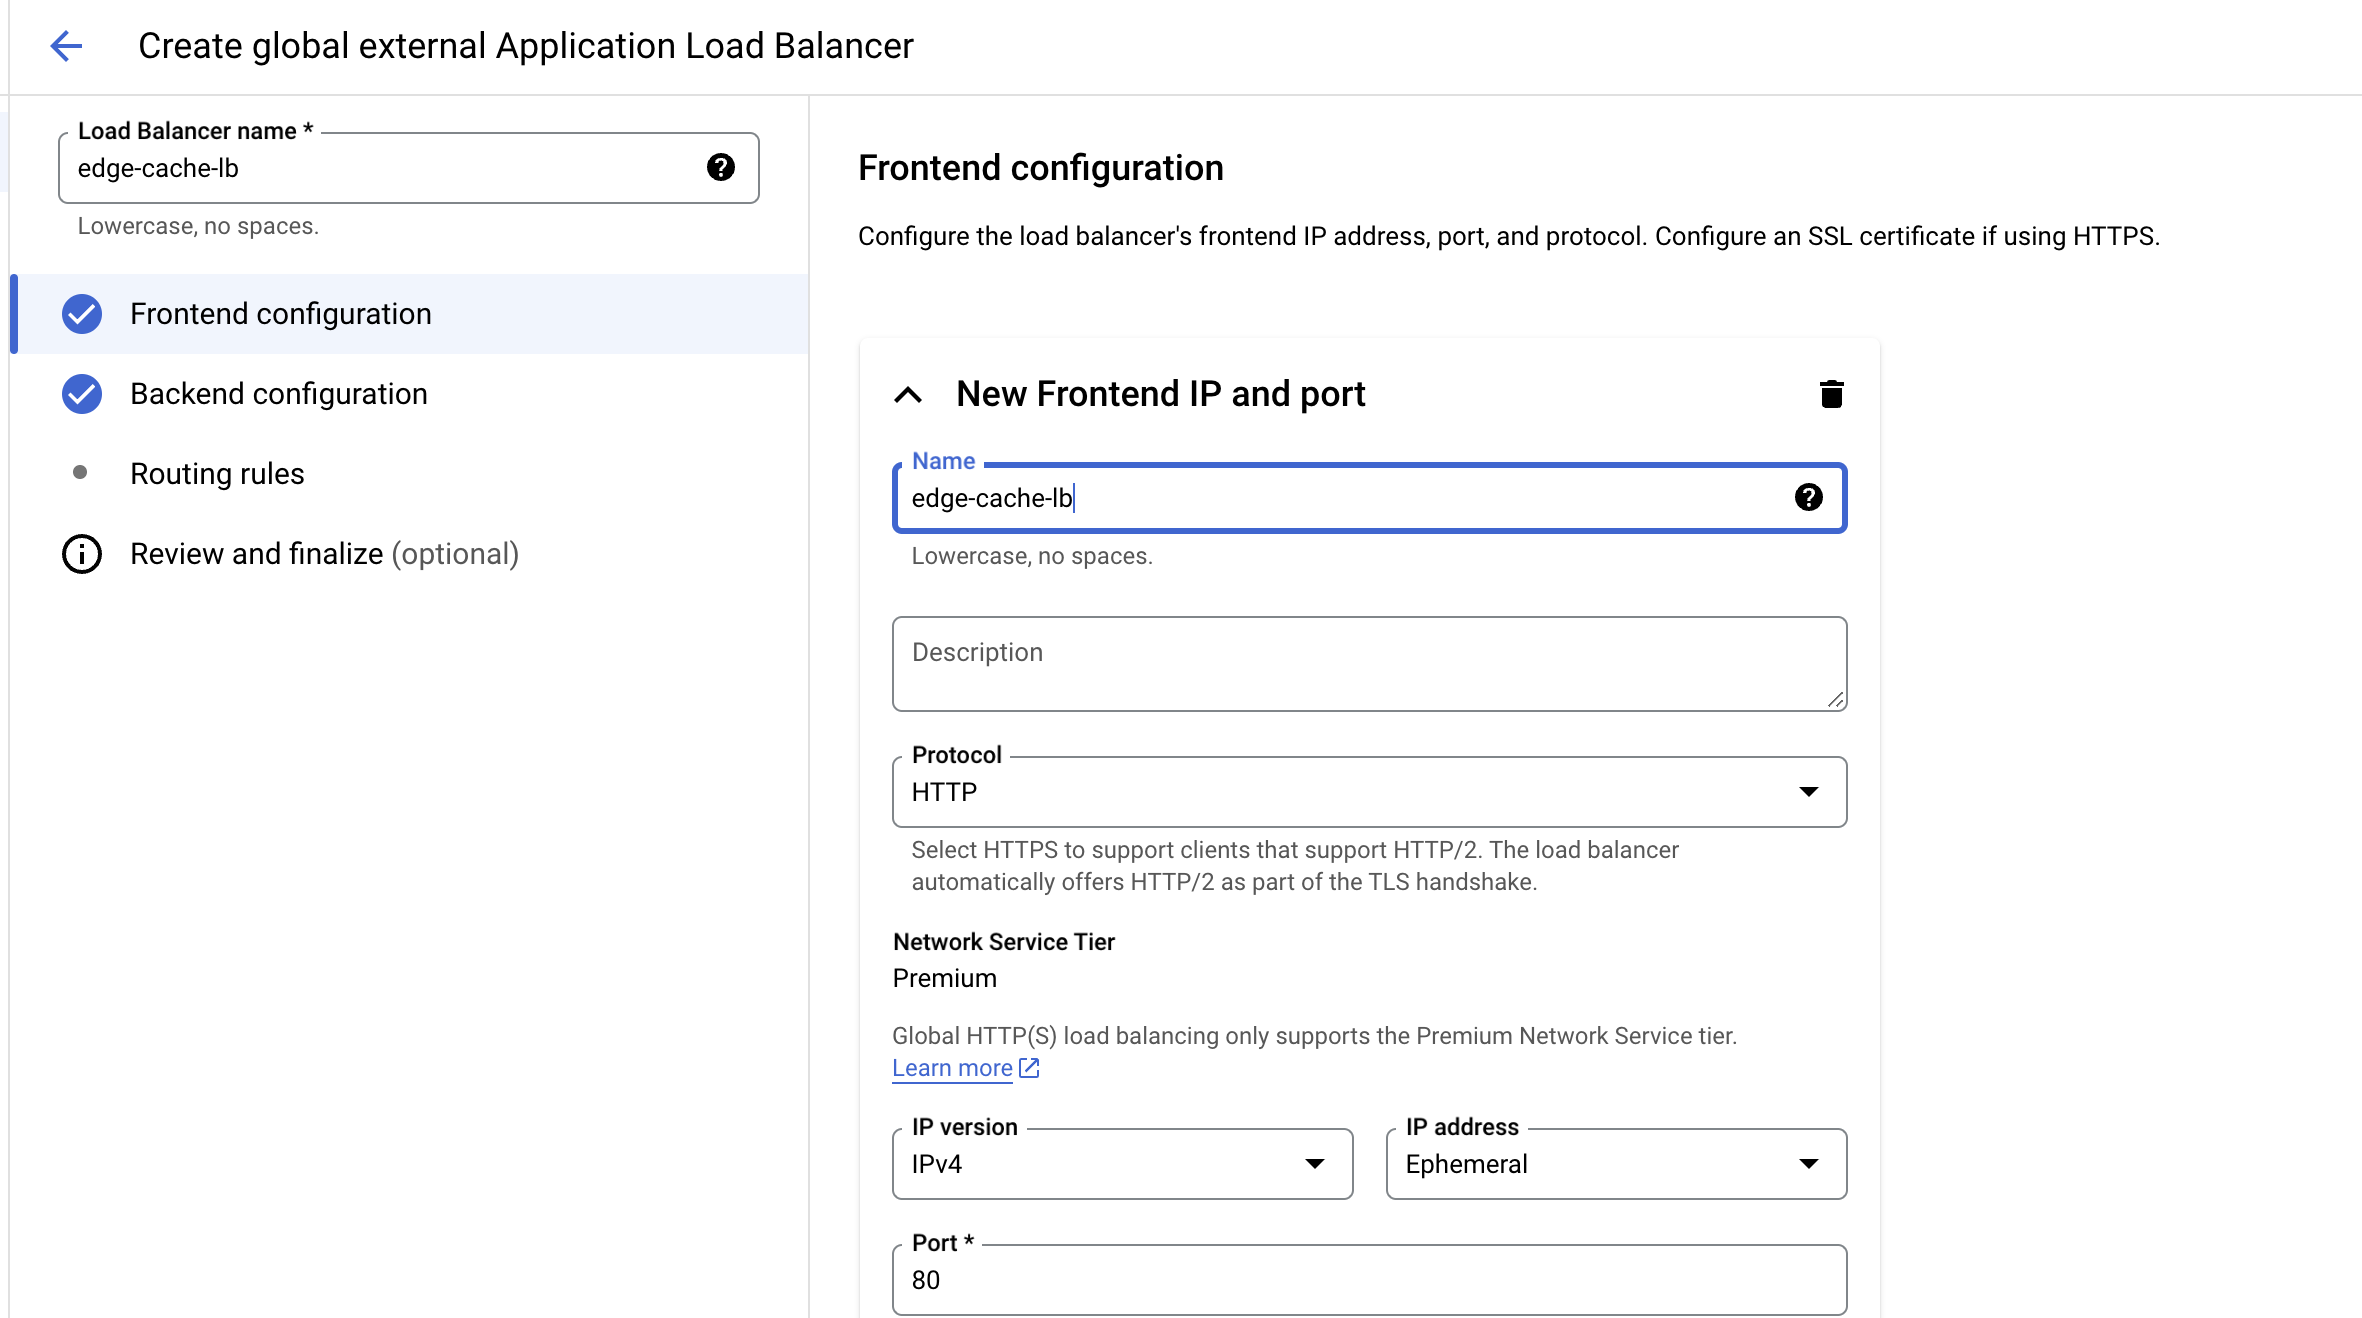
), click View All Products > Network services > Load Balancing.edge-cache-lb.To create the frontend configuration:
Click on Frontend configuration.
For the frontend configuration use HTTP (though HTTPS also works if you have a certificate) and an ephemeral IP address and ensure that you have selected the premium tier network. This is by default.
Click Done.
To create the backend configuration:
Click on Backend configuration.
For Backend services & backend buckets, click Create a backend bucket.
Set the Backend bucket name to lb-backend-bucket.
In the next field, select the Cloud Storage bucket created earlier by clicking the Browse button.
Leave all other values at their defaults.
Click Create.
To create host and path rules:
Click on Routing rules on the left.
Select simple host and path rule under Mode to send any request to the bucket. This is the default option.
To review and create the HTTP Load Balancer:
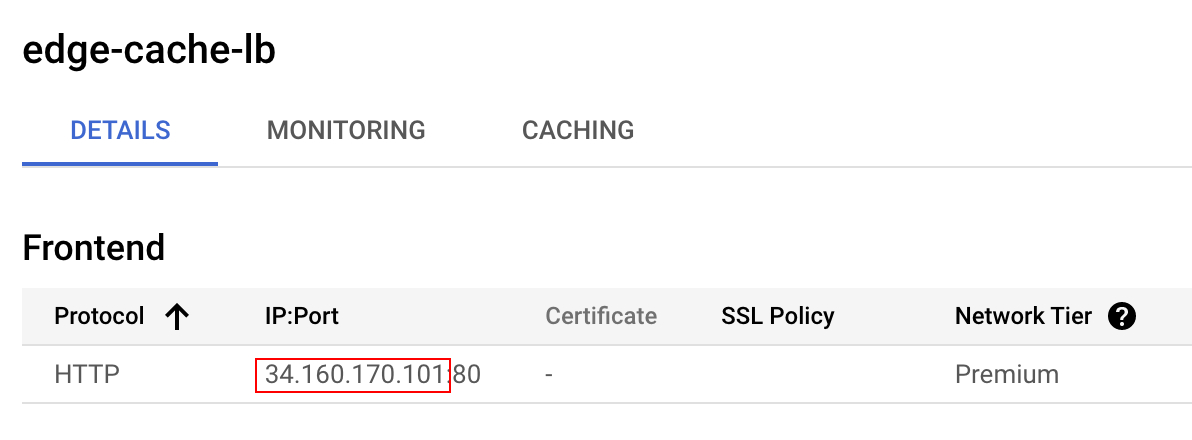
To get the Load Balancer IP from the console:
[LOAD_BALANCER_IP].After a couple minutes, query the load balancer for the object you uploaded. You will need the load balancer IP address and the name of the image.
Output:
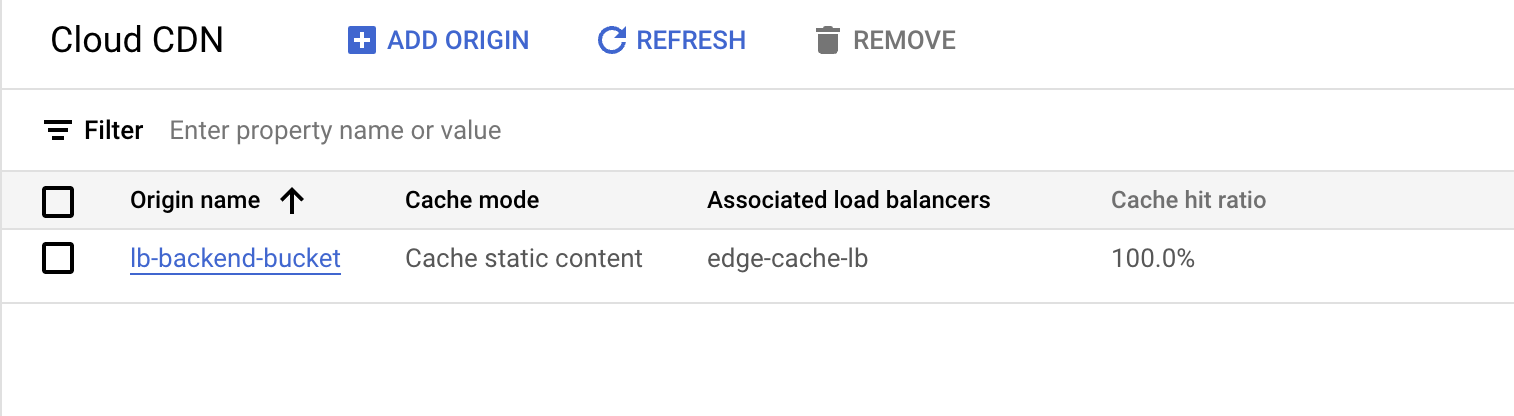
You should be able to get close to a 100% hit ratio.
Click Check my progress to verify the objective.
Now that the cache is populated, delete the object from the bucket. This will reinfore that you are applying the policy to the cache and not the backend.
In the Navigation menu (
Select the object and delete it by clicking the Delete button at the top.
Click Delete at the prompt.
Click Check my progress to verify the objective.
Cloud Armor policies are substantiated outside of the HTTP Load Balancer. Once the Cloud Armor policy is deployed, you can then associate it with one or more HTTP Load Balancer Backend Service or Bucket resources, referred to as a Target.
), click View All Products > Network Security > Cloud Armor policies and click Create Policy.| Property | Value (type value or select option as specified) |
|---|---|
| Name | edge-security-policy |
| Policy type | Edge security policy |
| Default rule action | Deny |
| Property | Value |
|---|---|
| Type 1 | Backend bucket (external application load balancer) |
| Backend Bucket target 1 | lb-backend-bucket |
Click Done.
Click Create Policy.
Now that you've created an edge security policy in front of the back-end bucket, validate that it works as expected.
After a few minutes have passed, you can check that the Cloud Armor policy is running.
From the command line, run the following command, which gives you a 403:
A 403 error occurs when you do not have permission to accessing a web page or something on a web server.
Output:
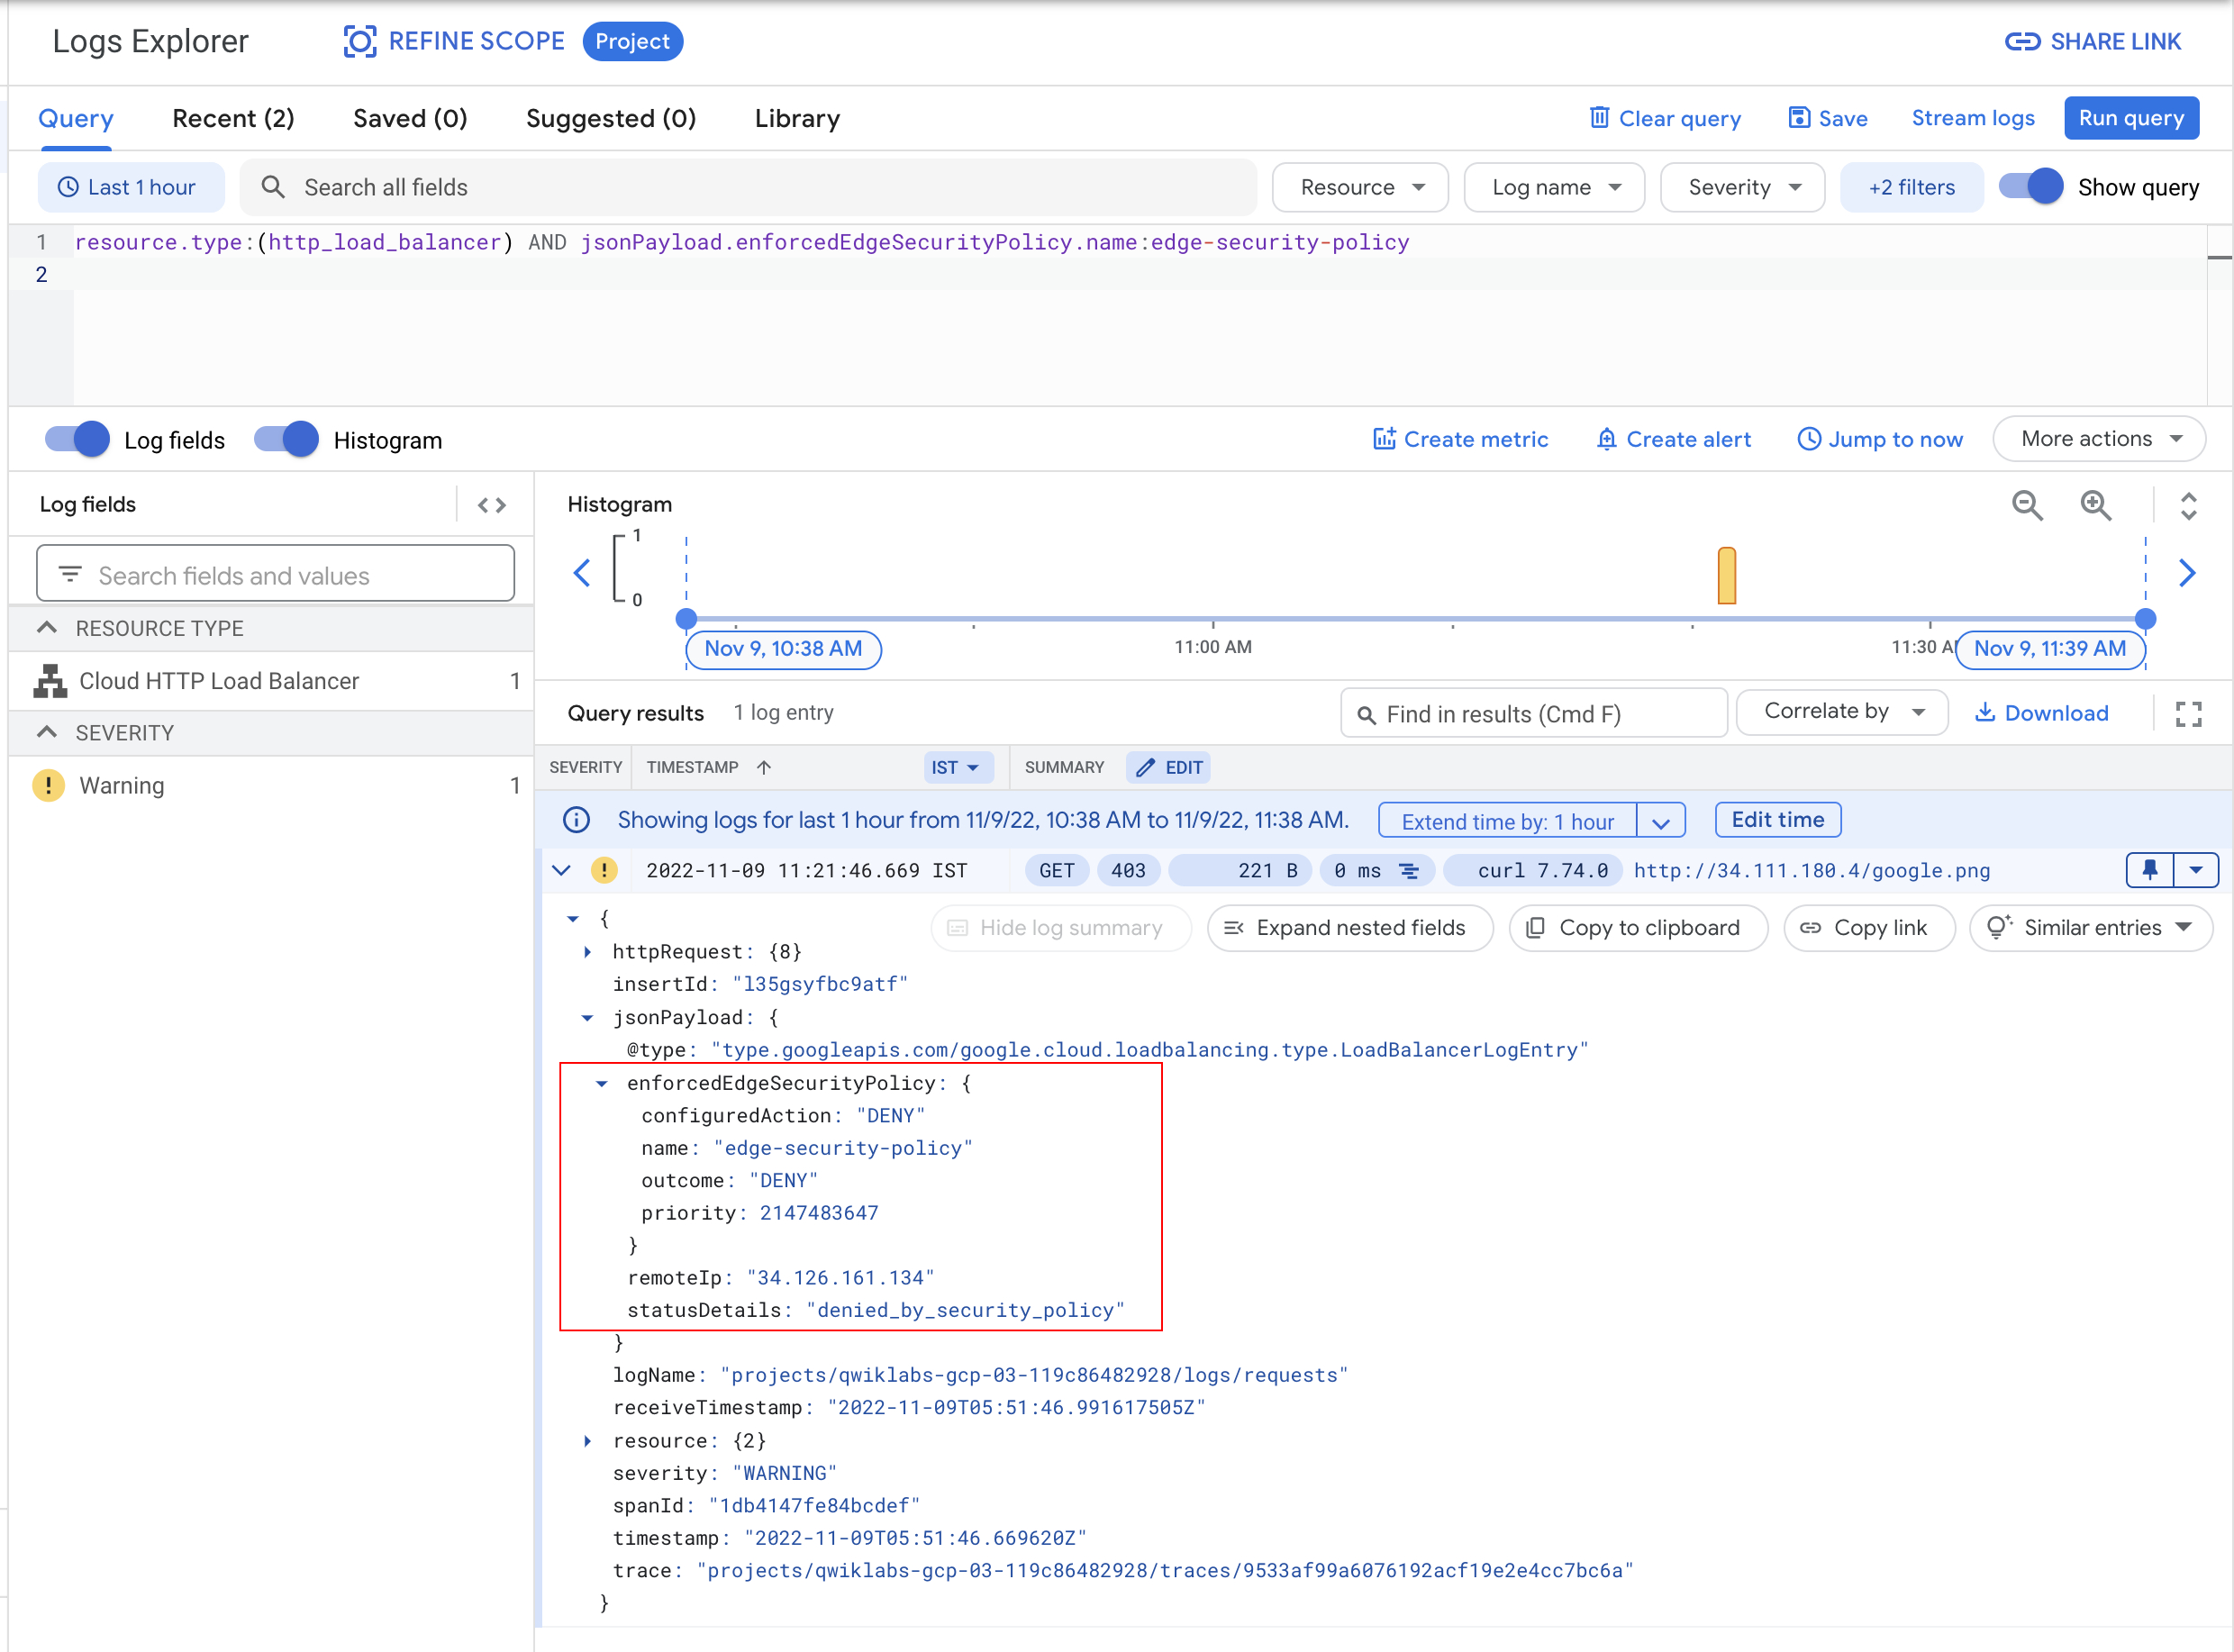
Next, you check the logs to see the enforced edge security policy.
In the Navigation menu (
Enter the below snippet into the query box and click Run Query:
403 response and the enforced security policy.Click Check my progress to verify the objective.
To prove that the object is getting delivered from the CDN cache, remove the Cloud Armor security policy and query the object. The origin object has been removed from Cloud Storage, thus illustrating that the object is getting served from the edge cache.
), click View All Products > Network Security > Cloud Armor policies > edge-security-policy > Targets.lb-backend-bucket target and click Remove to remove the target bucket. Confirm Remove.curl to the resource in the Cloud Storage bucket:You get a 200 response this time. The web page is acting as it is supposed to.
Output:
Try it a couple of times and see if you get a 403 status code.
You have successfully created a Cloud Storage bucket, uploaded an image to it, bound it to a load balancer, and then enabled Cloud CDN and edge security policies on it.
Manual Last Updated December 10, 2024
Lab Last Tested December 10, 2024
Copyright 2025 Google LLC All rights reserved. Google and the Google logo are trademarks of Google LLC. All other company and product names may be trademarks of the respective companies with which they are associated.


此内容目前不可用
一旦可用,我们会通过电子邮件告知您

太好了!
一旦可用,我们会通过电子邮件告知您

One lab at a time
Confirm to end all existing labs and start this one