Checkpoints
Build a Docker image
/ 50
Deploy the application to Cloud Run
/ 50
Build a Chat Application using the PaLM 2 API on Cloud Run
GSP1201

Overview
This lab demonstrates how to create and deploy an AI-powered chat application using Cloud Run on Google Cloud. The chat application is powered by the PaLM 2 Chat Bison Large Language Model's (LLM) (text-chat) APIs.
You will leverage the APIs in a web application and deploy it to Cloud Run, using Cloud Build and Artifact Repository to store the container image of the application build. The application can be used as a starting point for web interfaces using the PaLM2 APIs.
What you will learn:
In this lab, you will create a web application that runs on Cloud Run which utilizes APIs provided by the PaLM 2 for text (Chat Bison) Large Language Model (LLM) and surfaces them through a simple web interface deployed in the lab.
After this lab you will gain an understanding of how to build a web application which can utilize Large Language Models like the Chat Bison model to create engaging, conversation based interactions with end users who can asks questions and receive insightful responses through the chat application.
To complete the lab you will:
- Build a Docker image to run the application using Cloud Build
- Deploy a Cloud Run service that executes the application
- Review python code to understand how the application utilizes the
Chat Bisonmodel
Let's begin!
Setup and requirements
Before you click the Start Lab button
Read these instructions. Labs are timed and you cannot pause them. The timer, which starts when you click Start Lab, shows how long Google Cloud resources will be made available to you.
This hands-on lab lets you do the lab activities yourself in a real cloud environment, not in a simulation or demo environment. It does so by giving you new, temporary credentials that you use to sign in and access Google Cloud for the duration of the lab.
To complete this lab, you need:
- Access to a standard internet browser (Chrome browser recommended).
- Time to complete the lab---remember, once you start, you cannot pause a lab.
How to start your lab and sign in to the Google Cloud console
-
Click the Start Lab button. If you need to pay for the lab, a pop-up opens for you to select your payment method. On the left is the Lab Details panel with the following:
- The Open Google Cloud console button
- Time remaining
- The temporary credentials that you must use for this lab
- Other information, if needed, to step through this lab
-
Click Open Google Cloud console (or right-click and select Open Link in Incognito Window if you are running the Chrome browser).
The lab spins up resources, and then opens another tab that shows the Sign in page.
Tip: Arrange the tabs in separate windows, side-by-side.
Note: If you see the Choose an account dialog, click Use Another Account. -
If necessary, copy the Username below and paste it into the Sign in dialog.
{{{user_0.username | "Username"}}} You can also find the Username in the Lab Details panel.
-
Click Next.
-
Copy the Password below and paste it into the Welcome dialog.
{{{user_0.password | "Password"}}} You can also find the Password in the Lab Details panel.
-
Click Next.
Important: You must use the credentials the lab provides you. Do not use your Google Cloud account credentials. Note: Using your own Google Cloud account for this lab may incur extra charges. -
Click through the subsequent pages:
- Accept the terms and conditions.
- Do not add recovery options or two-factor authentication (because this is a temporary account).
- Do not sign up for free trials.
After a few moments, the Google Cloud console opens in this tab.

Task 1. Environment Setup
In order to deploy the Cloud Run application we will download the source from a Cloud Storage bucket.
- Open a new Cloud Shell terminal and execute the following command.
- Next, navigate to the folder of the project.
- Set the region and project environment variables referenced by subsequent commands.
Task 2. Build a Docker image
Next, you will build a Docker image for the application and push it to Artifact Registry. Once built and stored you will reference the container image to deploy the application to Cloud Run.
- Set environment variables required.
- Next, run the following command to create the Artifact Repository:
- Configure Docker authentication and submit the container image build job to Cloud Build.
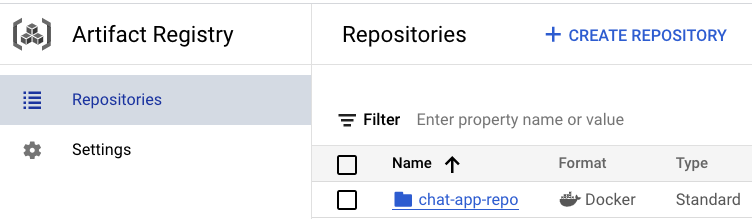
- To verify if the image is pushed to the Artifact Registry, go to the Artifact Registry page. Left Menu > Artifact Registry. Confirm the
chat-app-repois available.
Click Check my progress to verify the objective.
Task 3. Deploy the application to Cloud Run
Now that the application has been downloaded and built via Cloud Build, you will now deploy and test it on Cloud Run.
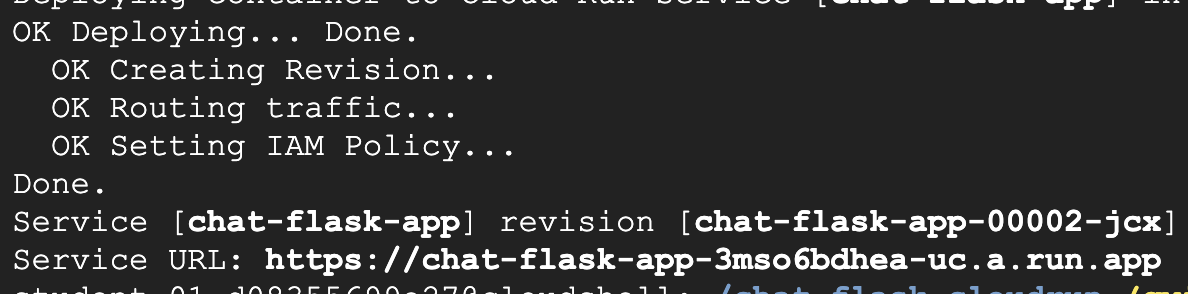
- In Cloud Shell, run the following command:
- To launch the application, click the service URL provided in the output of the last command:
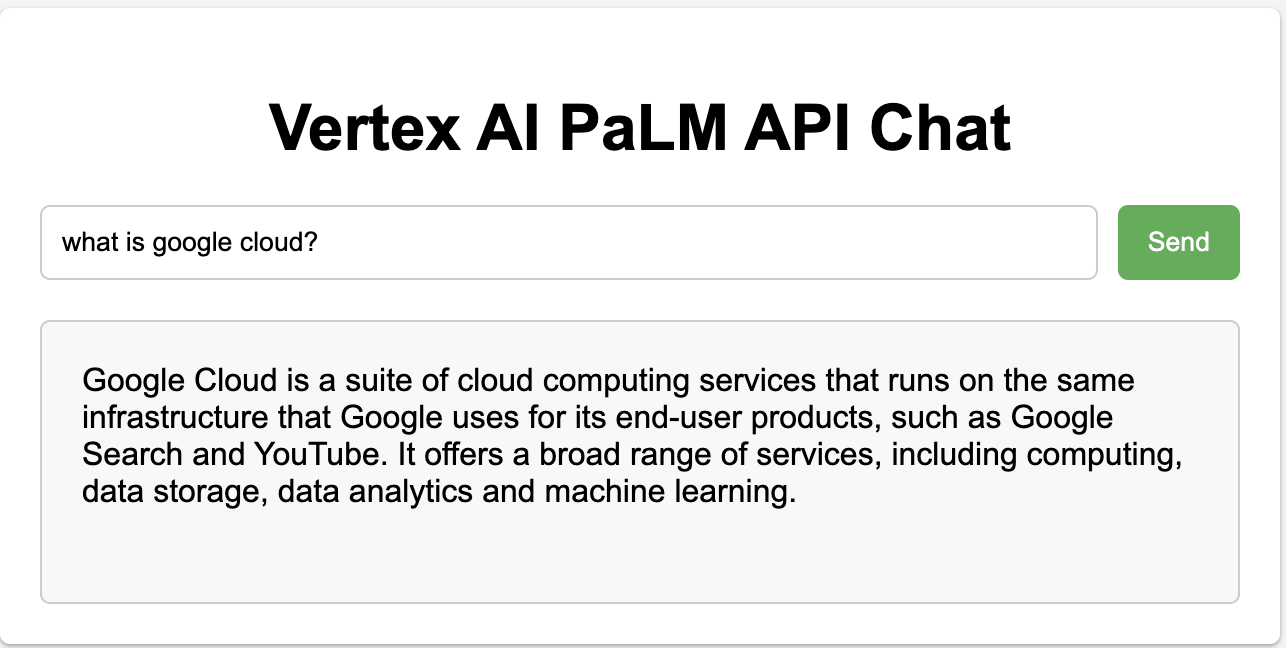
- Enter the following query into the input text box and click Send. You will receive a response generated by the PaLM 2 Chat Bison API in the output text box below the prompt input.
Click Check my progress to verify the objective.
Task 4. Explore the python code
To understand more about how the application utilizes the PaLM2 Chat Bison API, you will briefly explore the code used by the app.
-
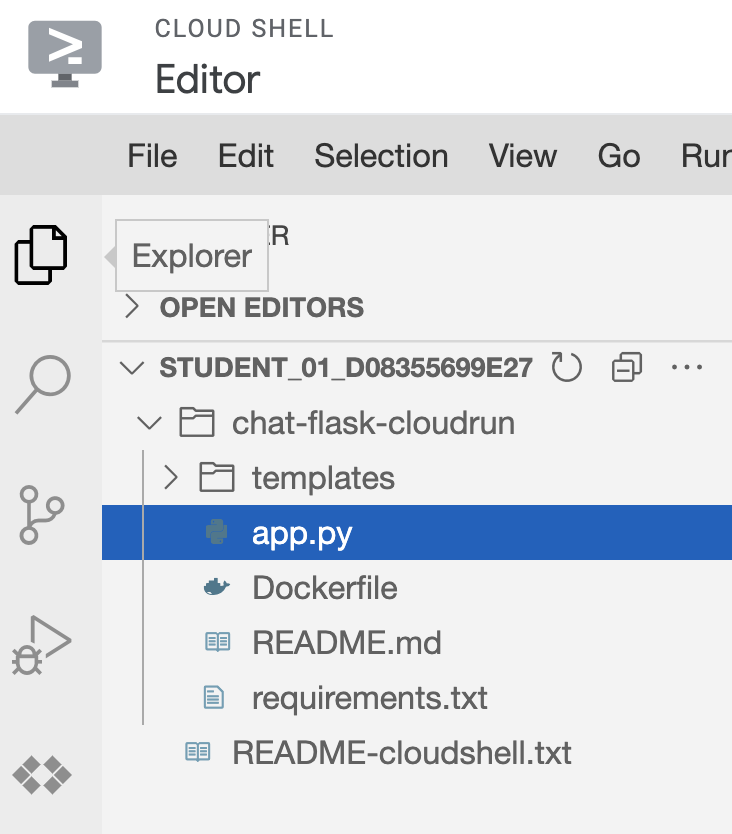
In Cloud Shell, click Open Editor which will provision a new Cloud Shell Editor for you to browse the code with.
-
Expand the folder
chat-flask-appand selectapp.pyto begin exploring the code.
- There are a few python methods in this file which are important to note.
-
create_session: this method creates a new session with Vertex AI using thechat-bison@001model. It is used by the route/palm2which you will observe further to establish a new chat session.
-
response: this method defines sensible defaults for parameters used to by the PaLM2 APIs such as thetemperature,max_output_tokens,top_pandtop_kparameters and submits the prompt to the chat bison model using the session created by thecreate_sessionmethod to retrieve a response.
-
indexandvertex_palm: theindexandvertex_palmmethods define routes for the application's API. Theindexmethod loads theindex.htmlpage when a user loads the application and thevertex_palmmethod submits the user's prompt collected from theindex.htmlpage to the API and returns the results in JSON format.
The index.html file includes inline JavaScript to read the results from the form submission when a user clicks Send and updates the UI with the response of the PaLM 2 API call.
Congratulations!
You have now completed the lab! In this lab, you learned how to build and deploy a simple web application using Cloud Build and Artifact Registry. The application is deployed to Cloud Run and utilizes the PaLM 2 Chat Bison model to respond to end user queries in order to create a chat based application that allows end users to ask questions and recieve responses in a web UI.
Next steps
- Check out the Generative AI on Vertex AI documentation.
- Learn more about Generative AI on the Google Cloud Tech YouTube channel.
Google Cloud training and certification
...helps you make the most of Google Cloud technologies. Our classes include technical skills and best practices to help you get up to speed quickly and continue your learning journey. We offer fundamental to advanced level training, with on-demand, live, and virtual options to suit your busy schedule. Certifications help you validate and prove your skill and expertise in Google Cloud technologies.
Manual Last Updated December 1st, 2023
Lab Last Tested December 1st, 2023
Copyright 2024 Google LLC All rights reserved. Google and the Google logo are trademarks of Google LLC. All other company and product names may be trademarks of the respective companies with which they are associated.

