Integrate Private Service Connect with Service Directory
- GSP1212
- Overview
- Setup and Requirements
- Task 1. Verify Producer project network configs
- Task 2. Configure and internal application load balancer in producer project
- Task 3. Publish service in Producer Network
- Task 4. Create a Private Service Connect Endpoint in consumer project
- Task 5. Test connectivity to service using service directory endpoint IP in consumer project
- Task 6. Configure Service Directory and Cloud DNS
- Task 7. Test connectivity to service using private dns and endpoint name in consumer project
- Congratulations
GSP1212

Overview
Private Service Connect
The need for security is important to every organization. Limiting exposure of systems to external networks is a recommended best practice.
Private Service Connect allows private consumption of services across VPC networks that belong to different groups, teams, projects, or organizations. You can publish and consume services using IP addresses that you define and that are internal to your VPC network.
Service Directory
Service Directory (SD) is a managed service that gives you a single place to publish, discover, and connect services. SD integrates with other services like Cloud DNS, Load balancers, Google Kubernetes Engine, Traffic Director and Private Services Connect to name a few.
What you'll build
In this lab, you're going to connect two projects with Private Service Connect to consume a web service in the producer project. This set-up represents a consumer and producer network.
Private Service Connect also automatically allows the option to create a Service Directory namespace for the service which can be used to manage the service endpoint.
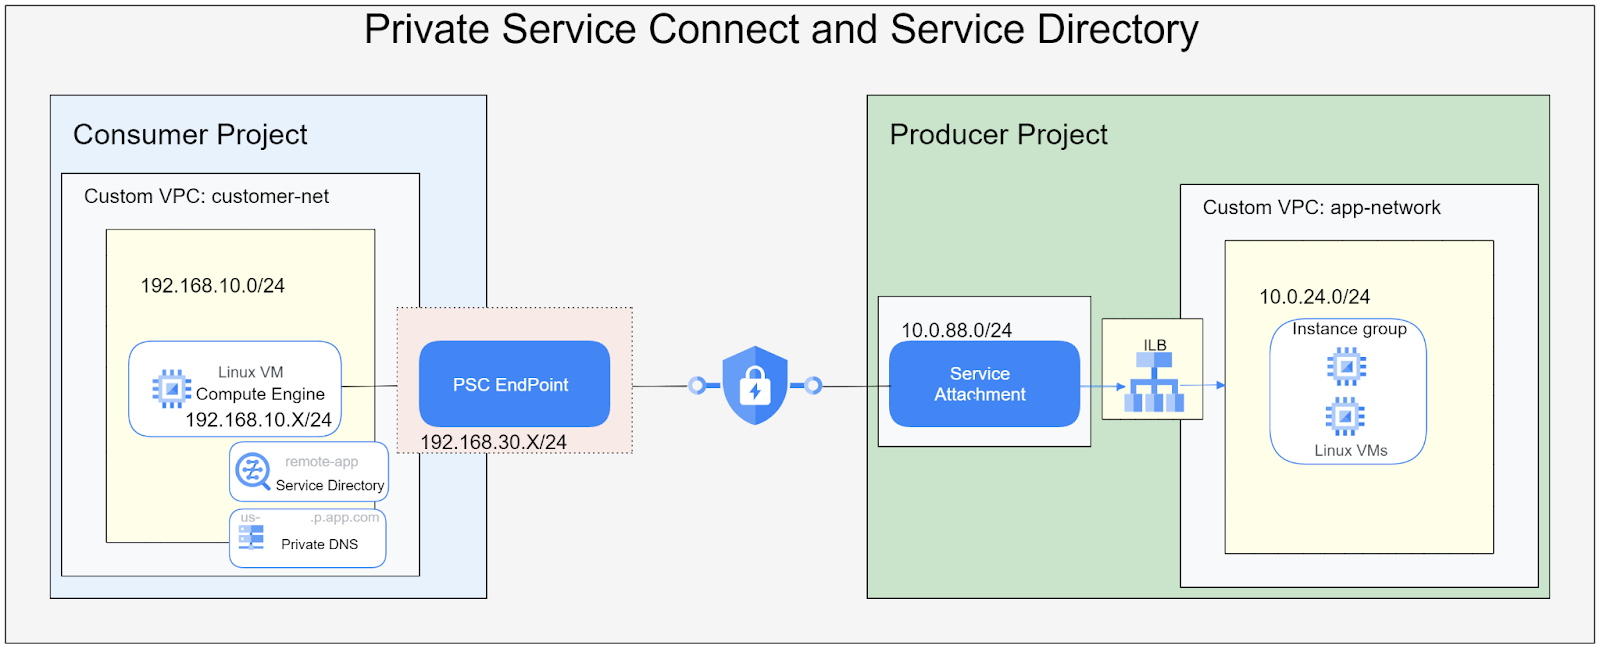
What you will configure:
- Create an Internal Application Load Balancer with static IPv4 address to expose the Managed Instance Group in the producer network
- Publish the service using a Private Service Connect service attachment with unrestricted access in the producer network
- Create a PSC endpoint and service directory namespace in the consumer project
- Connect to the web-app from a VM in the consumer project using the PSC endpoint
What you'll learn
- How create Internal Application Load Balancer
- Publish a service in Private Service Connect
- Create a Private Service Connect endpoint
- Create a service directory endpoint
- Create a private DNS zone for the service directory endpoint
- Verify service directory endpoint connectivity
Setup and Requirements
Before you click the Start Lab button
Read these instructions. Labs are timed and you cannot pause them. The timer, which starts when you click Start Lab, shows how long Google Cloud resources will be made available to you.
This hands-on lab lets you do the lab activities yourself in a real cloud environment, not in a simulation or demo environment. It does so by giving you new, temporary credentials that you use to sign in and access Google Cloud for the duration of the lab.
To complete this lab, you need:
- Access to a standard internet browser (Chrome browser recommended).
- Time to complete the lab---remember, once you start, you cannot pause a lab.
How to start your lab and sign in to the Google Cloud console
-
Click the Start Lab button. If you need to pay for the lab, a pop-up opens for you to select your payment method. On the left is the Lab Details panel with the following:
- The Open Google Cloud console button
- Time remaining
- The temporary credentials that you must use for this lab
- Other information, if needed, to step through this lab
-
Click Open Google Cloud console (or right-click and select Open Link in Incognito Window if you are running the Chrome browser).
The lab spins up resources, and then opens another tab that shows the Sign in page.
Tip: Arrange the tabs in separate windows, side-by-side.
Note: If you see the Choose an account dialog, click Use Another Account. -
If necessary, copy the Username below and paste it into the Sign in dialog.
{{{user_0.username | "Username"}}} You can also find the Username in the Lab Details panel.
-
Click Next.
-
Copy the Password below and paste it into the Welcome dialog.
{{{user_0.password | "Password"}}} You can also find the Password in the Lab Details panel.
-
Click Next.
Important: You must use the credentials the lab provides you. Do not use your Google Cloud account credentials. Note: Using your own Google Cloud account for this lab may incur extra charges. -
Click through the subsequent pages:
- Accept the terms and conditions.
- Do not add recovery options or two-factor authentication (because this is a temporary account).
- Do not sign up for free trials.
After a few moments, the Google Cloud console opens in this tab.

Activate Cloud Shell
Cloud Shell is a virtual machine that is loaded with development tools. It offers a persistent 5GB home directory and runs on the Google Cloud. Cloud Shell provides command-line access to your Google Cloud resources.
- Click Activate Cloud Shell
at the top of the Google Cloud console.
When you are connected, you are already authenticated, and the project is set to your Project_ID,
gcloud is the command-line tool for Google Cloud. It comes pre-installed on Cloud Shell and supports tab-completion.
- (Optional) You can list the active account name with this command:
- Click Authorize.
Output:
- (Optional) You can list the project ID with this command:
Output:
gcloud, in Google Cloud, refer to the gcloud CLI overview guide.
Task 1. Verify Producer project network configs
What your producer network looks like
The producer network is located in its own project
Currently the producer network contains a managed instance group with servers running an nginx website.
Switch to producer project
- At the left on the lab landing page look for the
project identifier. - At the top of your console on the right next to Google Cloud icon, click the dropdown and then select the all tab.
- From the listed project select the Producer project

Verify Setup
- Once the producer project is selected select the search option and type in VM Instances and select the VM Instances compute engine option which takes you to the landing page.

- In the VM instance view, you should see 1 VM, with a name starting with app-servers-XXXX.
- Select the name of the instance and select the SSH option to open a SSH session to the VM.
- In the SSH session window use the following command.
Expected Output
- From the Compute Engine menu select Instance groups
- In the Instance group view click on the appserver-igm instance name. You should see green check marks indicating the instance status and instance health is ok.
- Next in the search options type in VPC network and select the VPC network option.
- In the VPC network area you should see a VPC network named app-network with 1 subnet 10.0.24.0/24
Task 2. Configure and internal application load balancer in producer project
Set up a proxy only network for Internal Application Load Balancer
- Under networking options choose VPC networks
- On the VPC network page select the app-network
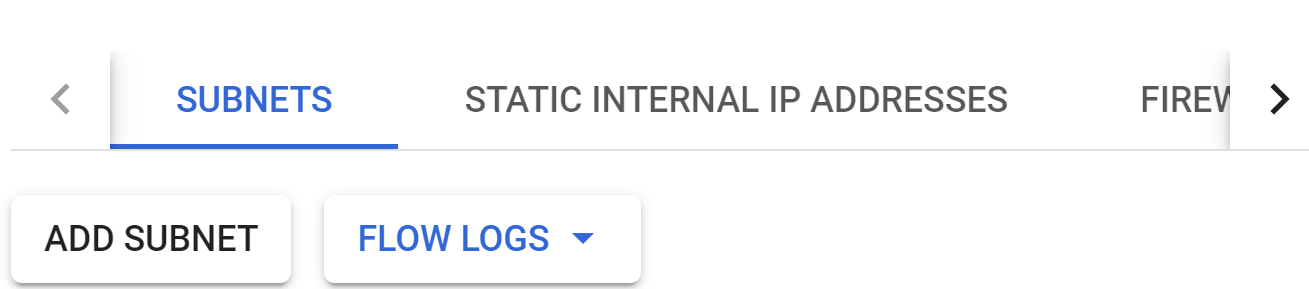
- On the app-network page visit the subnet tab and select add subnet
- In the add subnet window apply the following settings:
- Set the name field to
- Set the region field to
- Set the purpose field to
- Set the ipv4 field to
- Click the ADD button

- When the operation is completed, move to next step
Create an internal application Load Balancer
- Open the Network services option.
- Click the Load balancing option and then click create load balancer
- Select Application load balancer (HTTP/HTTPS) and next
- Under Public facing of internal select Internal then next
- Under Cross-region or single-region deployment select Best for regional workloads then next
- Under Create load balancer select configure
- At the top under Create regional internal Application Load Balancer use the name ilb-pro-app
-
Region select
- Under network select app-network
- Select Backend configuration and on the right hand pane under Create or select backend services
- Choose Create a backend service using the following values:
| Configuration | Name |
|---|---|
| Name | web-app-be |
| Backend type | Instance group |
| Protocol | HTTP |
| Instance group | appserver-igm |
| Port number | 80, 8080 |
- Scroll down and under Health check
- Create a health check, named: applb-hc with the following settings:
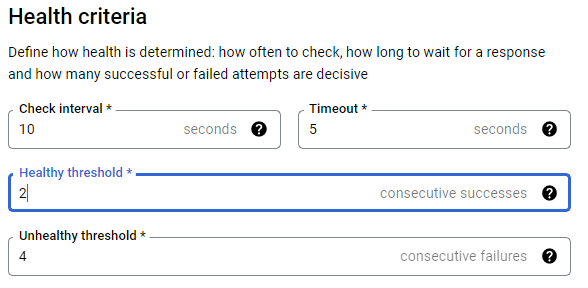
-
Select SAVE
-
On the main page select CREATE to complete then ok.
-
Next select Frontend configuration and use the following:
| Configuration | Name |
|---|---|
| Name | ilb-fe |
| Protocol | HTTP |
| Subnetwork | app-subnet |
| Port | 80 |
| IP Address | create ip address |
- You will see the reserve a static internal IP address window open
- In the Reserve a static internal IP address window. Use the following:
| Configuration | Name |
|---|---|
| Name | ilb-ip |
| Static IP | let me choose |
- Set a Custom IP address as 10.0.24.100
- Select RESERVE to complete
- Next select Done.
- From the main page select Create to complete the load balancer creation.
Task 3. Publish service in Producer Network
Publish service in producer network using Private Service Connect
- Go to Network services and select Private Service Connect.
- Switch to the Published Services tab.
- Select the Publish Service button

- Go to the publish service page under Load balancer type
- Select Regional internal Application Load balancer
- Under internal load balancer option select ilb-pro-app
- For service name use producer-serv
- Scroll down select subnets. Under subnets select reserve new subnet.
- In the reserve subnet for Private Service Connect use the following
| Configuration | Value |
|---|---|
| Name | psc-net |
| Region | us-central1 |
| IPv4 range | 10.0.88.0/24 |
- To complete select ADD and then ok
- Under Connection preference select Automatically accept all connections.
- Select Add Service to complete.
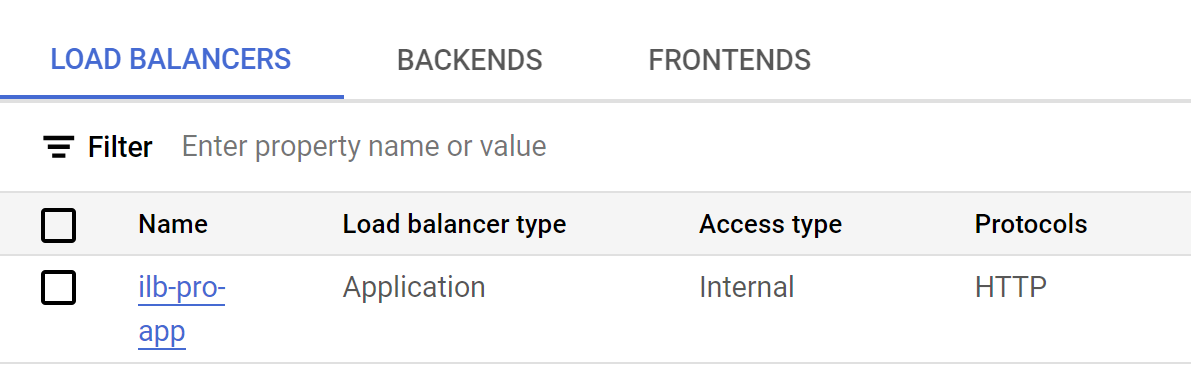
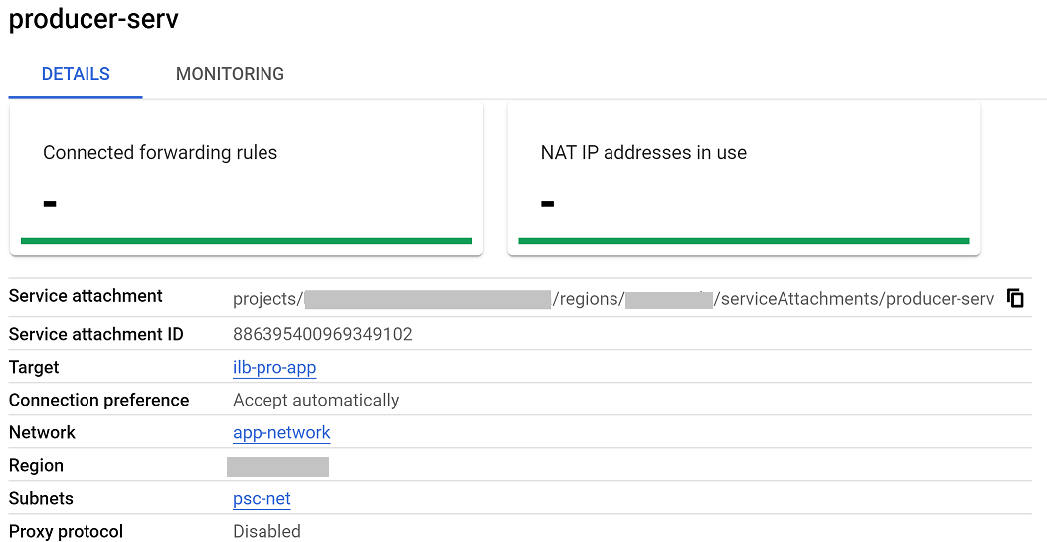
- Once completed under the published service tab select the producer-serv service name.
- In the Private Service Connect service details page copy the name of the Service attachment it should start with projects/ .
Task 4. Create a Private Service Connect Endpoint in consumer project
Switch between projects. At the left on the landing page look for the CONSUMER PROJECT ID and take note.
- At the top of your console on the right next to Google Cloud icon, click the dropdown and then select the all tab.
- From the listed project select the customer project
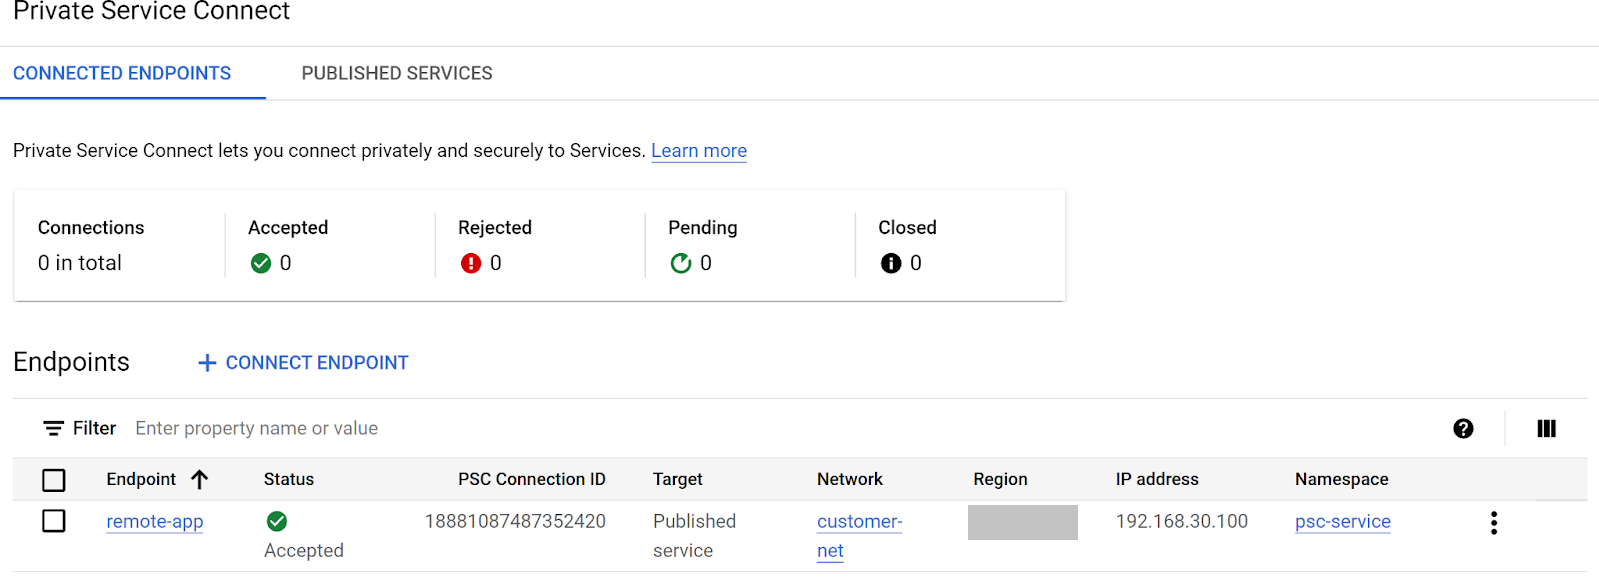
to continue. - Go to Network Services and select Private Service Connect
- On the Connected Endpoints tab, in the Endpoint section select Connect Endpoint

- In the connect endpoint page configure as follows:
| Configuration | Value |
|---|---|
| Target | Published service |
| Target service | Paste the service address you copied in the previous section. Task 3, step 14 |
| Endpoint name | remote-app |
| Network | customer-net |
| Subnetwork | psc-subnet |
| IP Address | Create IP address, name psc-ip.In the Static IP box select let me choose.Use the custom IP address box to enter 192.168.30.100 |
- In the Service Directory section select Enable API if the option is present. This takes a few minutes to enable the API.
- Once complete in the namespace box select create namespace
- For the Namespace name use psc-service and select create
- On the main page select add endpoint to complete.
Task 5. Test connectivity to service using service directory endpoint IP in consumer project
Test connectivity from test VM in the consumer project
- In the consumer project
use the search option and type in VM Instances and select the VM Instances compute engine option which takes you to the landing page.
- In the VM instance view you should see 1 VM called customer-vm, select the ssh option to open a SSH session into the VM.
- In the VM SSH window do a curl to the IP address of the endpoint just created. Use the following command e.g.:
You should get a successful return from the service in the producer project.
Expected Output
Task 6. Configure Service Directory and Cloud DNS
Link Service Directory to a DNS private zone
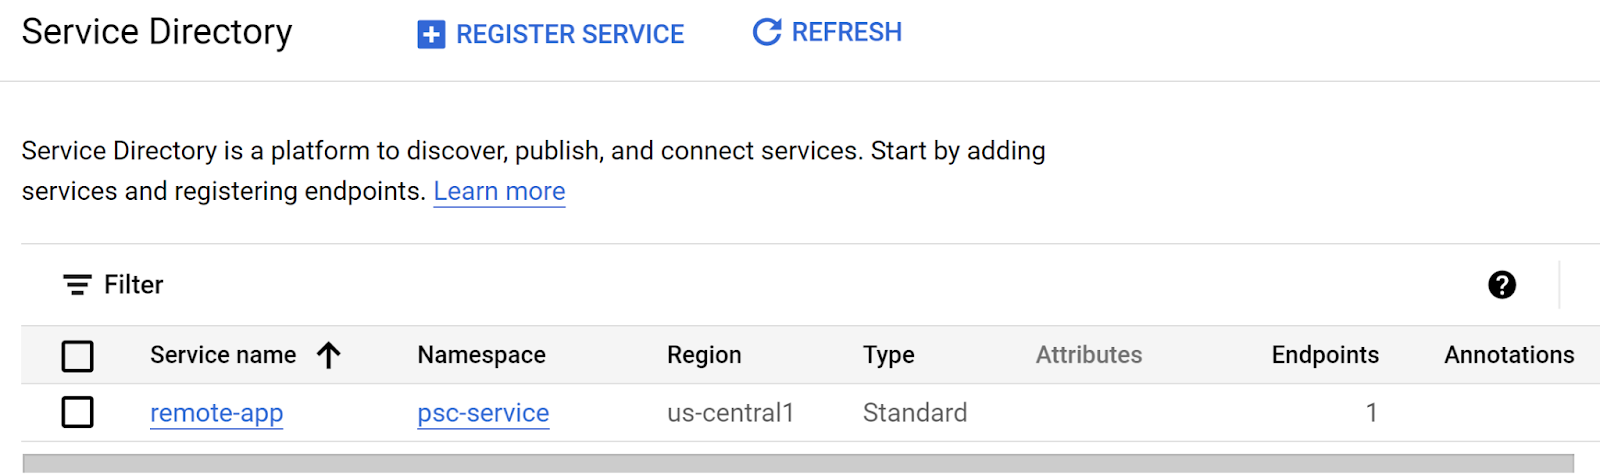
- In the consumer project
go to Network Services and select Service Directory - In the Service Directory page you should see the following namespace and service you created.
-
Now switch to Cloud DNS in the Network Service area and select the create zone.
-
In the create DNS zone area

| Configuration | Value |
|---|---|
| Zone type | Private |
| Zone name | psc-service-us-central1 |
| DNS name | us-central1.p.app.com |
| Options | Use a service directory namespace |
| Networks | customer-net |
| Region | us-central1 |
| Namespace | psc-service |
- Select create to complete.
- Once completed, move to the next task.
Task 7. Test connectivity to service using private dns and endpoint name in consumer project
When using a private DNS name linked to the Service Directory you can access the service even if the IP is changed at any point.
- In the consumer project
use the search option and type in VM Instances and select the VM Instances compute engine option which takes you to the landing page.
- In the VM instance view you should see a VM called customer-vm
- Select the SSH option to open a session into the VM
- In the VM use the curl command to view the endpoint response.
Expected Output
You should get a successful return from the service in the producer project.
Congratulations
Congratulations, you've successfully configured Private Service Connect, Service Directory and private DNS!
Reference docs
- Documentation:Private Service Connect Overview
- Documentation: Networking for secure intra-cloud access
Manual Last Updated Apr 15, 2024
Lab Last Tested Apr 15, 2024
Copyright 2024 Google LLC All rights reserved. Google and the Google logo are trademarks of Google LLC. All other company and product names may be trademarks of the respective companies with which they are associated.